Now Reading: How to Secure HTTP Requests Using OAuth Authentication in Power Automate
-
01
How to Secure HTTP Requests Using OAuth Authentication in Power Automate
How to Secure HTTP Requests Using OAuth Authentication in Power Automate
When working with workflows triggered by HTTP requests, you may face a common challenge, i.e., ensuring that only authorized users can start the workflow. In many cases, you might need to restrict access so that only specific users within your organization can trigger it.
When a workflow is triggered by an HTTP request, controlling who can access it is crucial. Without proper security in place, anyone with the request URL could start the workflow, leading to unauthorized users gaining access to critical business processes or sensitive data. This could pose serious security risks to your organization, potentially leading to data breaches, process disruptions, or compliance issues.
To resolve this, you need a reliable way to manage authentication. One effective approach is OAuth authentication, which allows you to limit access to specific users within your organization. By implementing OAuth, you can ensure that only approved users have permission to trigger the workflow, while unauthorized users are blocked. This not only strengthens security but also ensures that workflows are used only by the right people, improving efficiency and protecting vital business information.
By setting up OAuth authentication for the “When an HTTP request is received” trigger, your company can:
- Restrict Access – Ensure only authenticated users from the organization can trigger the workflow.
- Allow Specific Users – Limit execution to only certain employees or service principals.
- Verify Authentication Claims – Ensure each request contains valid credentials with necessary claims (e.g., tenant ID, issuer, audience).
This security enhancement protects sensitive data and ensures workflows are triggered only by the right people, reducing the risk of unauthorized actions.
Prerequisites: Before setting up OAuth authentication for HTTP request triggers in Power Automate, ensure you have:
- Power Automate Account – Access to create and manage workflows.
- Azure AD Tenant – Required for authentication and app registrations.
- App Registration in Azure AD – Must have API permissions for Power Automate.
- Admin Access to Azure Portal – To configure authentication and manage credentials.
- HTTP Request Trigger – A flow using “When an HTTP request is received“ trigger.
- Valid API Permissions – Ensures secure authentication and service access.
- OAuth 2.0 Token Endpoint – Knowledge of obtaining access tokens from Azure AD.
- Postman or API Testing Tool (Optional) – Helps test API requests and authentication.
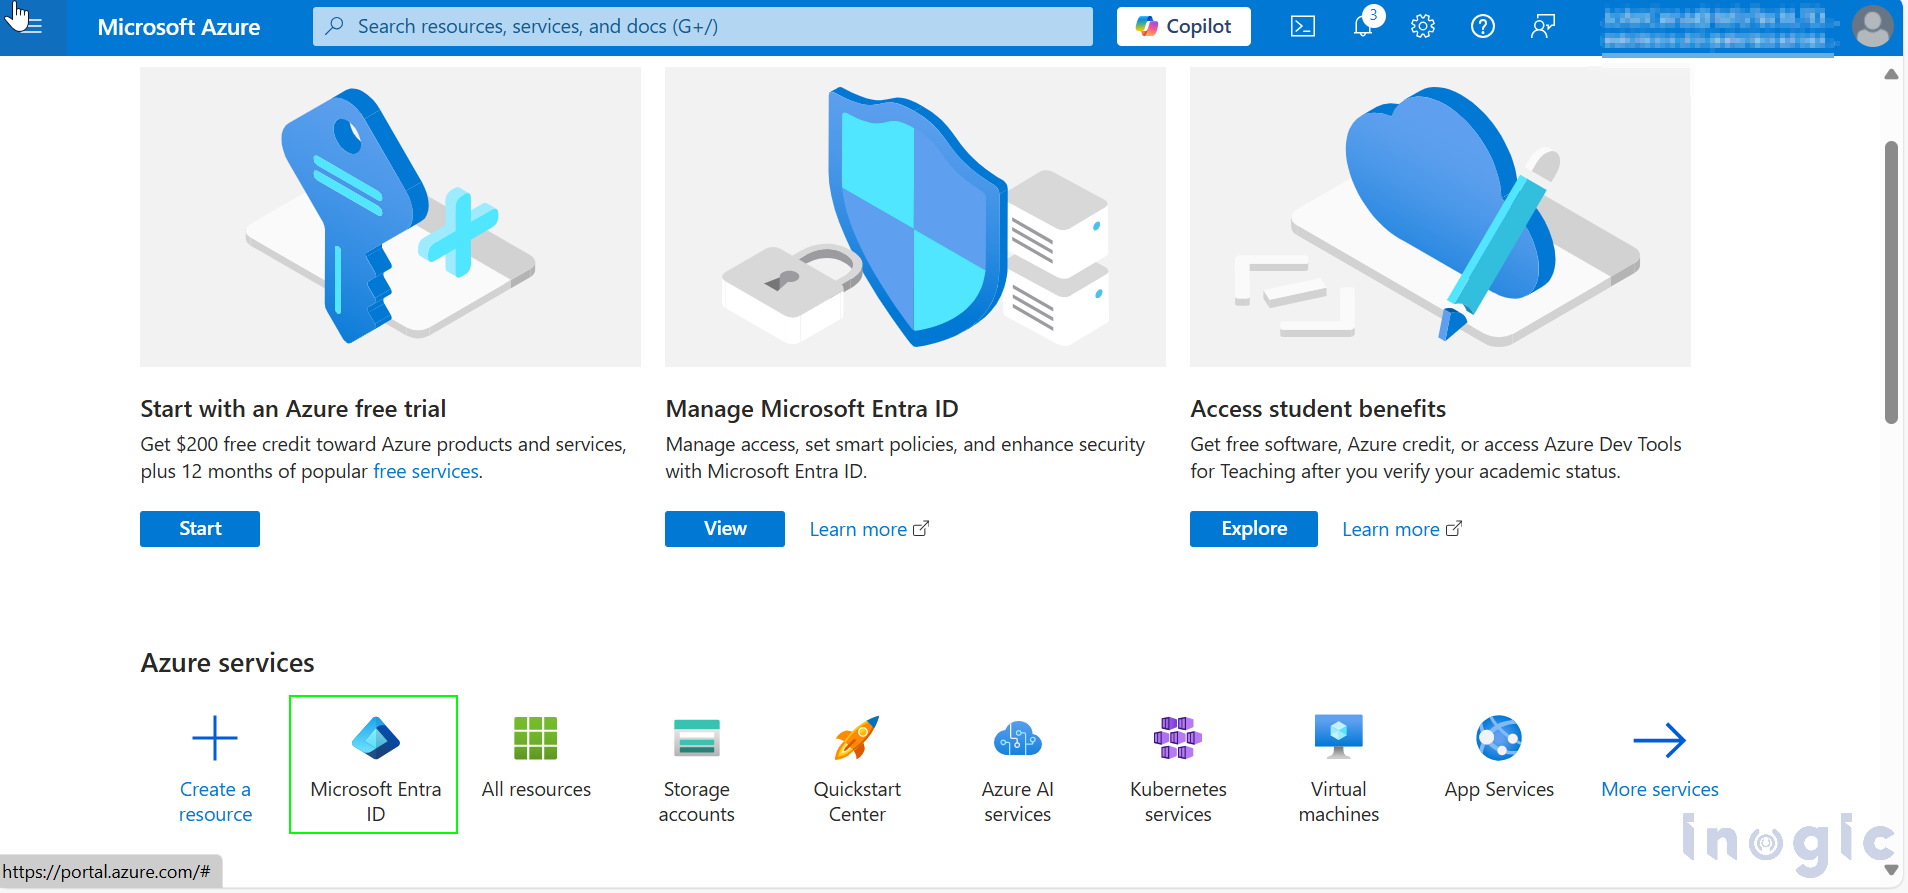
How to Configure: First go to Home – Microsoft Azure and select Microsoft Entra ID.
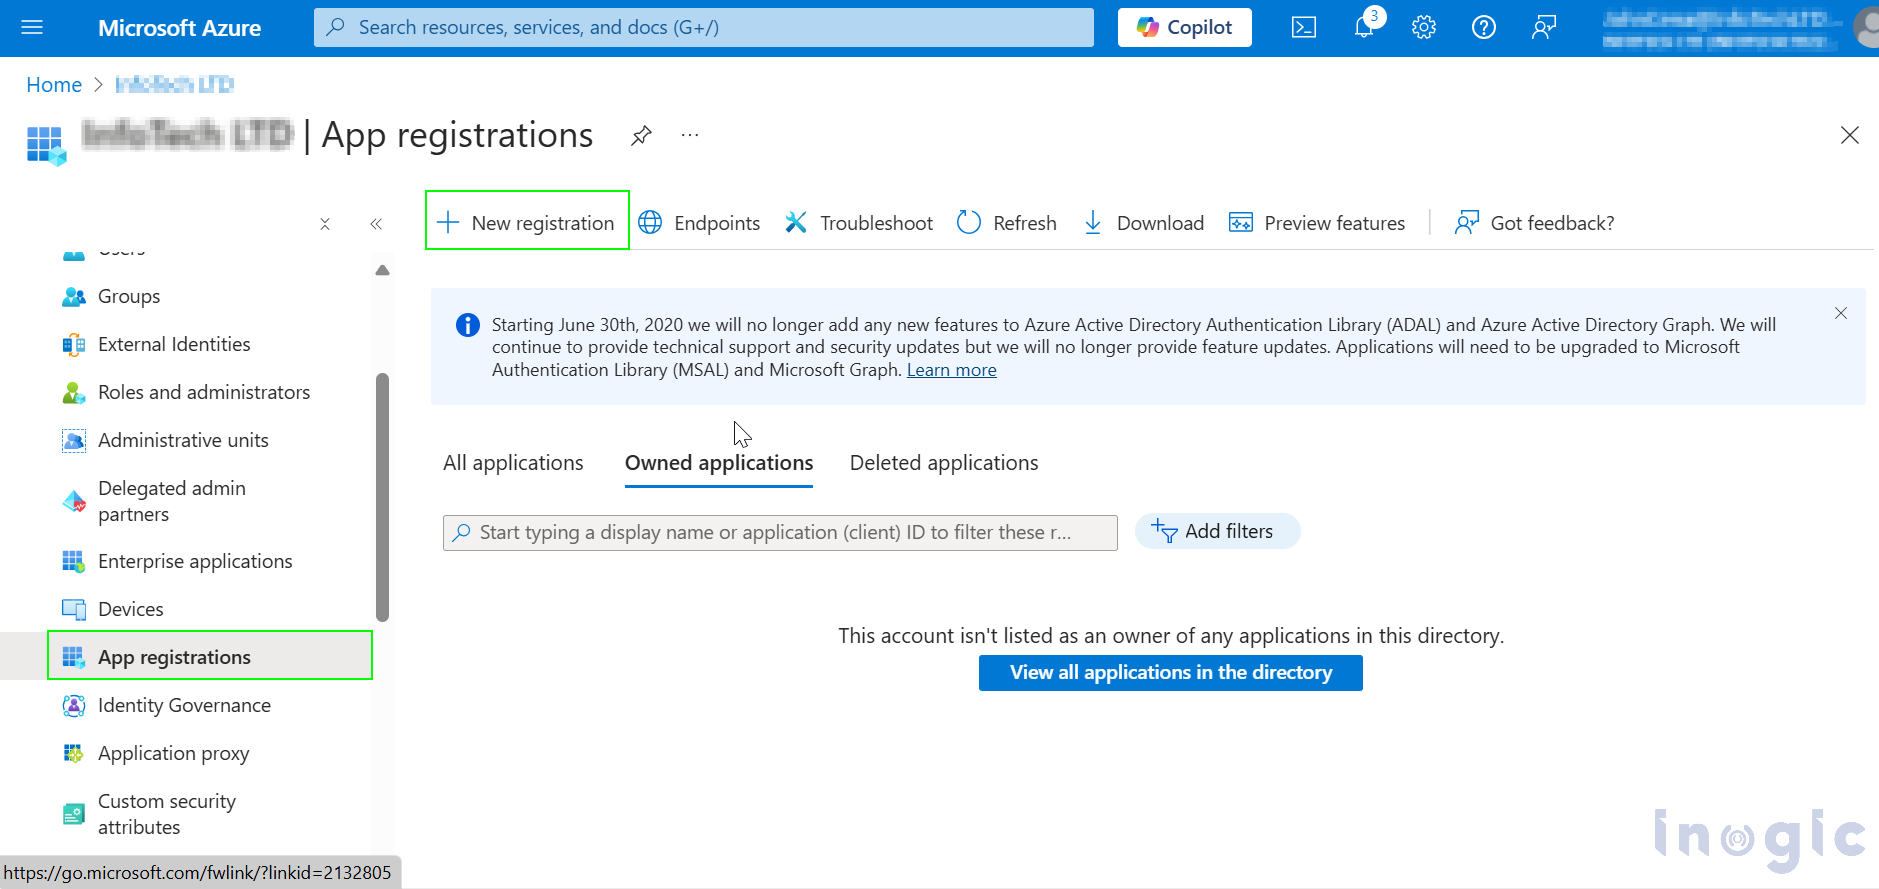
Now go to App registration > New registration.
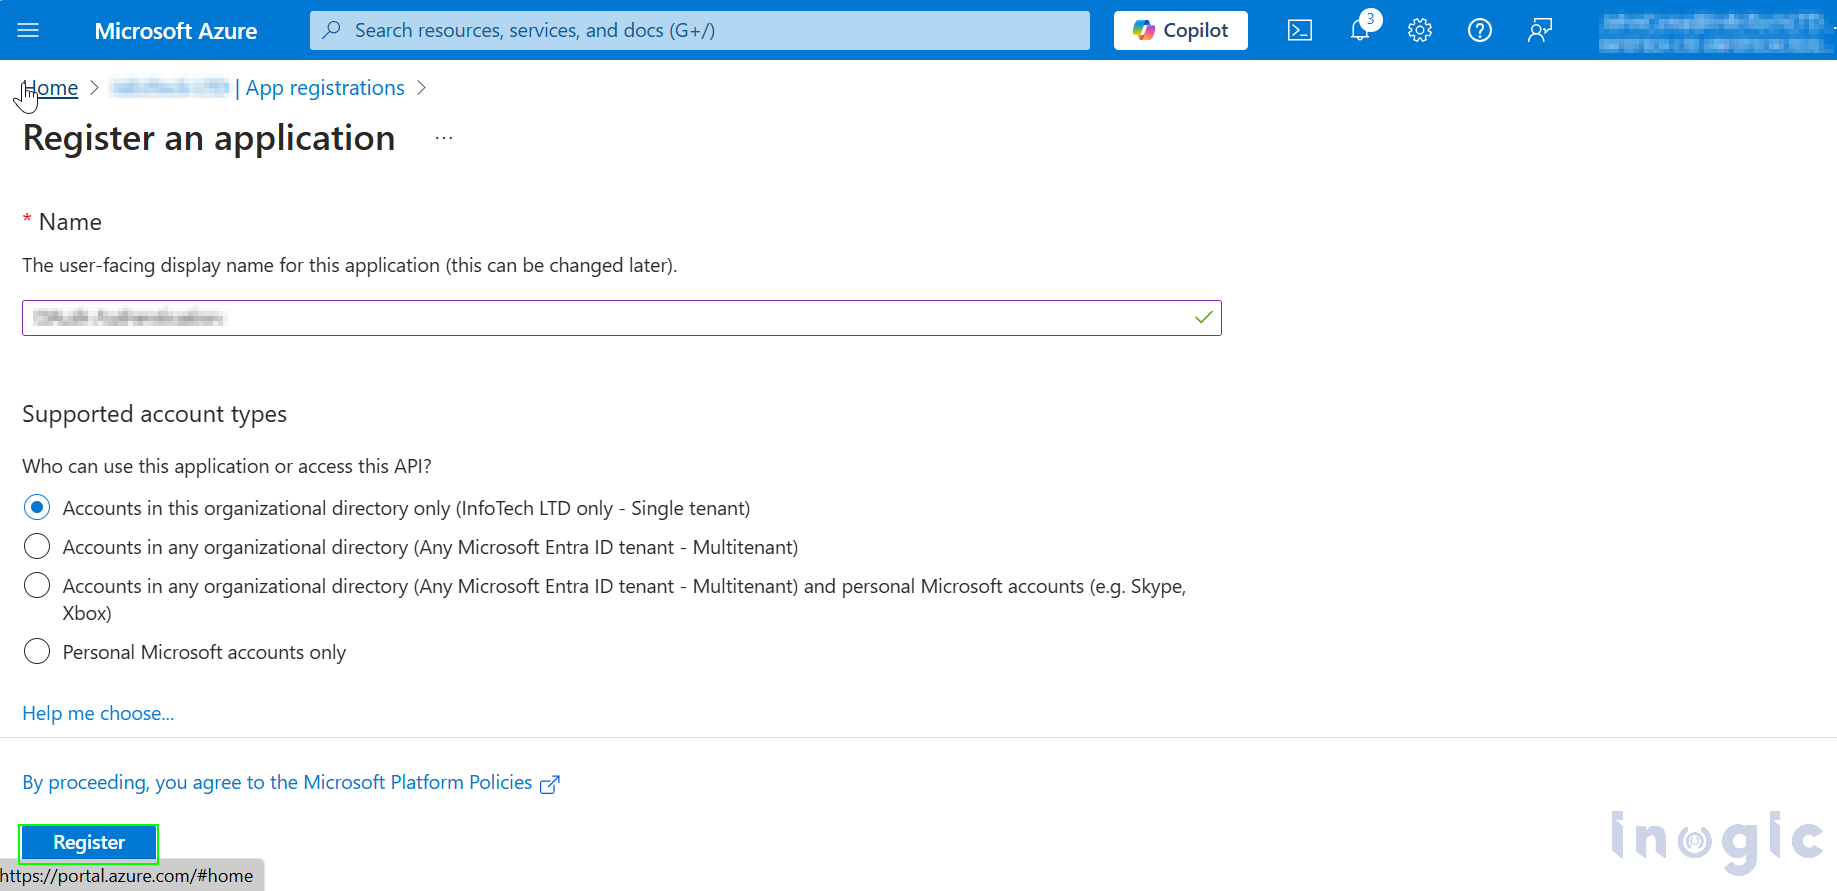
And give a name to the Application and add a redirect URL if you want and click on Register.
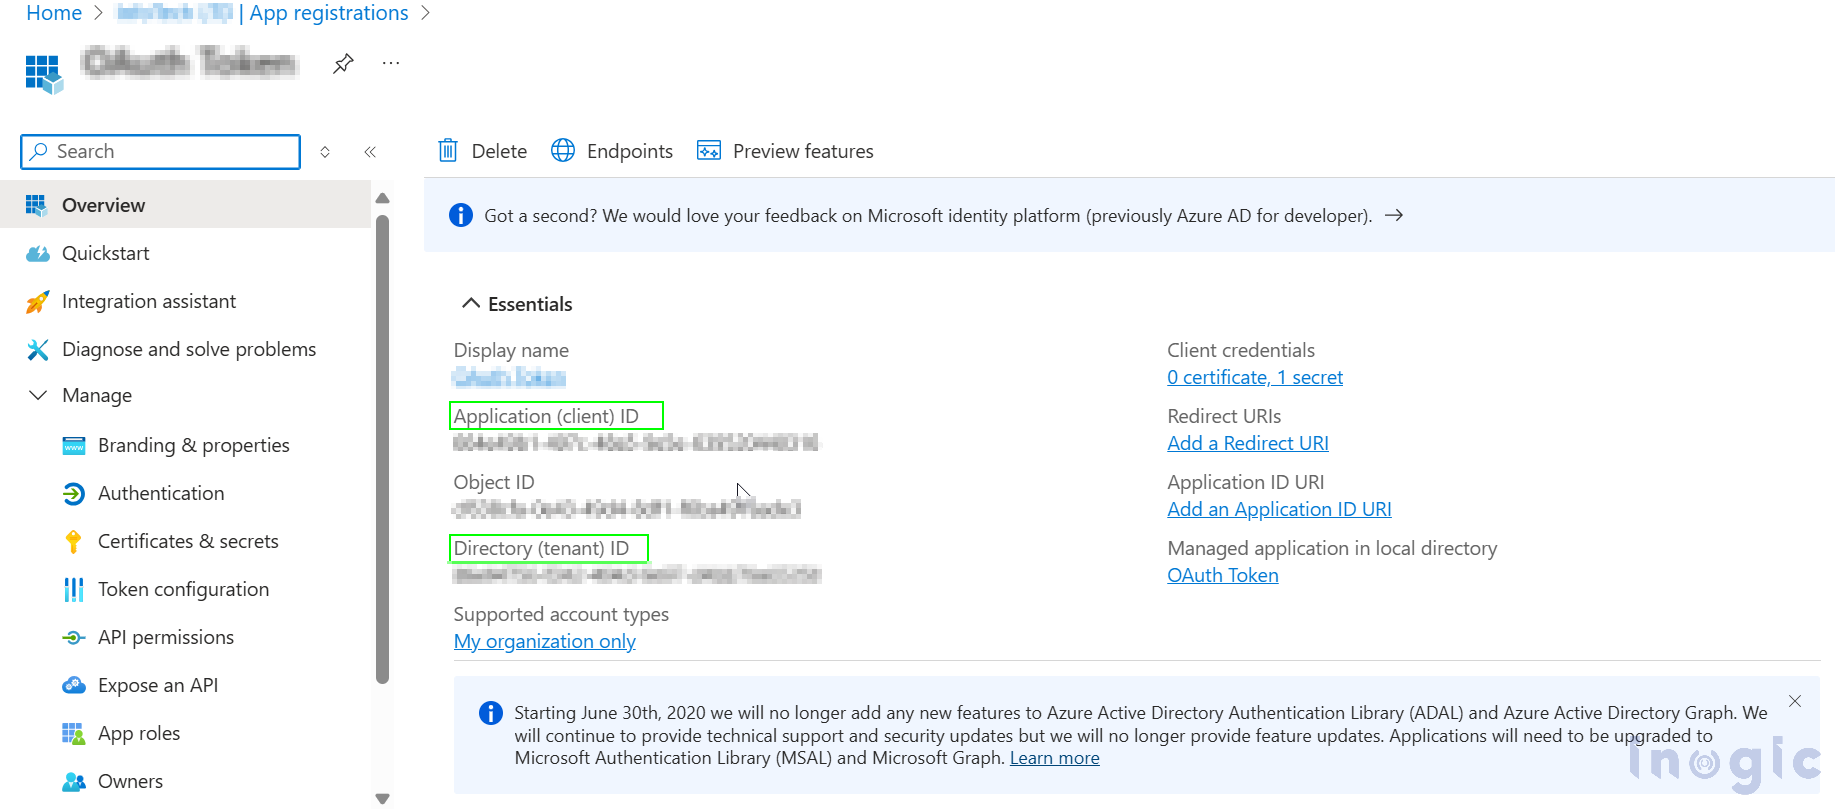
Once you click on register you will be Redirected to Newly created apps Overview tab. As Shown below copy the Application (Client) ID and Directory (Tenant) ID store it somewhere.
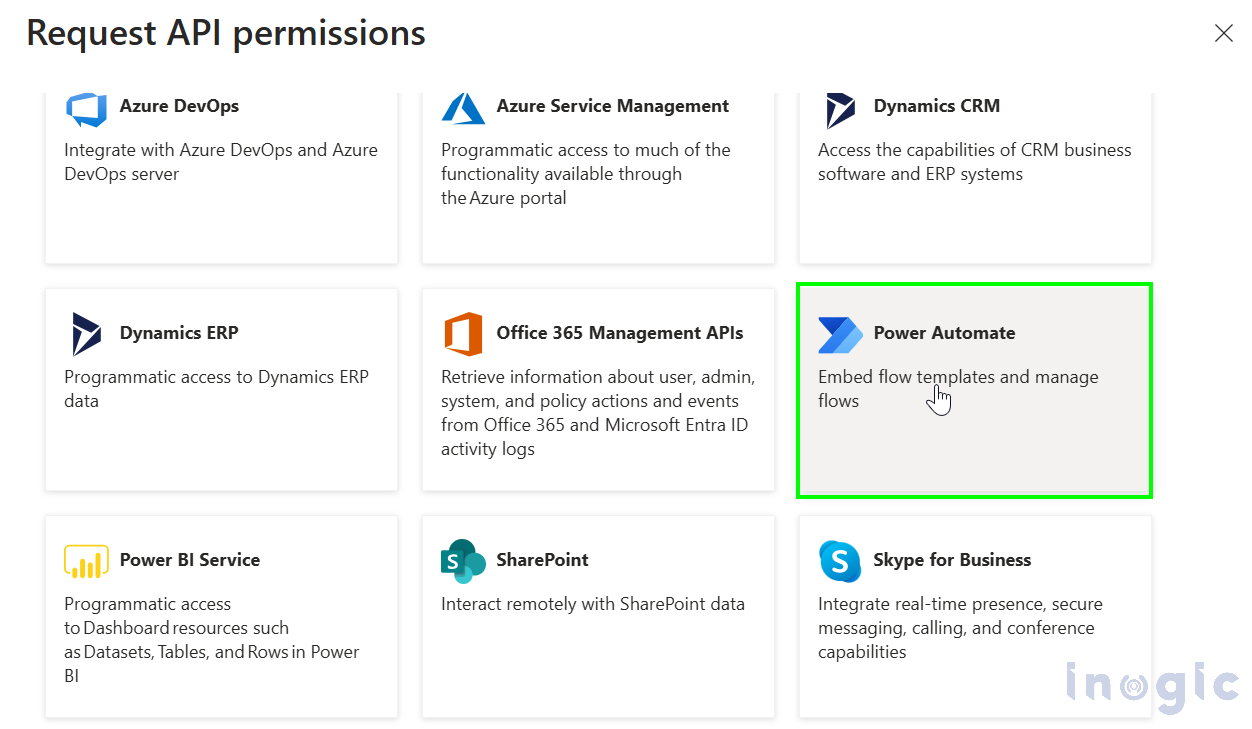
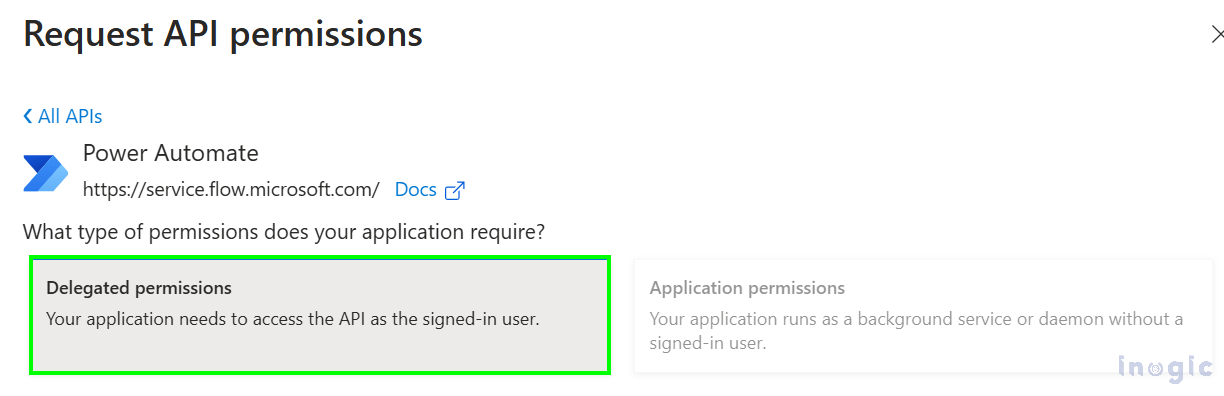
Now go to API Permissions and select the Power Automate and give Delegated permission as below.
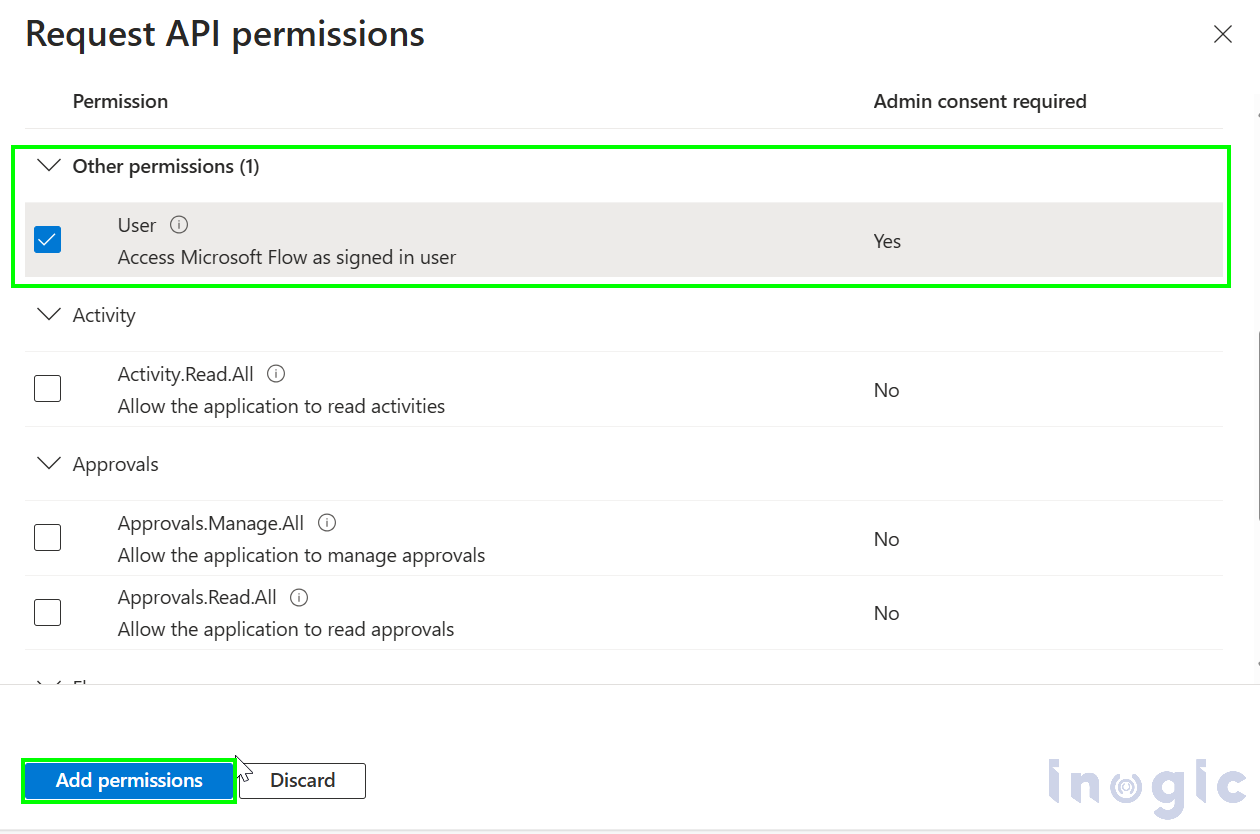
Also check the check box as below and hit Add permissions button.
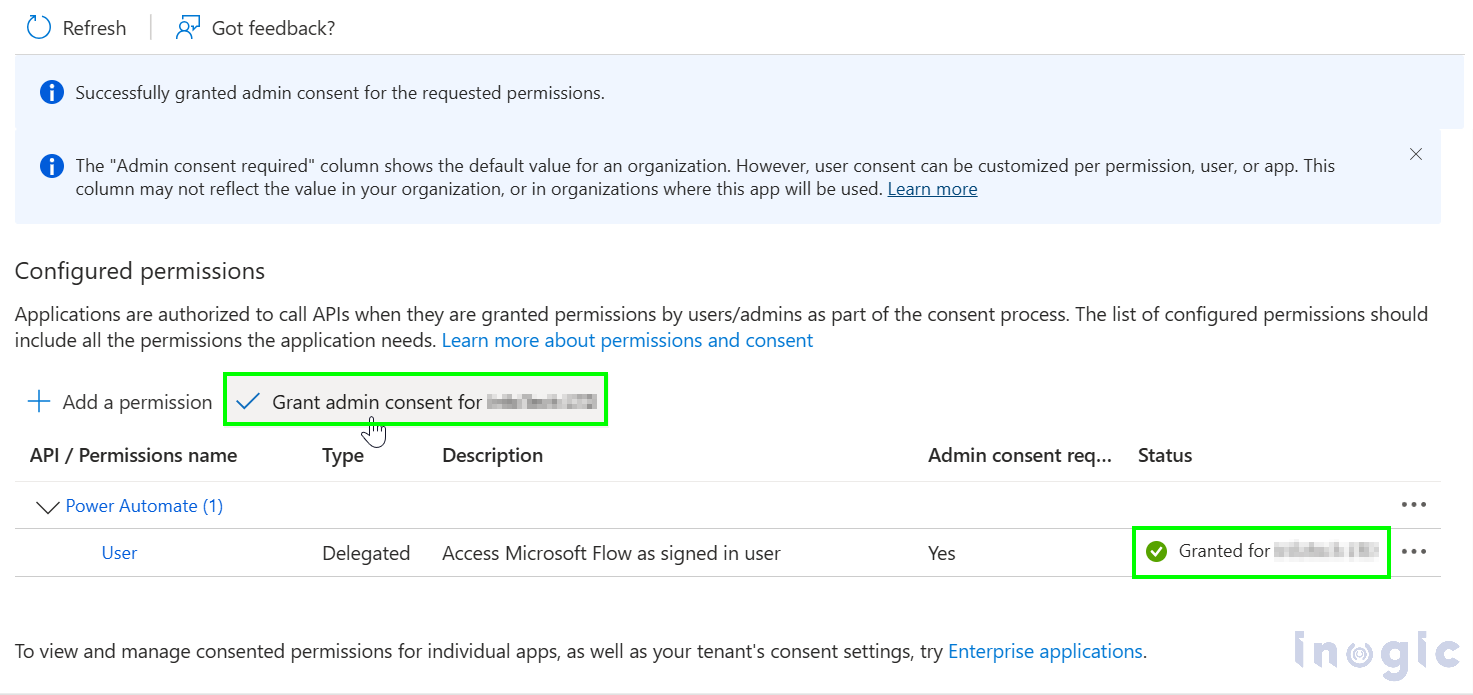
Give Admin consent as shown below, and status should look like below.
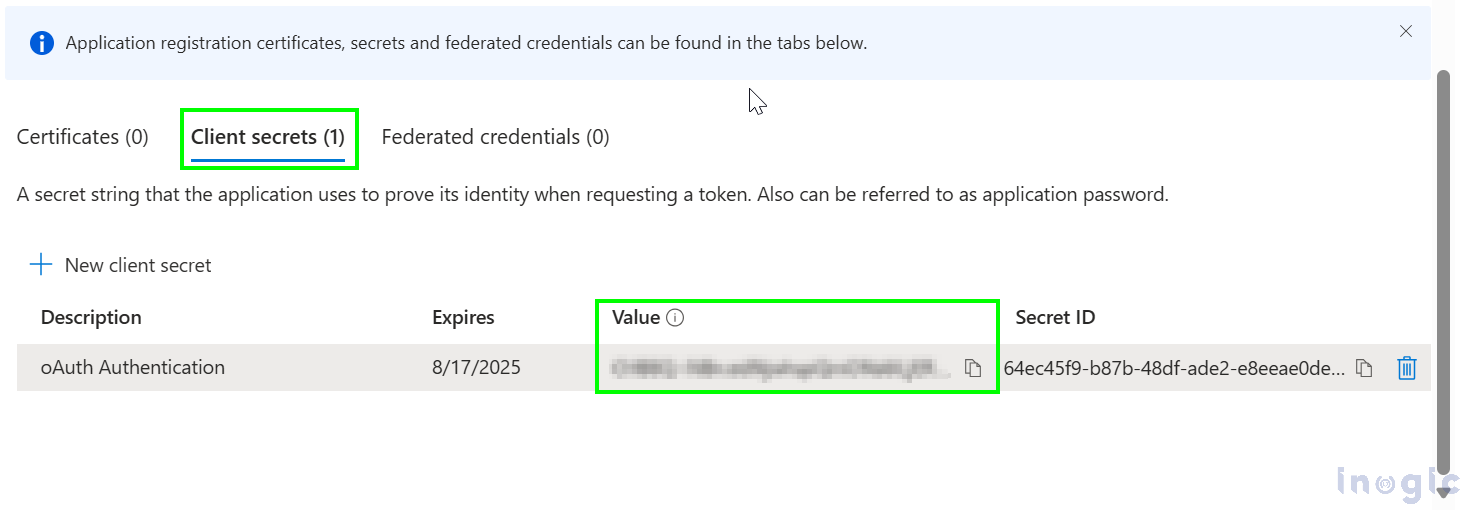
Now go to Certificates and Secrets tab and create the new client secret as shown below. Write Description and expiration date for the secret and click on Add.

Once you click on add, copy the value and store it somewhere, as it gets encrypted after some time.
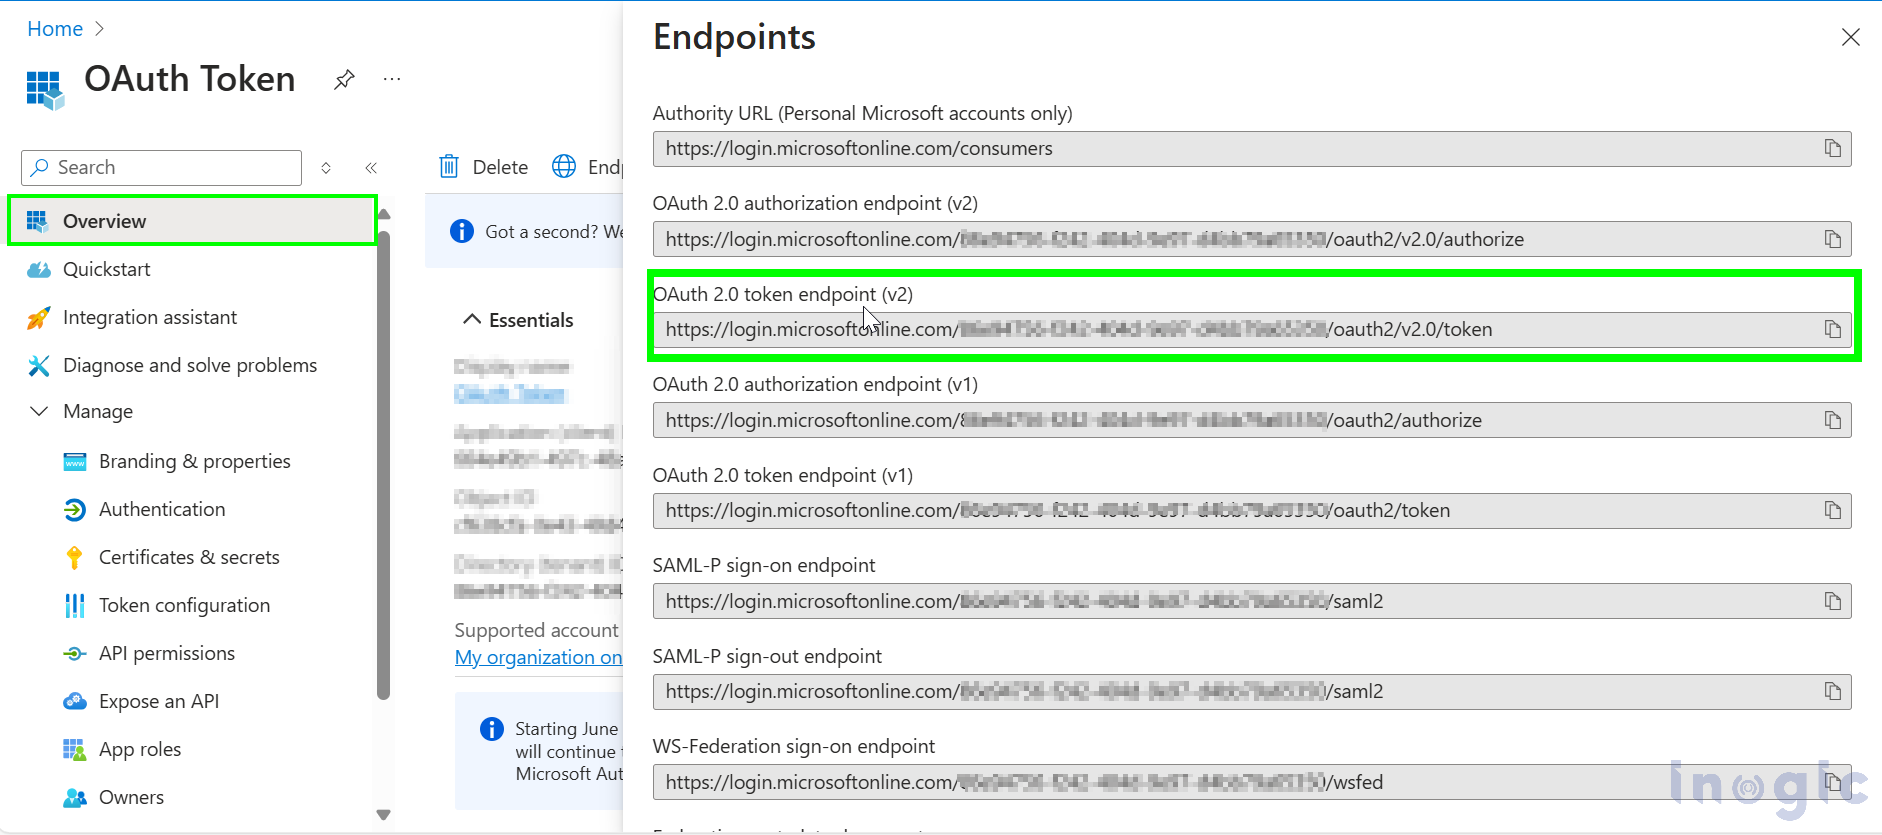
Once you’ve completed the above steps, you will need the Application (Client) ID and Client Secret value. To obtain them, go to the App overview, click on Endpoint, and copy the API endpoint as shown below to generate user-specific tokens.
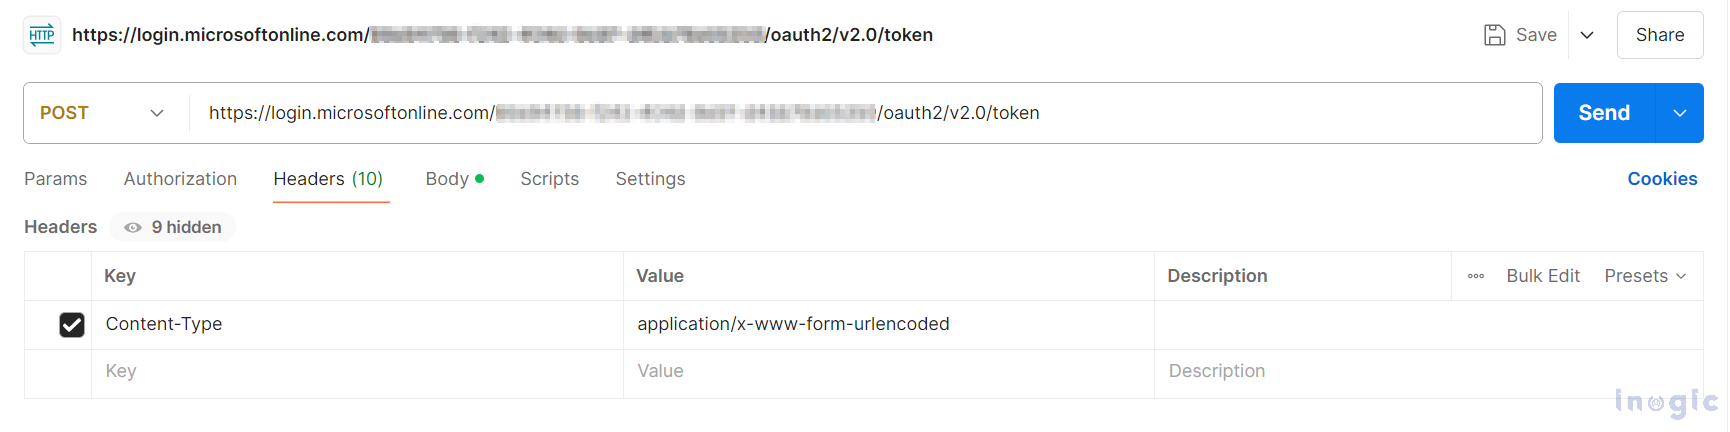
Now open any API testing tool here I am using Postman to perform the API request.
In the body, include the following data. Here, client_id and client_secret refer to the Application (Client) ID and the Certificates & Secrets value, as mentioned earlier.
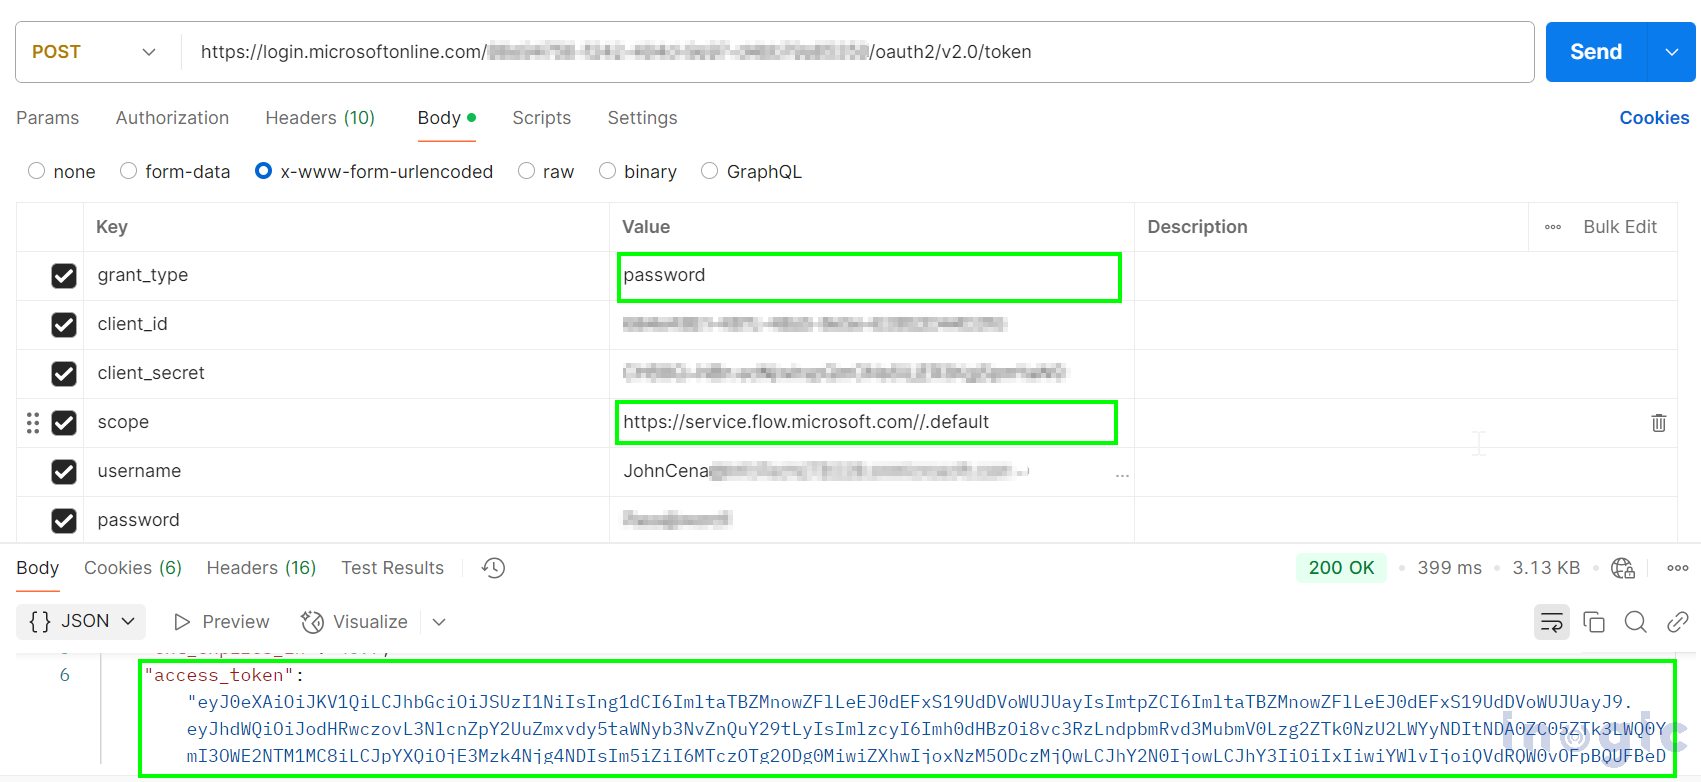
Note: Using the request above, we will obtain a user-specific token based on the username and password provided. If you do not require a user-specific token, set grant_type to “client_credentials” and remove the username and password fields. In this case, the token will be generated for the app associated with the provided App ID and client secret. Additionally, ensure that the scope of the token is set to: https://service.flow.microsoft.com//.default
Otherwise, you may encounter an “invalid scope” error. You can also decode and verify the token using tools like JSON Web Tokens – jwt.io.
Once, we are done with the above steps, we can proceed with Flow configuration and the logic that we want to execute through our Power Automate Flow for that, you can use Power Apps or Power Automate here I am using Power Apps to configure the Flow
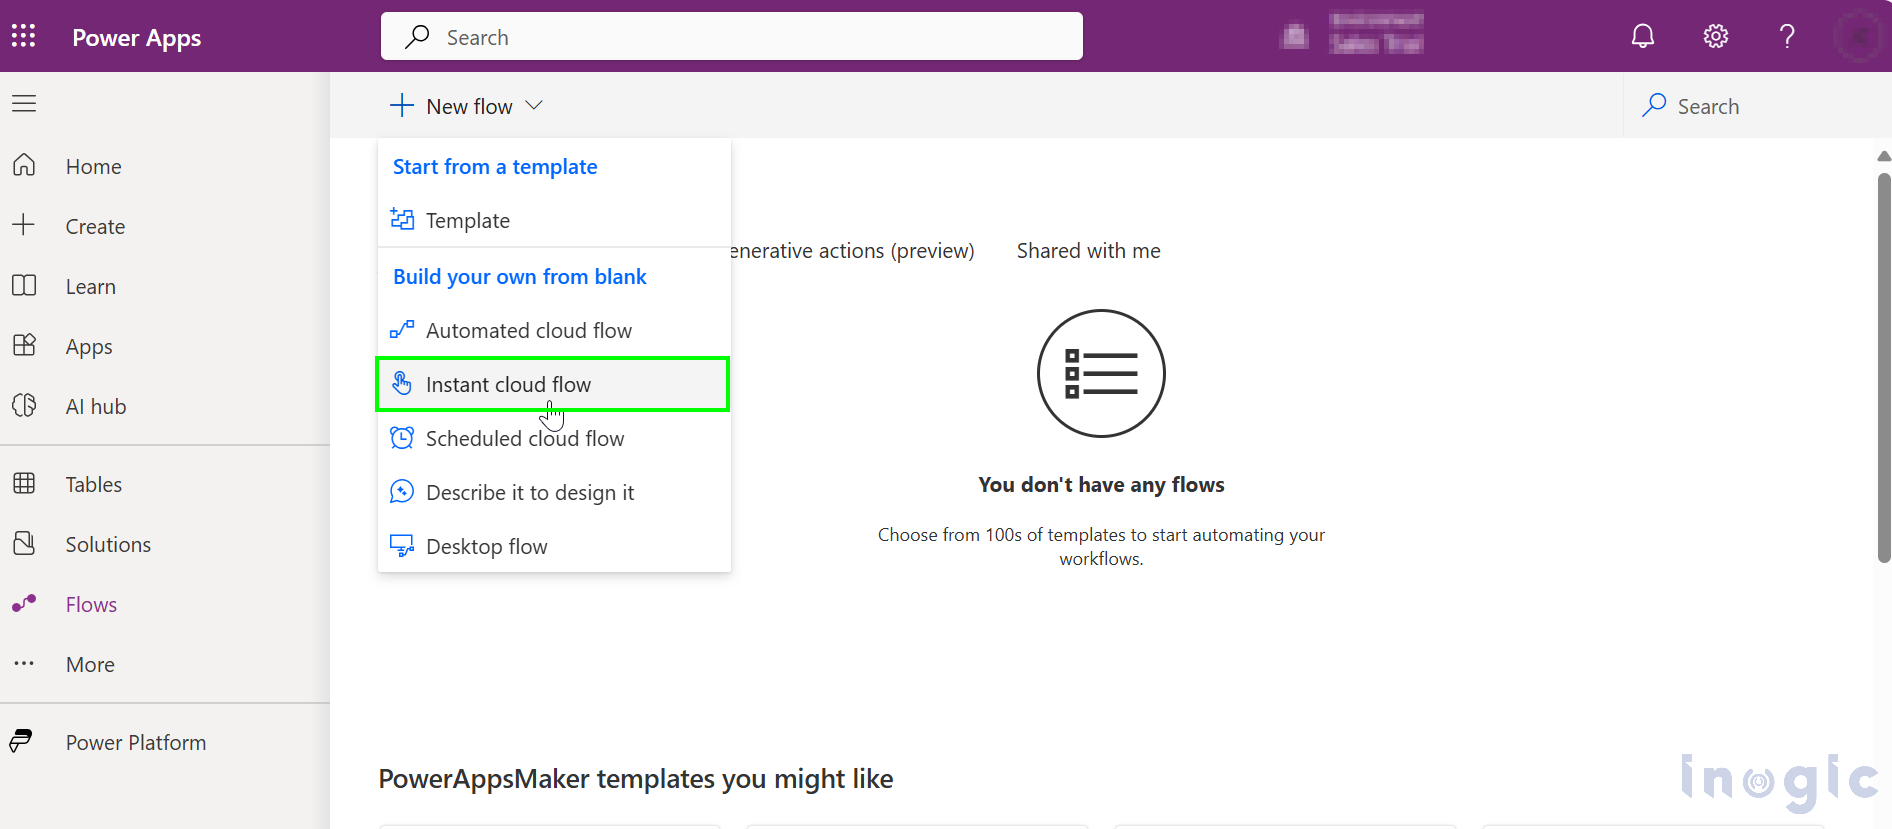
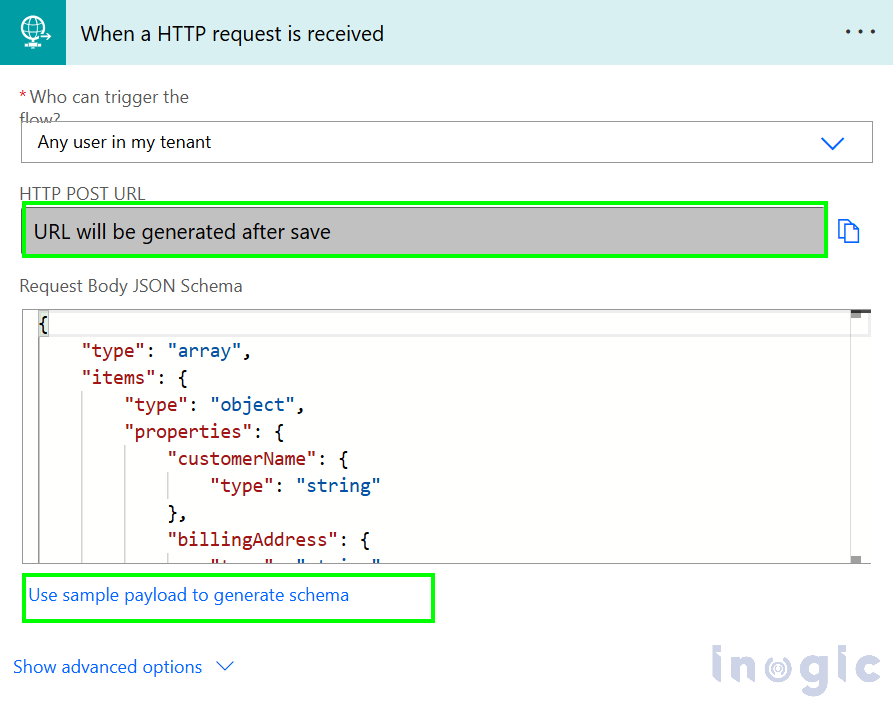
Select New flow > Instant cloud flow, give name to the flow and select “When an HTTP request is received” trigger. Then hit the Create button.
Select the “Who can trigger the flow?” option you can select.
- Anyone – Anyone with the HTTP URL can trigger the flow. No authentication or security tokens are required, meaning anyone who has the link can run the flow.
- Any user in my organization – Only users within your Microsoft 365 tenant (organization) can trigger the flow. They must sign in using their Microsoft (Azure AD) account. External users outside your organization cannot access it.
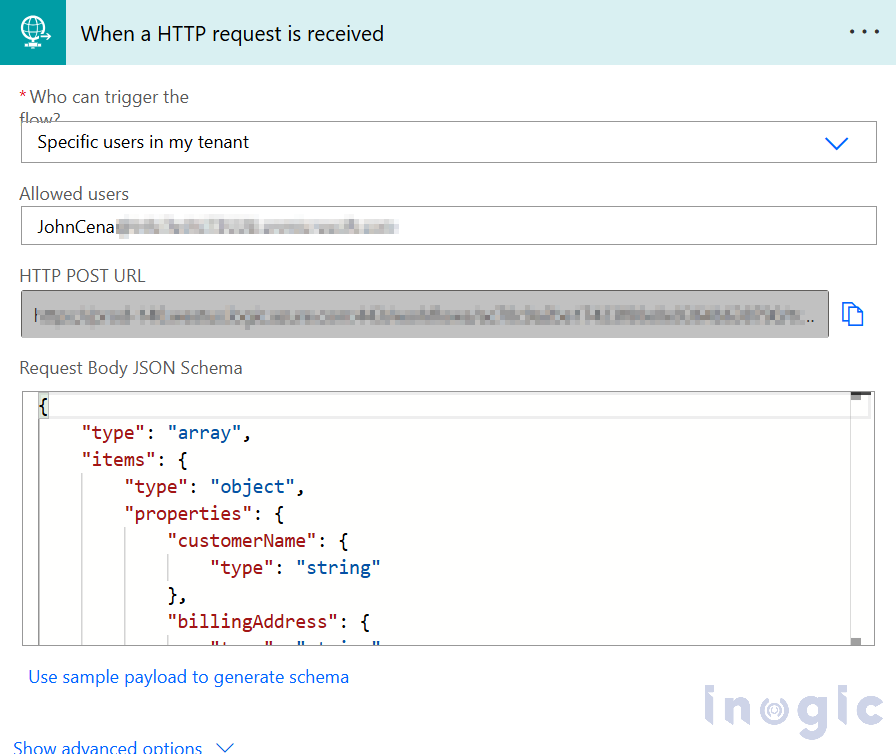
- Specific users in my organization – Only selected users within your organization can trigger the flow. The flow owner must manually specify who has access, and users must authenticate with their Microsoft (Azure AD) account.
We will not select “Anyone” as it follows the legacy behaviour of this trigger, allowing anyone with access to the HTTP URL and JSON schema to use it. Instead, we will explore the other two options. In the first case, I have selected “Any user in my tenant”. Now, generate a JSON schema based on the data you want to pass through the HTTP URL. For testing, I am using the following dummy data:
“[{ “customerName”: “Robert Carlson”, “billingAddress”: “Florida”, “email”: “test@gmail.com”, “customerType”: “Premium”, “orderHistory”: [ { “orderId”: “ORD12345”, “orderDate”: “2024-02-18”, “totalAmount”: 5000}]}]”.
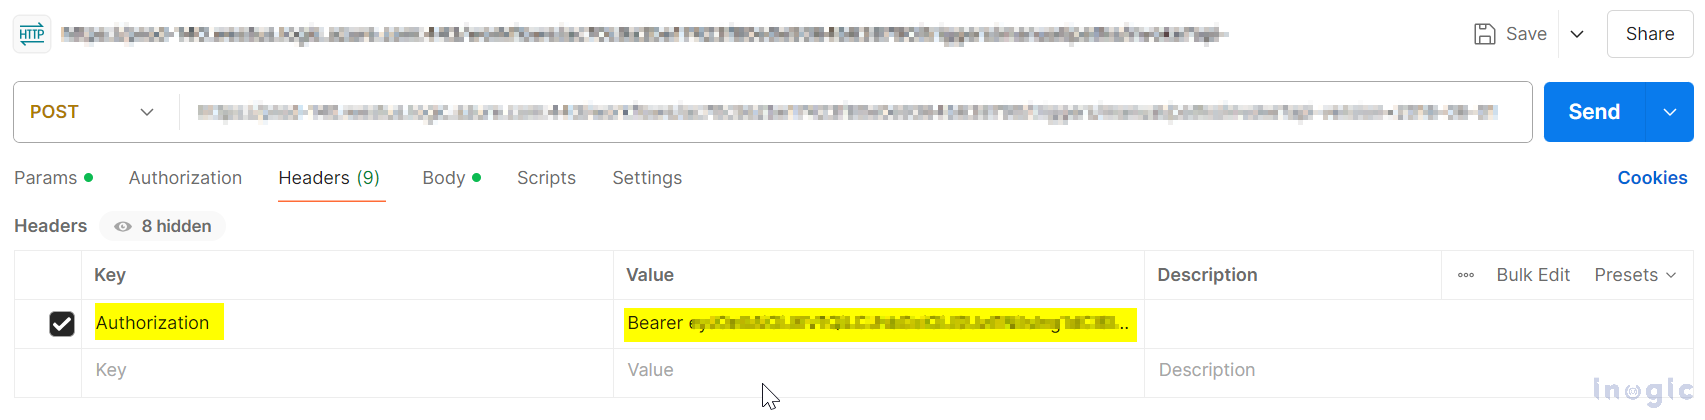
Once this is completed, add the next action and save the flow. This will generate the HTTP URL. Copy the URL and paste it into an API testing tool. Then, add the Authorization header with the access token obtained in the previous step, as shown below.
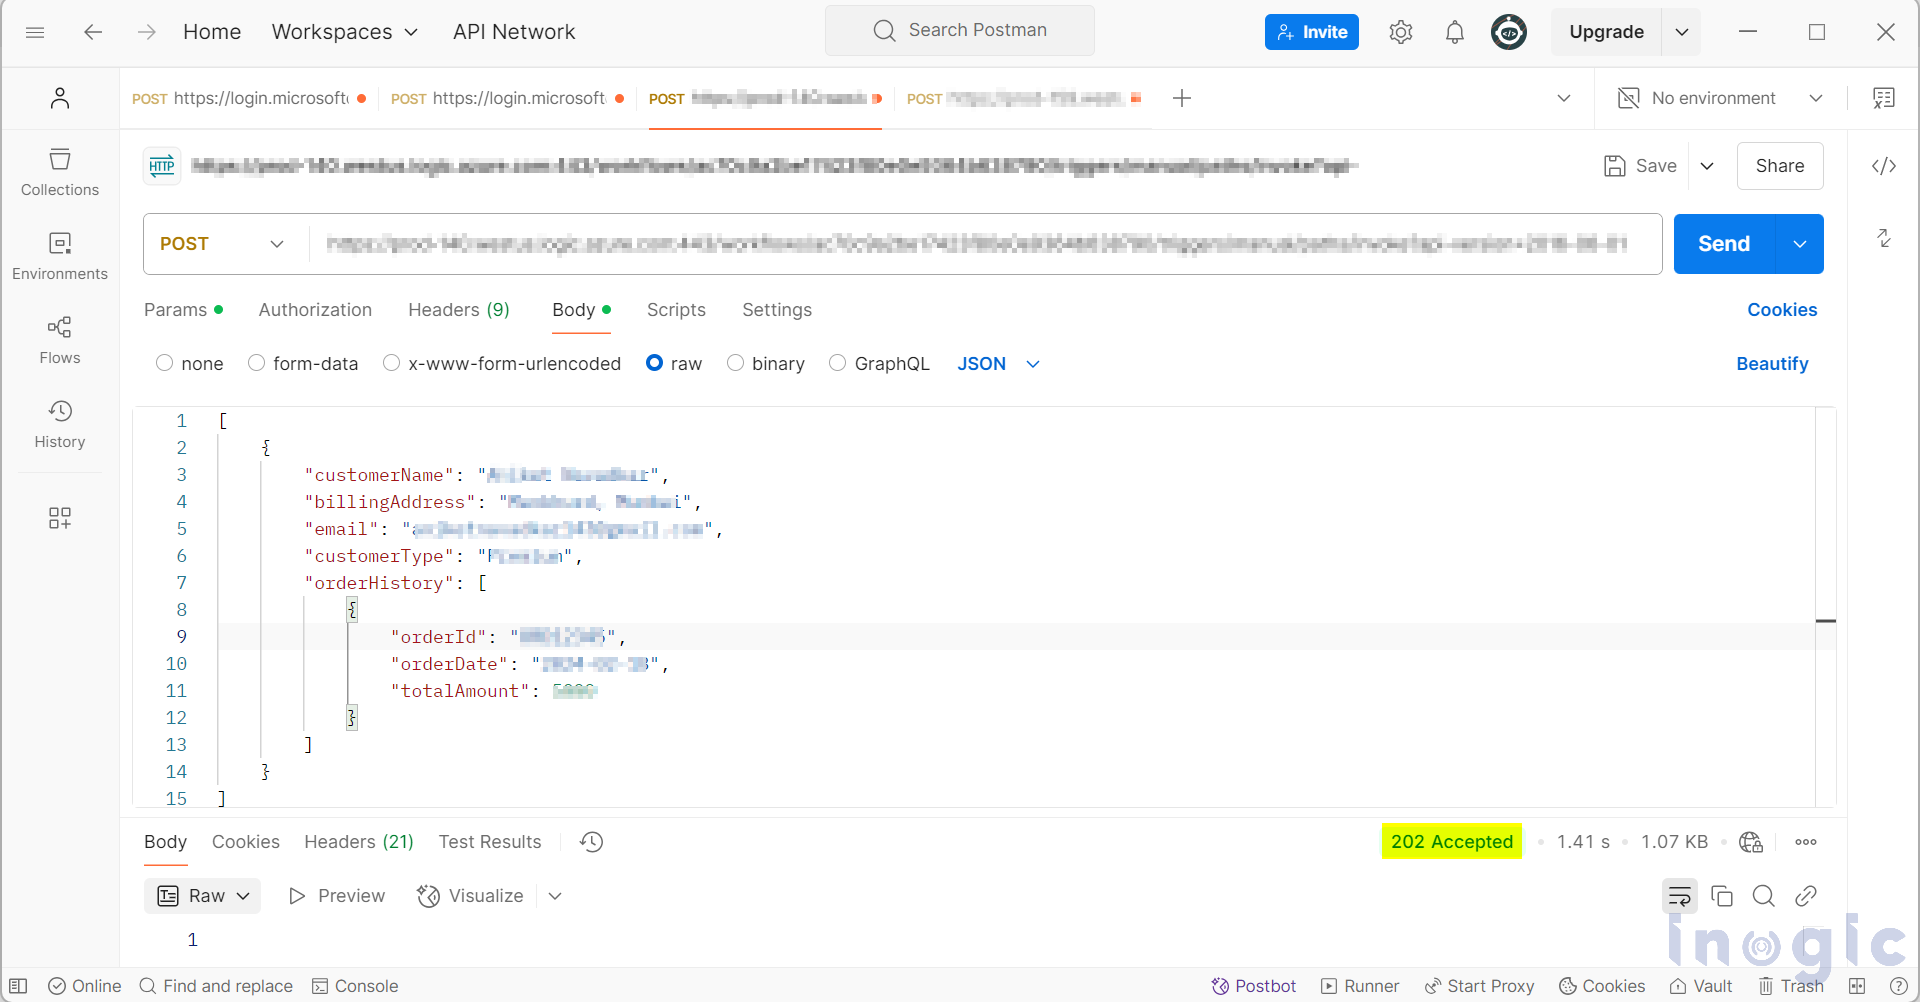
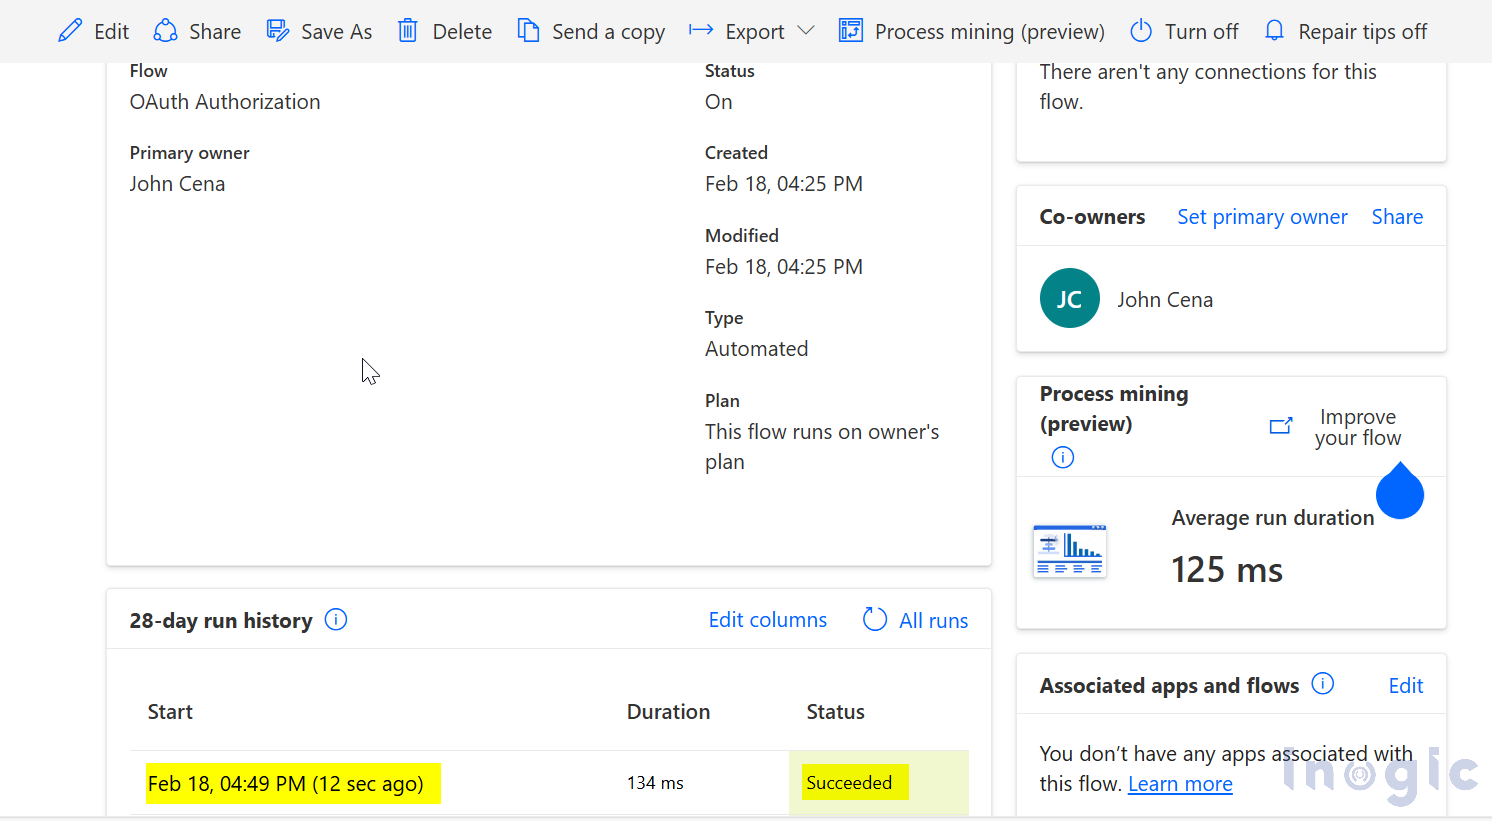
Once you have the authority to trigger the flow, you will receive a “202 Accepted” response, and the flow will be triggered immediately if the access token belongs to a user within the same tenant.
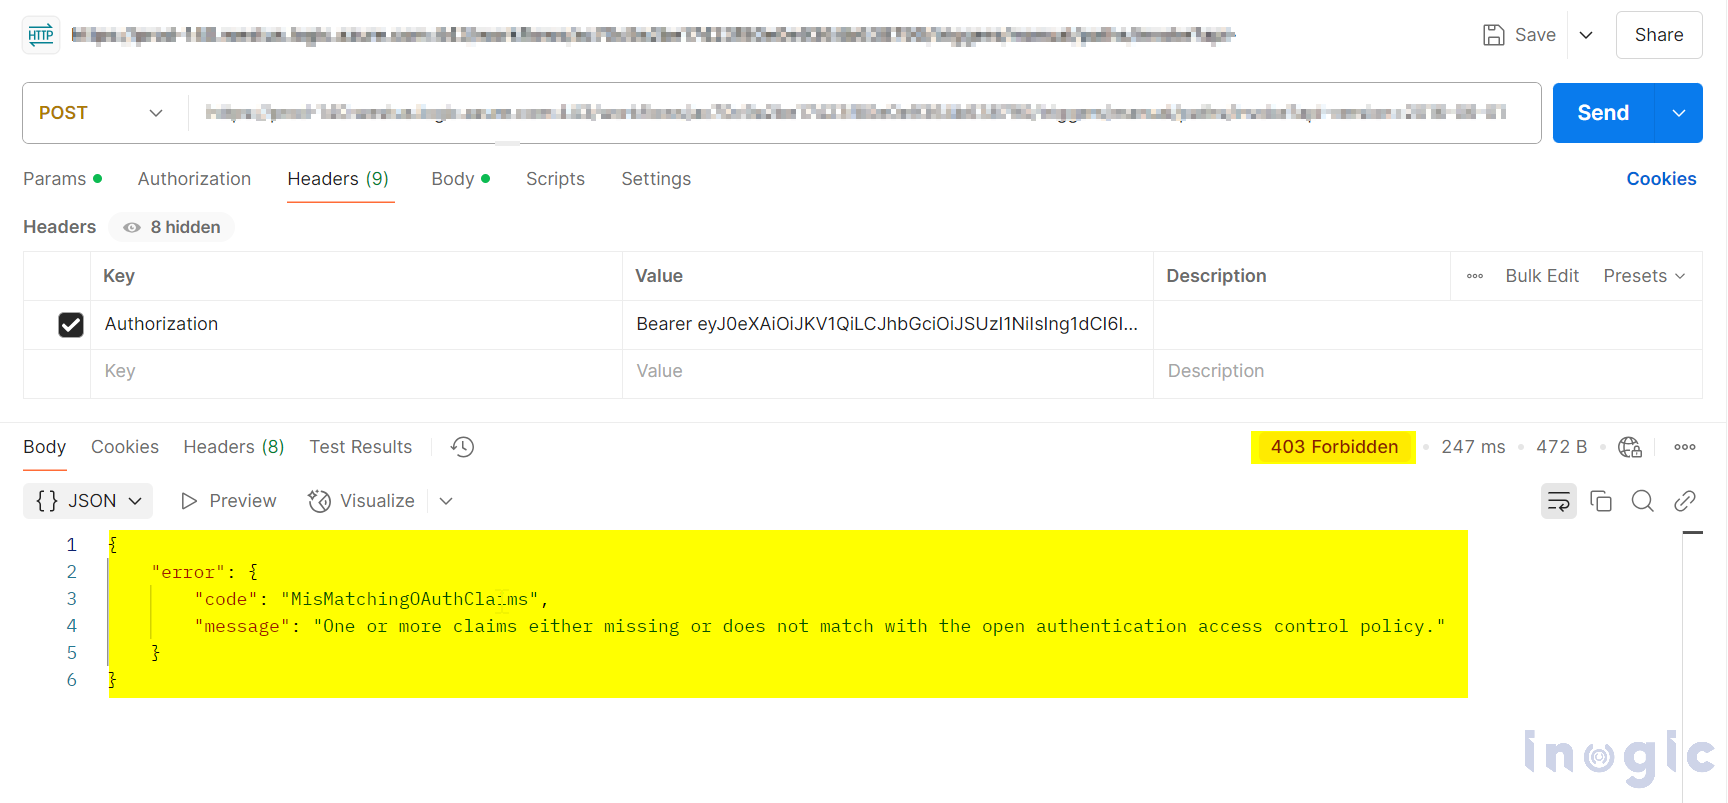
Now, let’s test the “Specific user in my tenant” option by attempting to trigger the flow with a user who is not included in the Allowed user list.
Note: In the Allowed user list, you can specify both user email addresses and Azure app object IDs, separated by a semicolon (;). If an HTTP request is made using an access token from a user or application not listed in the Allowed user list, the flow will not be triggered.
For example, if an attempt is made to trigger the flow using the user token of Carter, who is part of the tenant but not included in the Allowed user list, the request will be denied.
Conclusion
By using OAuth authentication, I was able to set up the workflow so that only specific users with their unique access tokens could trigger it. This means that no one outside the approved list can access or run the workflow meant for certain tasks. Now, with OAuth in place, only authorized users with the correct access tokens can interact with the workflow. This improves security and ensures that important business processes stay protected and under control. By adding OAuth authentication, I made it easier to secure my HTTP-triggered workflows while still allowing the right users to use them without any issues.

The post How to Secure HTTP Requests Using OAuth Authentication in Power Automate first appeared on Microsoft Dynamics 365 CRM Tips and Tricks.
Original Post https://www.inogic.com/blog/2025/03/how-to-secure-http-requests-using-oauth-authentication-in-power-automate/