

Now Reading: Website Tracking In Realtime Marketing – How Does It Work?
-
01
Website Tracking In Realtime Marketing – How Does It Work?
The Website Tracking for Realtime Marketing is FINALLY here. A long awaited feature that has been pushed several times from Wave to Wave, now we can see it in it’s preview state. In this post I will walk through what the feature has in this iteration… and what you might consider ‘missing’ that will hopefully be released by the time it’s generally available. Let’s take a look!
First, make sure you are on at least version 1.1.51539.118 (December 2024 release). Then navigate to the feature switches and turn on the Web Tracking feature.
Once you’ve done that, you might need to refresh your browser a few times, but you should get access to the Web Tracking option under Customer engagement in the Settings area. You’ll need to copy this then add to your website (either directly in the header of your site, or using Google Tag Manager). Note that if you have different websites, it is still the same tracking code as there is nothing that determines different sites.
So how does the tracking work? Currently it works with cookie browsers (you can find more information about how the cookies are used here). So consider someone navigating your site, then filling out a form which would create/update a Lead or Contact. Once the form is filled out, sending them back to the website via an email would then apply a behavior-analysis cookie ID to the person’s browser, where the cookie will remain active for one year.
Ok so now let’s get on to the new standard triggers. You will see two new ones, Marketing Website Clicked and Marketing Website Visited. Ignore the two that say outbound marketing, those will likely end up going away in June anyway, are not the ones for you.
- Website visits: Captured every time a known customer visits a page on your website.
- Website link clicks: Captured every time a known customer selects a link such as a banner on your website.

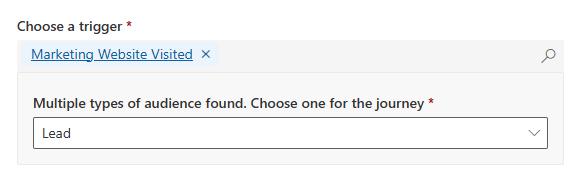
In this example I will use the Marketing Website Visited trigger. You will be prompted to set if it is for Leads or Contacts.
Next, you can add one or more conditions to the journey. If you don’t, it will fire for ANY page visited at ANY point for ANY of the websites where you added the code. Not really what you want right? Each trigger has slightly different values/information that will be passed back via the trigger (more on this in future posts).
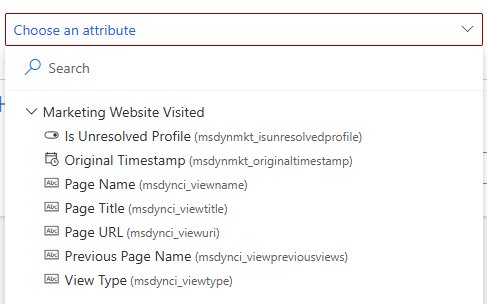
In this example, we will start the trigger when a Lead has visited a specific URL on my website. Once that happens, the Lead will be sent through the Journey and go through any of the steps set up (sent emails etc.).

One important setting on the journey to consider is the repeat option. The default in terms of when someone can go through the journey again is immediately. That would mean each time they visit the URL (refresh their browser, go back and forth in their browser), they would go through the journey again. So consider the purpose of your journey and how likely it is they should go through it again.

What Else Does It Do?
Well, this is in preview, and this is the important part, preview means we need to share feedback with Microsoft to make it better! These things are currently (at time of this post being published) not available to work with Website Tracking.
- No way to see the traffic anywhere in Customer Insights – Journeys so you won’t know who has visited a specific page any other way than the trigger firing
- No way to use the website visits or clicks to build a segment
- No way to use the website visits or clicks for lead scoring
- No visibility of website visits or clicks on the timeline for a Contact or Lead
So as always, check out the feature but always give constructive feedback to Microsoft so they know what to add, improve or consider working on for future releases. The best place to add it, constructively, is on the Microsoft Ideas site in the Analytics and Insights section.
Original Post http://meganvwalker.com/website-tracking-in-realtime-marketing-how-does-it-work/


