

When you build a portal in Power Pages, you usually secure your data by linking a record to the logged-in user through a Contact or Account relationship.
But what happens if a table doesn’t have that relationship?
Think about a support portal. You have a table for “Ticket Categories.” These categories are general reference data; they don’t belong to any specific user. Let’s say you want portal users to only submit tickets related to payments. You want the form dropdown to only show the “Payment” category, while keeping options like “IT Support” or “HR” hidden because they are for internal staff only.
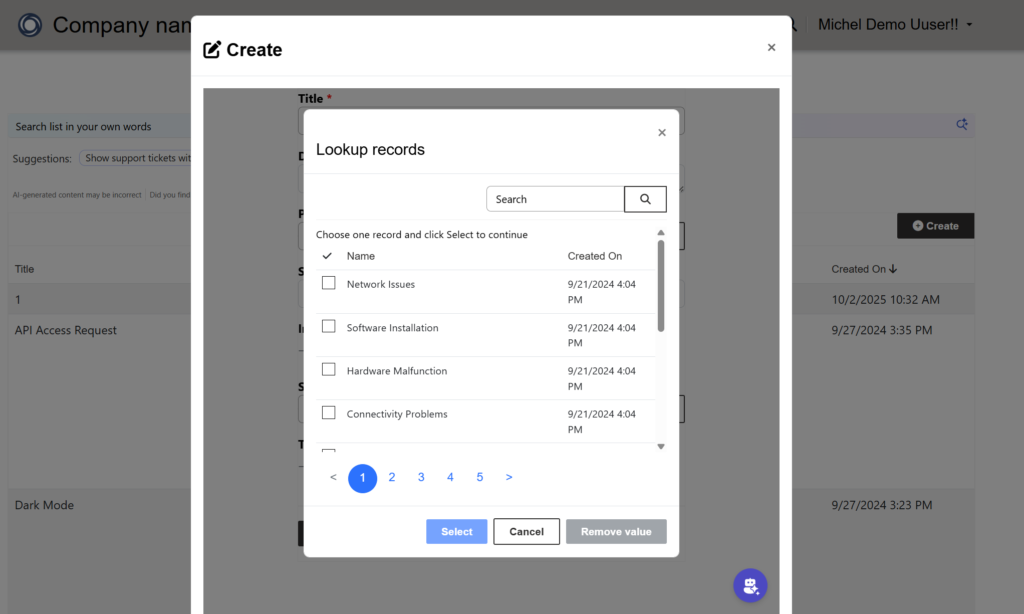
In the past, you had to set the table permission to “Global” just so users could read the public options (which by default would bring all the categories in the lookup search as below when trying to create new records):
Then, you had to write JavaScript to hide the internal categories from the dropdown menu.
The problem is that hiding data with JavaScript is not secure. The data is still sent to the user’s browser. Anyone who knows how to open their browser’s developer tools can unhide the options, find the IDs, and submit a ticket using an internal category.
The Solution
There is now a built-in way to fix this. Power Pages introduced a new Custom access type (currently in Preview) for table permissions.
It lets you filter records using a FetchXML query. Instead of sending all the data to the browser and trying to hide it with code, the Custom access type filters the data inside Dataverse. It only sends the records you want the user to see. If someone tries to use developer tools or the portal Web API to find hidden categories, it won’t work because the data is blocked at the source.
How to set it up
Here is how you configure the “Custom access” table permission for our payment category example:
Turn on Enhanced Authorization: First, go to your Power Pages site settings in the Power Platform admin center and enable Enhanced Authorization:
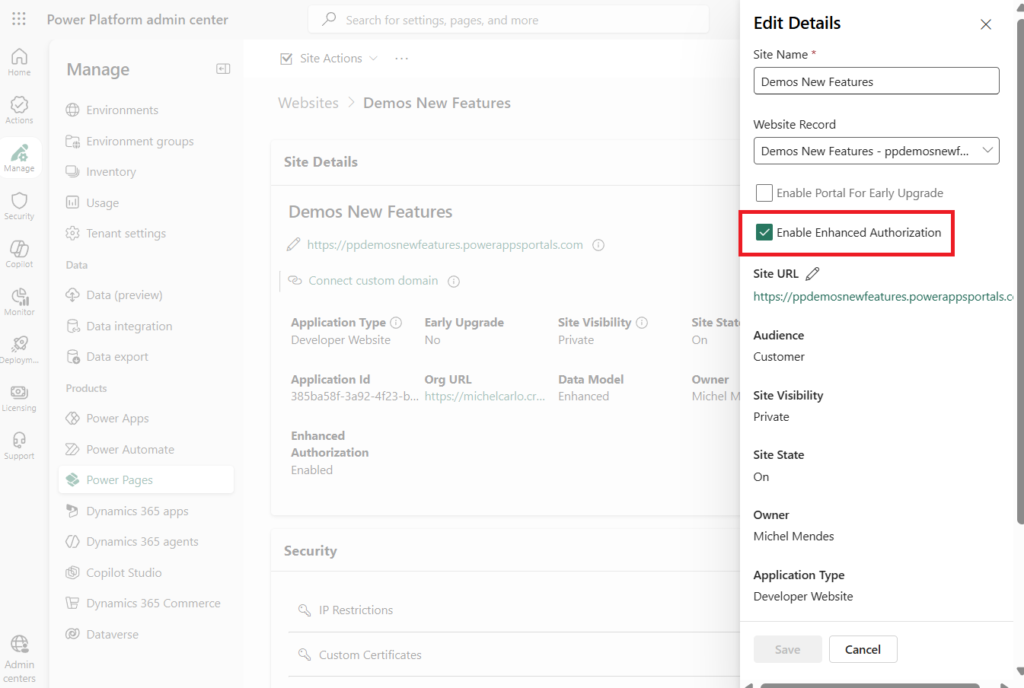
This moves the permission checks directly into Dataverse, which is required for this feature to work.
Create the Custom Permission: When you create the Table Permission for your Categories table, look at the access type dropdown. Instead of picking Global, Contact, or Account, select Custom access (and also deactivate any previous table permission you used too)
Write your FetchXML: A text box will appear. Paste your FetchXML query here.
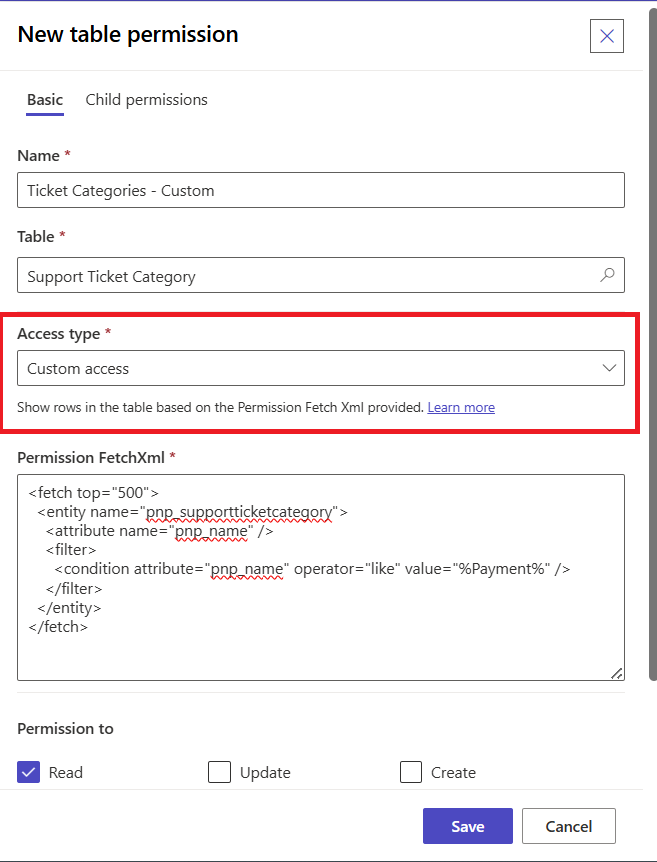
For our ticketing example, you just write a simple FetchXML query that filters the category table to only return the record where the name contains “Payment.”
<fetch>
  <entity name="pnp_supportticketcategory">
    <attribute name="pnp_name" />
    <filter>
      <condition attribute="pnp_name" operator="like" value="%payment%" />
    </filter>
  </entity>
</fetch>
Save the permissions and refresh the cache. Next time you open the form to create a new record, you will see the limited list of categories in the lookup search:
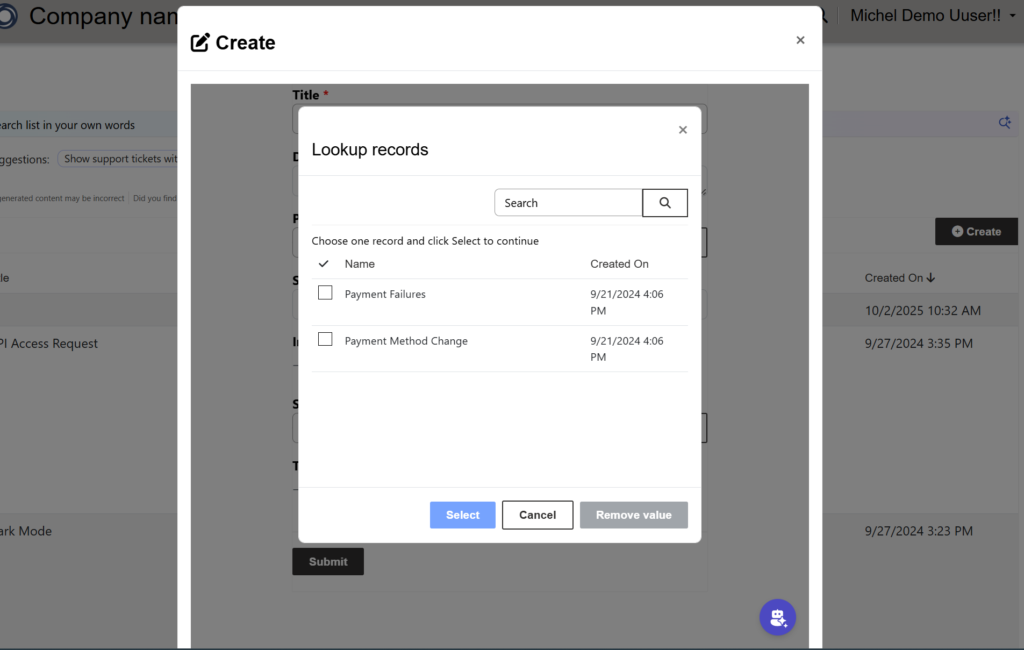
That is it. You no longer need to write custom JavaScript to clean up the form, and your data is properly secured.
References
Power Pages Table Permissions – Custom Access Type – Microsoft Learn
Power Pages – Enable Enhanced Authorization – Microsoft Learn