
Supplier communication is one of the most time-consuming activities in procurement. Buyers spend significant effort following up on purchase order confirmations, delivery commitments, supplier responses, and email-based conversations.
To address this challenge, Microsoft has introduced the Supplier Communications capabilities of the Procurement Agent in Dynamics 365 Supply Chain Management, enabling AI-powered supplier engagement through Microsoft Copilot and Copilot Studio.
In this article, we’ll walk through the complete setup and configuration process and explore how organizations can enable automated supplier communication using the Agent Deployment Wizard.
Why Supplier Communications Matters
Procurement teams often deal with:
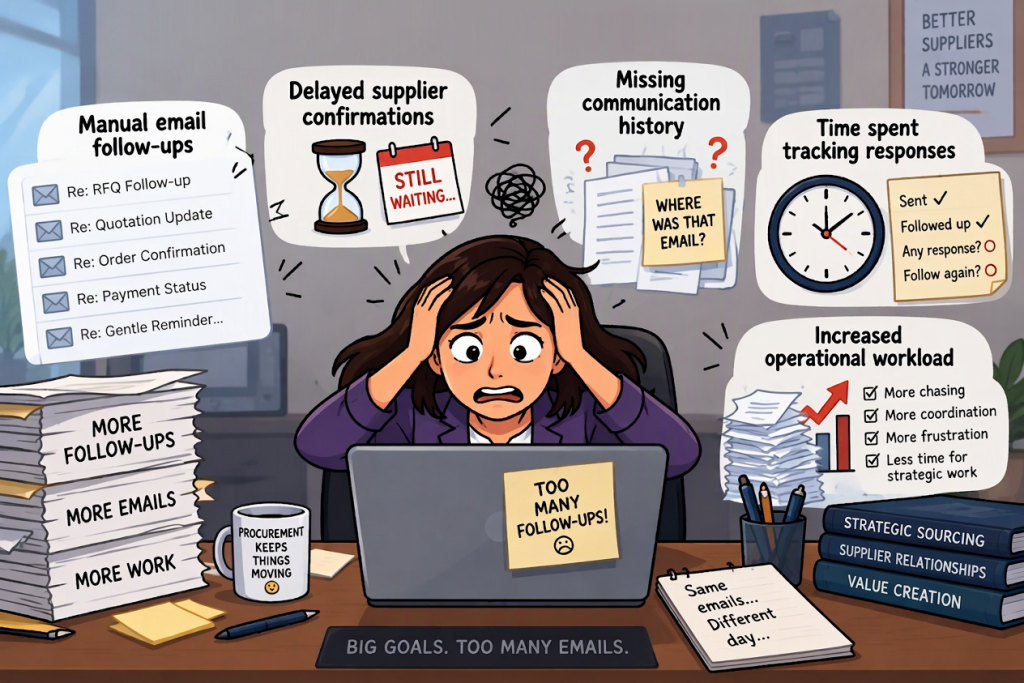
- Manual email follow-ups
- Delayed supplier confirmations
- Missing communication history
- Time spent tracking responses
- Increased operational workload

The Procurement Agent helps streamline these processes by:
 Monitoring supplier emails
Classifying inbound communications
Sending follow-up messages
Managing supplier interactions through AI
Reducing manual procurement effort
Improving supplier responsiveness
The Supplier Communications capability uses Microsoft Copilot technologies to interact with suppliers while maintaining integration with Dynamics 365 Supply Chain Management
Prerequisites
Before starting the deployment, verify that your environment meets the required prerequisites.
Dynamics 365 Version
Dynamics 365 Supply Chain Management 10.0.44 or later
Latest available quality updates installed
How to check your version?
On the Top -right corner of your environment , click on ? and select About

Version with build details will be displayed

Enable Required Features
From Feature Management, enable:
- (Production ready Preview) Immersive Home
- (Production ready Preview) Agent Management
- (Production ready Preview) Procurement Agent – Supplier Communications
- Procurement Agent – Supplier Communications – Automatically sending follow-up emails

Pay close attention to the order in which the features are enabled. Attempting to enable a dependent feature before its prerequisite feature has been activated will result in an error.
For example, when I tried to enable “(Production Ready Preview) Procurement Agent – Supplier Communications – Automatically Sending Follow-up Emails” before enabling “(Production Ready Preview) Procurement Agent – Supplier Communications”, the system displayed the following error message.

When disabling the Procurement Agent features, follow the reverse order of the enablement sequence. Disabling a prerequisite feature while dependent features are still active will result in validation errors.
- Procurement Agent – Supplier Communications – Automatically sending follow-up emails
- (Production ready Preview) Procurement Agent – Supplier Communications
- (Production ready Preview) Agent Management
- (Production ready Preview) Immersive Home
If the sequence is not followed, the system will prevent the action and display a dependency warning. For example, I attempted to disable Immersive Home while the other Procurement Agent features were still enabled, and the system generated the warning shown below.

Deploy Dynamics 365 agents by using the agent deployment wizard
The agent deployment wizard in Copilot Hub provides a centralized experience for deploying Dynamics 365 agents to your business applications. It guides administrators through a secure, validated process that deploys Microsoft‑provided agents into environments such as Dataverse, Power Platform, and Microsoft finance and operations apps.
The screenshot below is from my admin center and showcases the Public Preview experience, which provides early access to the latest enhancements and capabilities available in the Agent Deployment Wizard.

One of the key advantages of using the Agent Deployment Wizard is that you don’t have to manually verify and configure every prerequisite beforehand. The wizard guides you through the entire deployment process, validates the required settings, and highlights any missing configurations. For each missing prerequisite, it provides a direct link to the relevant page, making it easy to complete the required setup and continue with the deployment.
Let’s take a closer look at the wizard steps.
After navigating to Dynamics 365 Agents in Copilot Hub, start by selecting the appropriate environment from the drop-down list available in the upper-right corner of the page. All subsequent deployment and configuration activities will be performed within the selected environment. Once the environment is chosen, you can proceed with deploying and configuring the Supplier Communications Agent using the guided setup experience.

Upon selecting the environment, the agents will show ‘Add’ option if you are configuring for the first time.

If the configuration is already done and needs some update, then it shows ‘Configure’

Click the Add/Configure option and the wizard presents you with teh overview of the steps.

Click Next
In the first step of the deployment process, the wizard automatically validates whether the required Copilot applications are installed and running on the supported versions. When the validation is successful, a green check mark is displayed, indicating that the prerequisite has been met and no further action is required.
A particularly useful feature of the wizard is its ability to identify missing or outdated prerequisites. If the required Copilot application is not installed or is running on an unsupported version, the wizard highlights the issue and provides a direct link to the appropriate configuration page. This allows administrators to quickly install or update the required Copilot components and then return to the deployment process without having to manually search for the relevant settings or documentation.

If the required application is not installed or does not meet the minimum version requirement, the validation step displays a red cross, clearly indicating that the prerequisite has not been satisfied.
This visual indicator helps administrators quickly identify configuration gaps before proceeding with the deployment. The wizard not only highlights the issue but also provides a direct link to the relevant installation or update page. By following the provided link, administrators can install or upgrade the required Copilot application and then rerun the validation to confirm that the prerequisite has been successfully completed. Once the issue is resolved, the red cross is replaced with a green check mark, allowing the deployment process to continue.

Go to the above link and hit ‘Install app’

Then select the below options

Select the apps and click Next.

Select the check box and hit Install.
The installation takes a few minutes to complete.
Once the above apps are installed, come back to the wizard and click on the ‘refresh’ for the specific step.

Then the step turns green .

Verify Finance and Operations
This step has to be manually marked after you verify the FO version

Enable Copilot features
This pre-requisite will be automatically validated once the correct setups are in place.

Enable generative AI features

Set up Copilot Studio usage and billing

Configure data and connector policies
Verify the connections required by this agent are allowed in your organisation. Go through the DLP policies and enable accordingly.

Once all the above prerequisites are enabled , you can see all the options are validated and updated in Green.

STEP 2: ‘Set up agent Identity’
The wizard then guides administrators through identity configuration.
Create or Select Entra User
Best practice:
Create a dedicated account specifically for the Procurement Agent.
Example: scmagent@contoso.com

Click on ‘Microsoft EntraId’ which takes you to the M365 admin center . Click ‘Add a User’

Finish the required basics and finish the process.

Assign the license

Assign the required license

Cick on ‘Set up ‘

Import the roles in the D365FO

Once all the steps are completed, the validations will be completed with a green check mark. click Next.

STEP 3: Connect agent
The wizard then establishes all required platform connections.
Typical connections include:
- Dataverse
- Exchange
- Copilot Studio
- Supply Chain Management services

Clicking ‘New connection’ takes the user to powerapps page and displays the Dataverse login

Enter the display name. Select ‘Oauth’ as the Authentication Type .
Make sure you enter the User Id which was created in the Entra step and not the admin id.

Repeat the same for ‘Copilot Studio’ connection as well.

Activate data flows and processes
Click on the Power Apps maker portal to activate the flows


Step 5: Configure Mailboxes
To allow supplier communication, mailboxes must be configured and synchronized.
Organizations can choose:
Shared Mailboxes
Useful when procurement teams manage communications collaboratively.Shared mailboxes are associated with Teams in the Power Platform environment and can be accessed by authorized users.
Private Mailboxes
Private mailboxes can be configured for individual procurement users.
Only the mailbox owner can create configurations and review results related to that mailbox

Click on the ‘Set up shared mailbox’
If a mailbox doesnt exist, click on ‘Create a shared mailbox’

Click ‘Add a shared mailbox’

Enter the required details

Click ‘Set up’

Set up is validated

Click Complete once the set up is done

Click ‘Manage mailbox in the environment’ to configure the set ups

This take you to the user mail box settings

Enter the time and click Ok

Step 5: User permission for Agent access
Click Next and add the user who should have access to the agent.

Final step is enabling the agent

If you select Microsoft Copilot Studio Agents and apply a filter for “Supplier”, you will see two dedicated agents that support the Supplier Communications capability:
- Supplier Communications Agent – Inbound: This agent processes incoming supplier emails and transfers the relevant information into Dynamics 365 Supply Chain Management for further processing and action.
- Supplier Communications Agent – Outbound: This agent manages outbound communications by generating and sending emails from Dynamics 365 Supply Chain Management to suppliers.
Together, these agents enable a seamless two-way communication channel, allowing procurement teams to automate supplier interactions while keeping all communication activities connected to Dynamics 365. Before proceeding with the deployment, ensure that both agents are successfully installed and published, as they form the foundation of the Supplier Communications solution.

Final step is review and Complete

That’s it. 
Pretty straightforward, isn’t it?
One of the biggest advantages of the Agent Deployment Wizard is that there’s no need to remember the various setup pages and configuration links for Microsoft Entra ID users, Copilot Studio agents, Power Automate flows, Dataverse connections, or Copilot applications. The wizard brings everything together in a single guided experience, validates the prerequisites, identifies any missing configurations, and provides direct links to the relevant setup pages.
This significantly reduces the time and effort required to deploy the Supplier Communications capability and helps administrators avoid common configuration mistakes.
In this post, we’ve covered how to deploy and configure the Supplier Communications features using the Agent Deployment Wizard. In the next post, we’ll move from deployment to execution and explore how these agents can be used within Dynamics 365 Supply Chain Management to automate supplier interactions and streamline procurement processes.
I’ll leave you with a thought that perfectly reflects this journey:
“It always seems impossible until it’s done.”
– Nelson Mandela
Happy learning and happy automating! 
