Now Reading: Power Pages Portal Security Scan Feature in Dynamics 365
-
01
Power Pages Portal Security Scan Feature in Dynamics 365
Power Pages Portal Security Scan Feature in Dynamics 365
In the current digital age, keeping your website secure is more crucial than ever. Microsoft Power Pages provides a feature known as the Security Scan that allows you to scan and repair vulnerabilities, securing your site for users.
In this blog, we will walk through the Security Scan, how to execute it, and why it is important for your website’s security.
What is the Security Scan?
- This is a feature that is meant to assist you in making your site more resilient.
- It detects potential security risks and vulnerabilities and helps you to fix them before they can be used against you.
- This preventive measure is critical for ensuring online security.
Benefits of Running a Security Scan
- Identify Vulnerabilities: The scan helps you pinpoint weaknesses in your website’s security.
- Fix Issues: You’ll receive alerts with descriptions on how to fix any vulnerabilities found.
- Safeguard Users: By addressing security threats, you protect your users’ data and enhance their trust in your site.
How to Run a Security Scan
Running a security scan in Power Pages is straightforward. We will need to follow these steps to get started:
- Prerequisites: Power Pages Core version 1.0.2403.84 or later is required.
- Access the Security Workspace: Sign in to Power Pages and go to the Security Workspace.
- Run the Scan:
-
- Click on the Run Deep Scan button.
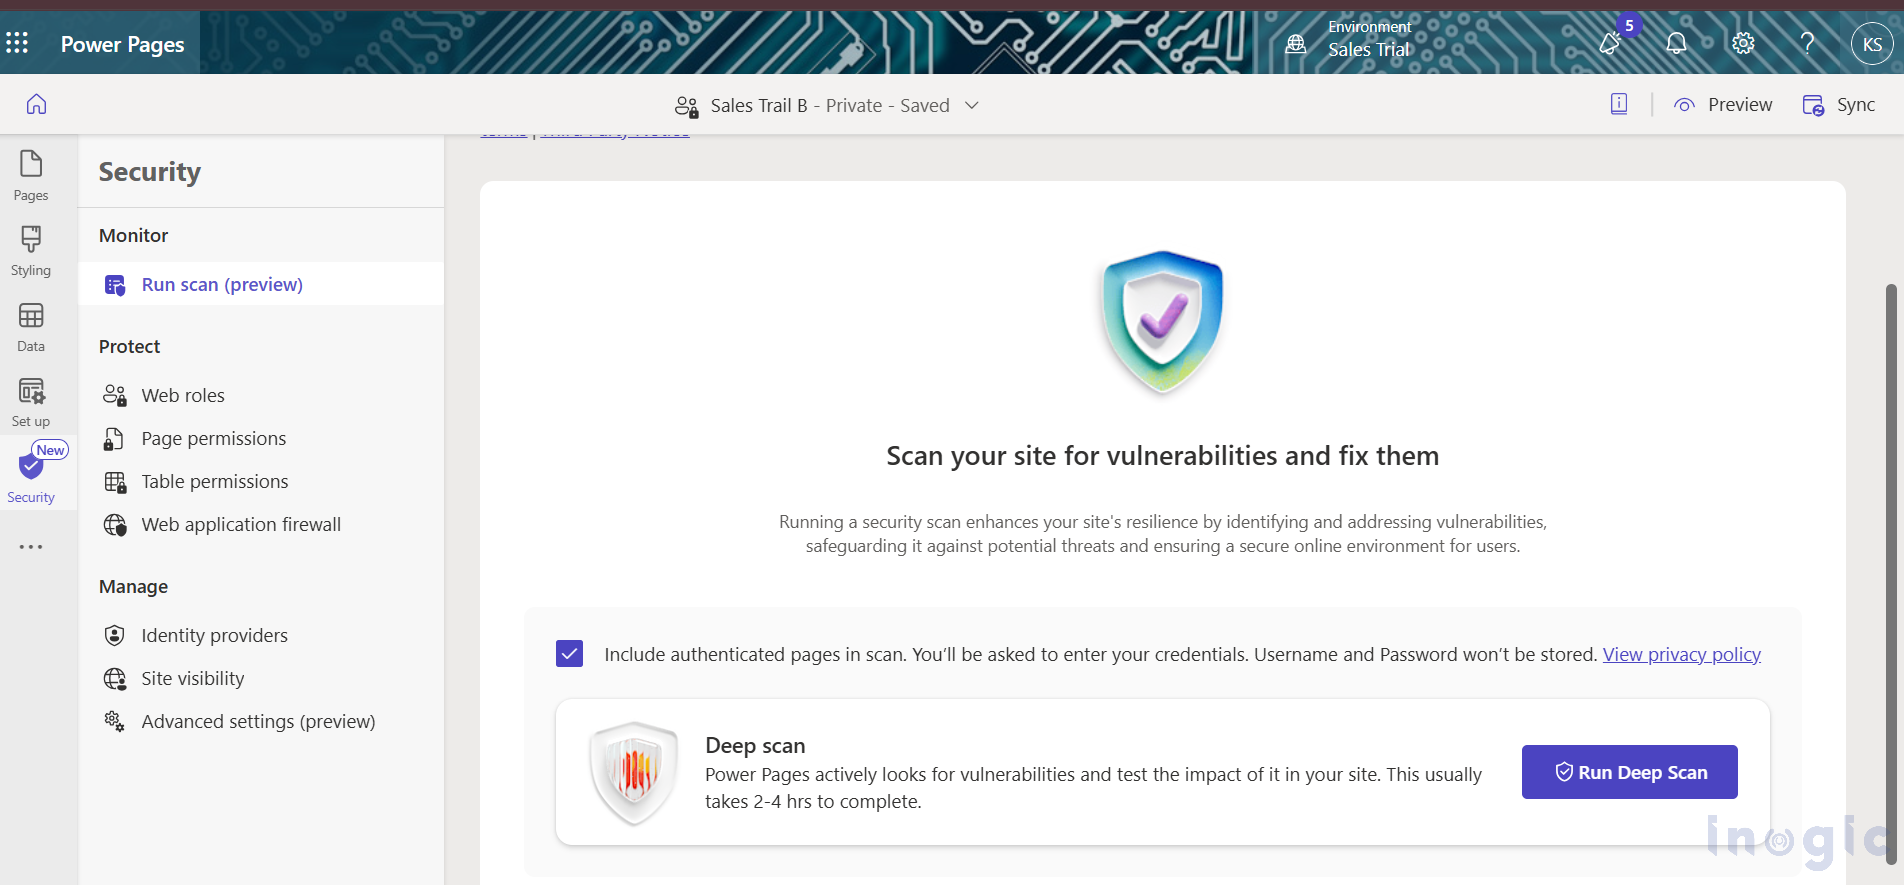
-
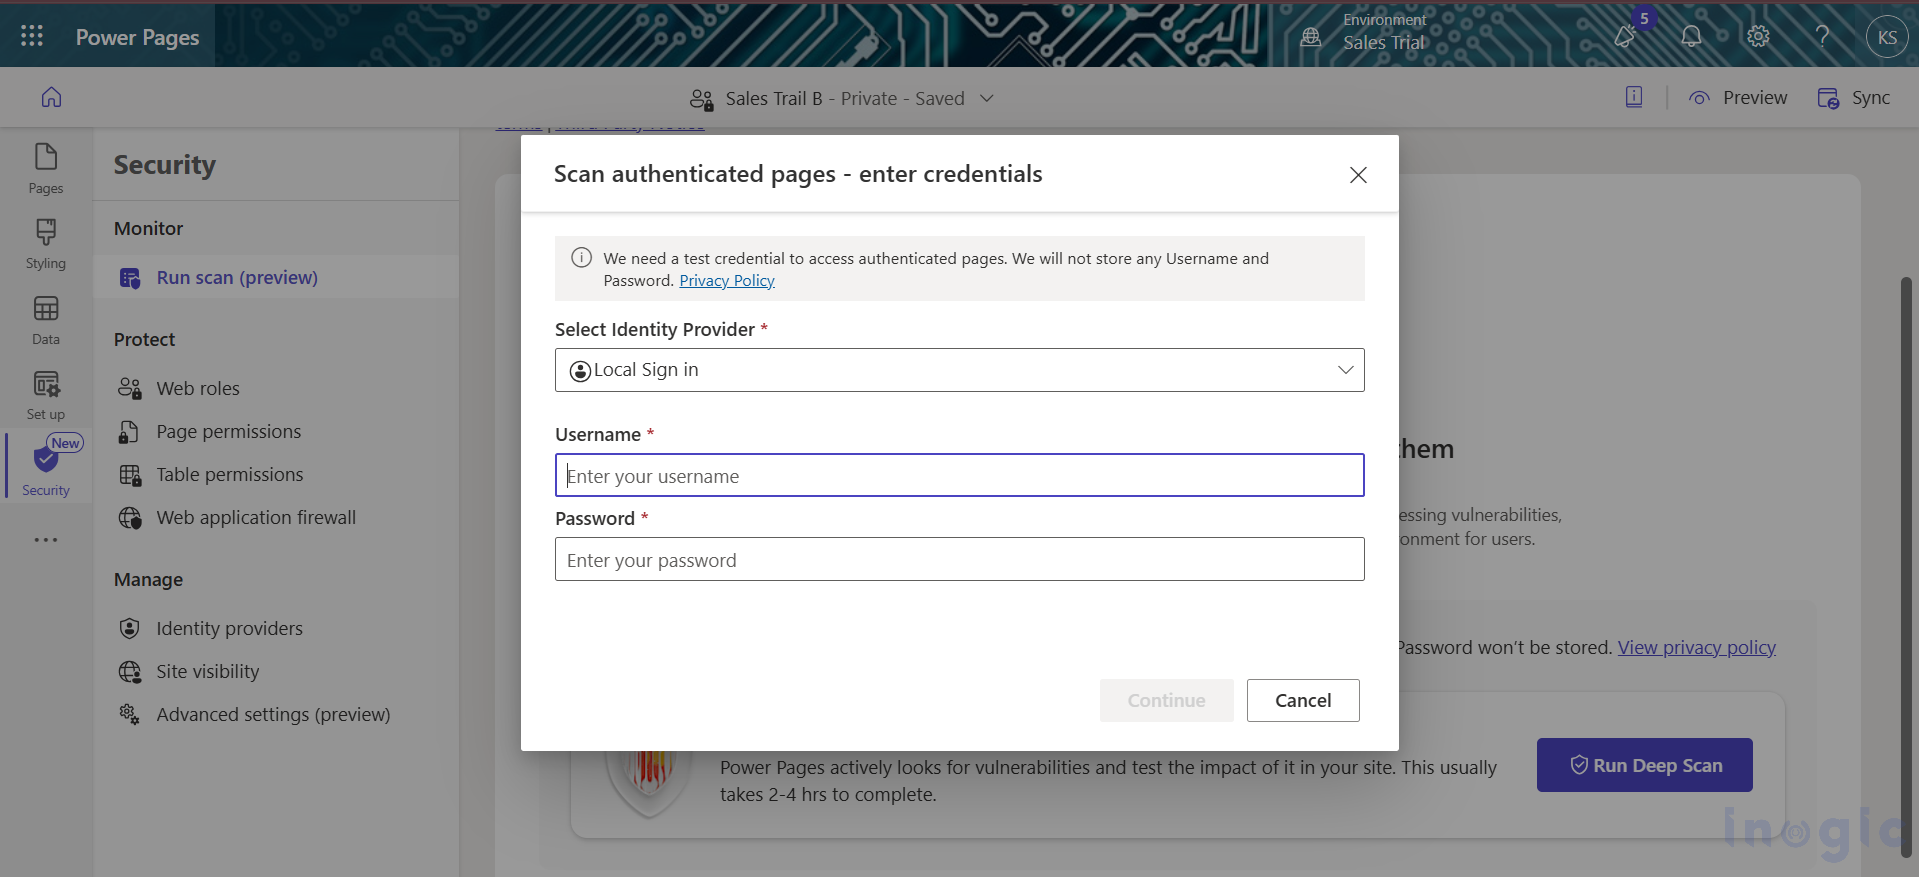
- By default, the scan will check only “anonymous pages” from your site. If you want to include authenticated pages (pages whose security is set to “Authenticated Users” or require login), select the checkbox labeled Include authenticated pages in scan.
- Enter Credentials: When scanning authenticated pages, a notification window appears. Enter your username and password of the Contact which is used for portal sign-in, and then click Continue to start the scan.
- Cancelling the Scan: If you need to stop the scan for any reason, you can do so by returning to the Security workspace and selecting the Cancel Scan button.
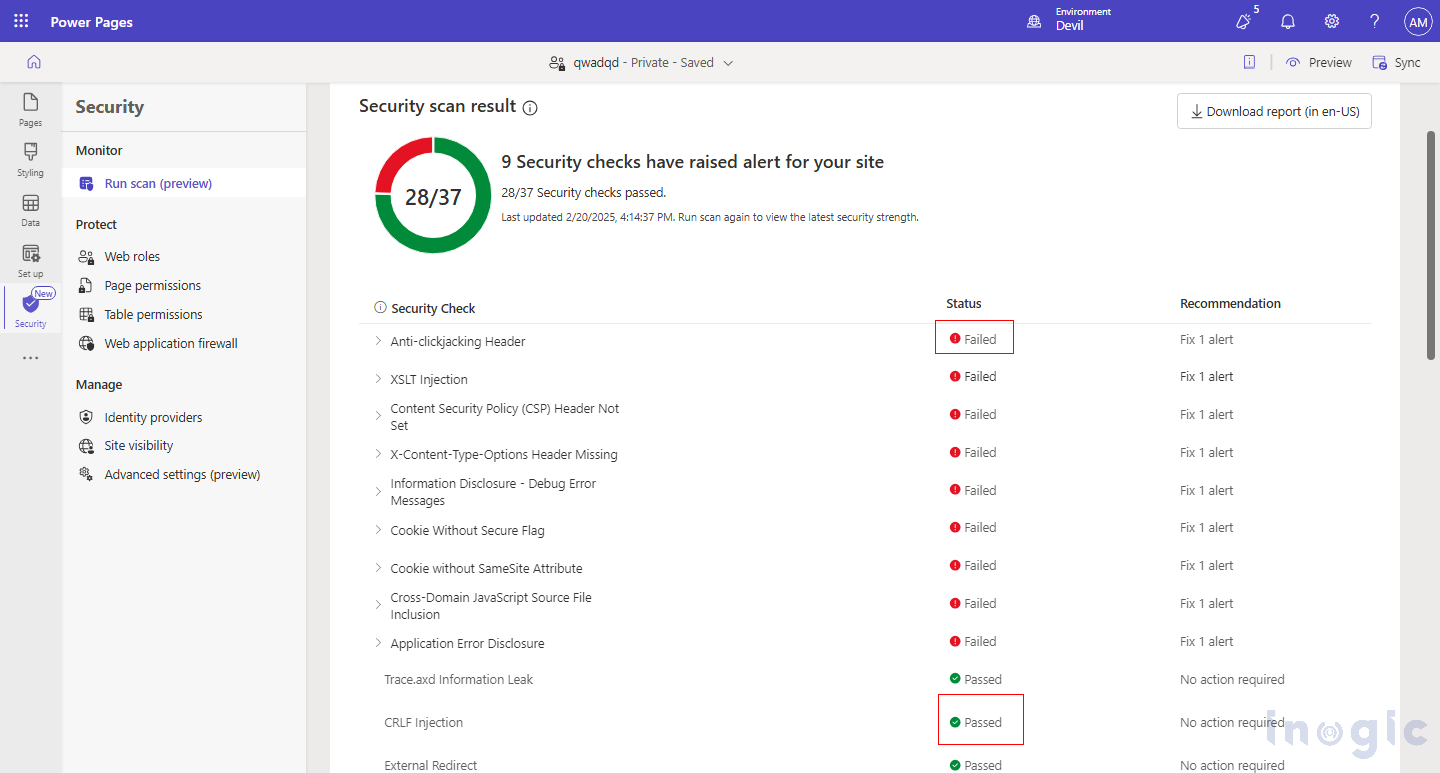
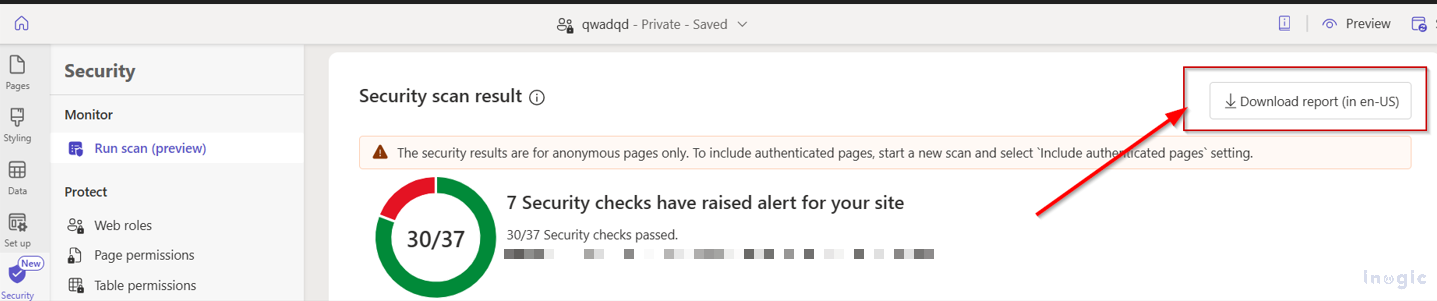
- Scan Completed: Once the scan is complete, it will show how many security vulnerabilities are found with status “Failed” and “Passed” after the scan.
- After identifying the vulnerabilities, the next step we get to check is what kind of issues they are. It will show how to fix them, where to fix them, and provide a link to the specific settings needed to address them.
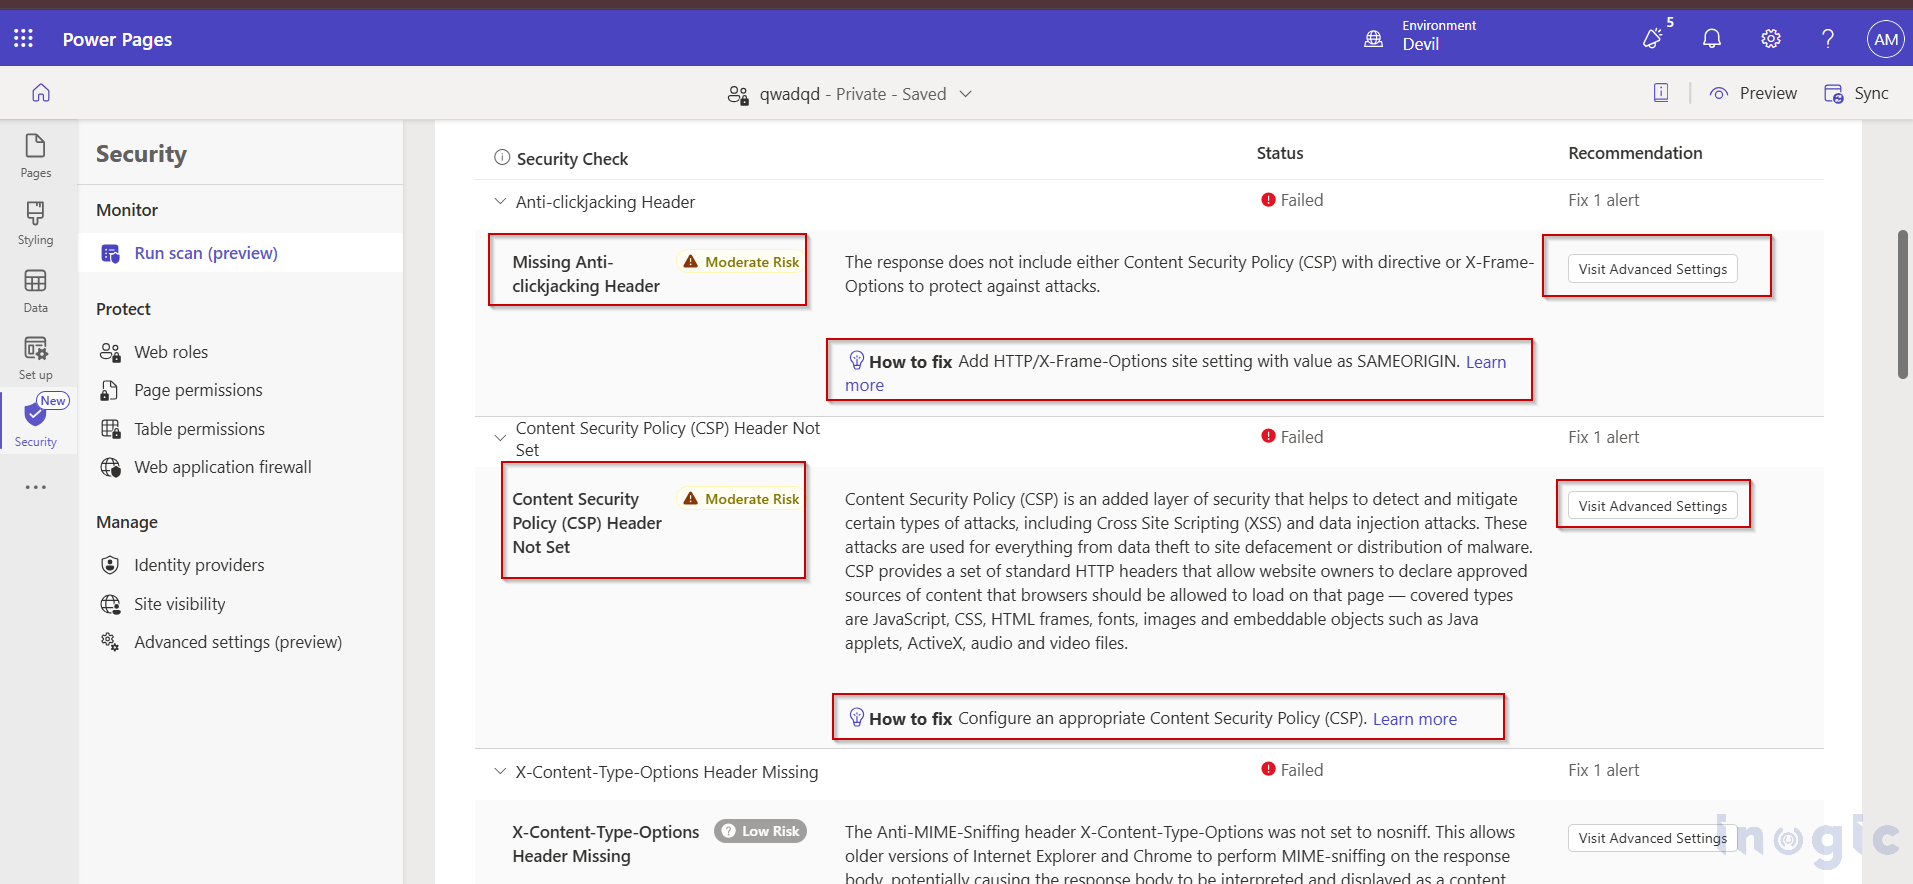
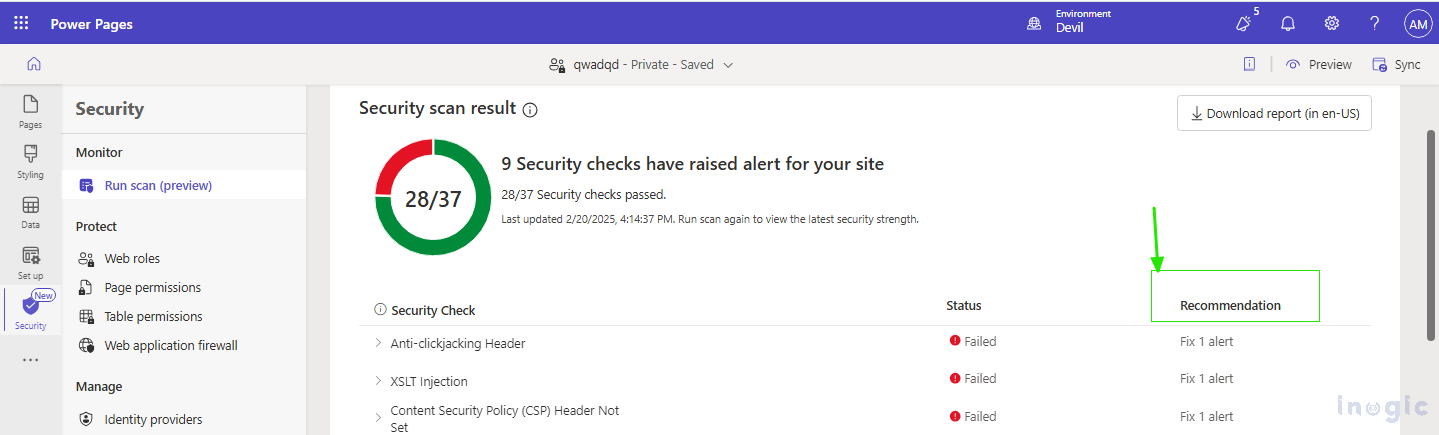
- One of the features of security scan results that help us is by providing the Recommendations. Recommendations for each error are specified in the Recommendations column of the security scan results. (At the end of the blog, you will be able to implement these recommendations).
- We can download a report of security checks that provides all the details of failed vulnerabilities in the details in PDF form. This pdf report has impressive details of alerts (alerts are raised because of security check failure), which are categorized in different sections.
- After fixing all vulnerabilities that are mentioned in the scan, we can rescan and it will show no vulnerabilities for the website security.
REAL TIME EXAMPLE:
Until now, we have seen the details of security scans, but here is the use case that will show how we can use these scans for better security and usability of our site.
The following image shows which security checks failed for the First scan.
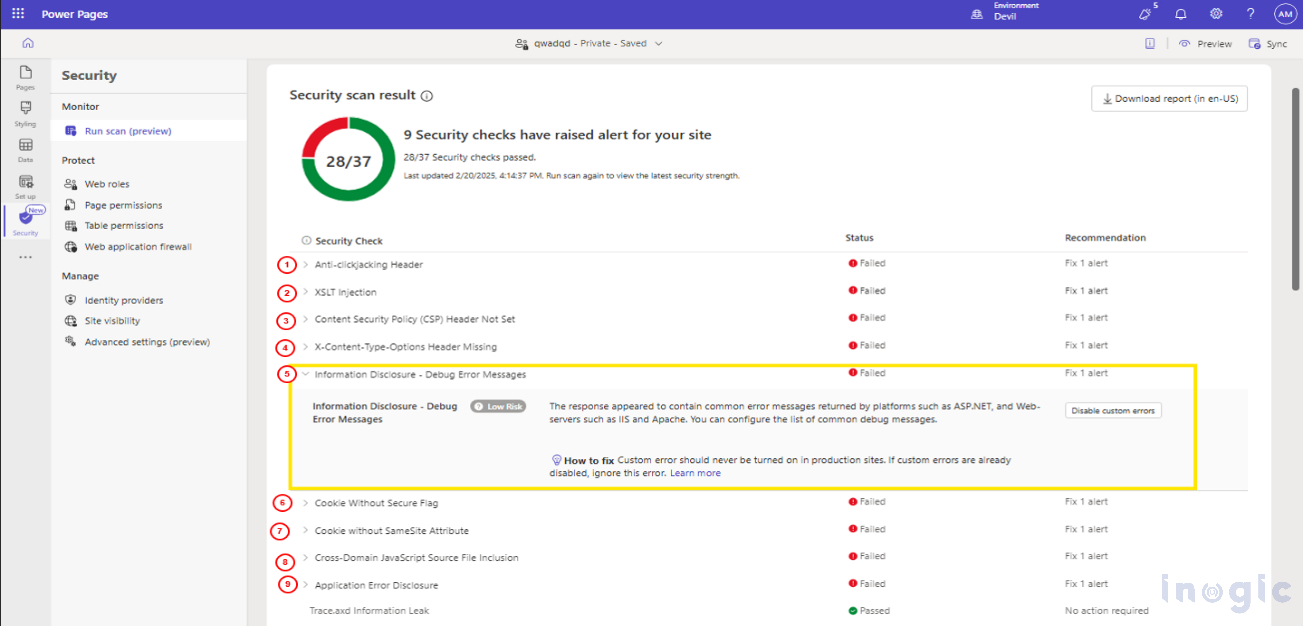
- A total of 9 security checks failed. Out of these, we will consider the 5th Security risk i.e. Information Disclosure – Debug Error Messages, highlighted in the yellow box of the above image.
- In the Recommendations column provided for the above-mentioned error we can see a “Disable Custom Error” button.
- Click on the button, it will take us to the Power Platform Admin Centre.
- In the left upper corner of the Power Platform Admin Centre page, there is the option of “Site Actions”.
- Click on it, and a list is displayed. From the list, click the “Disable Custom Error”
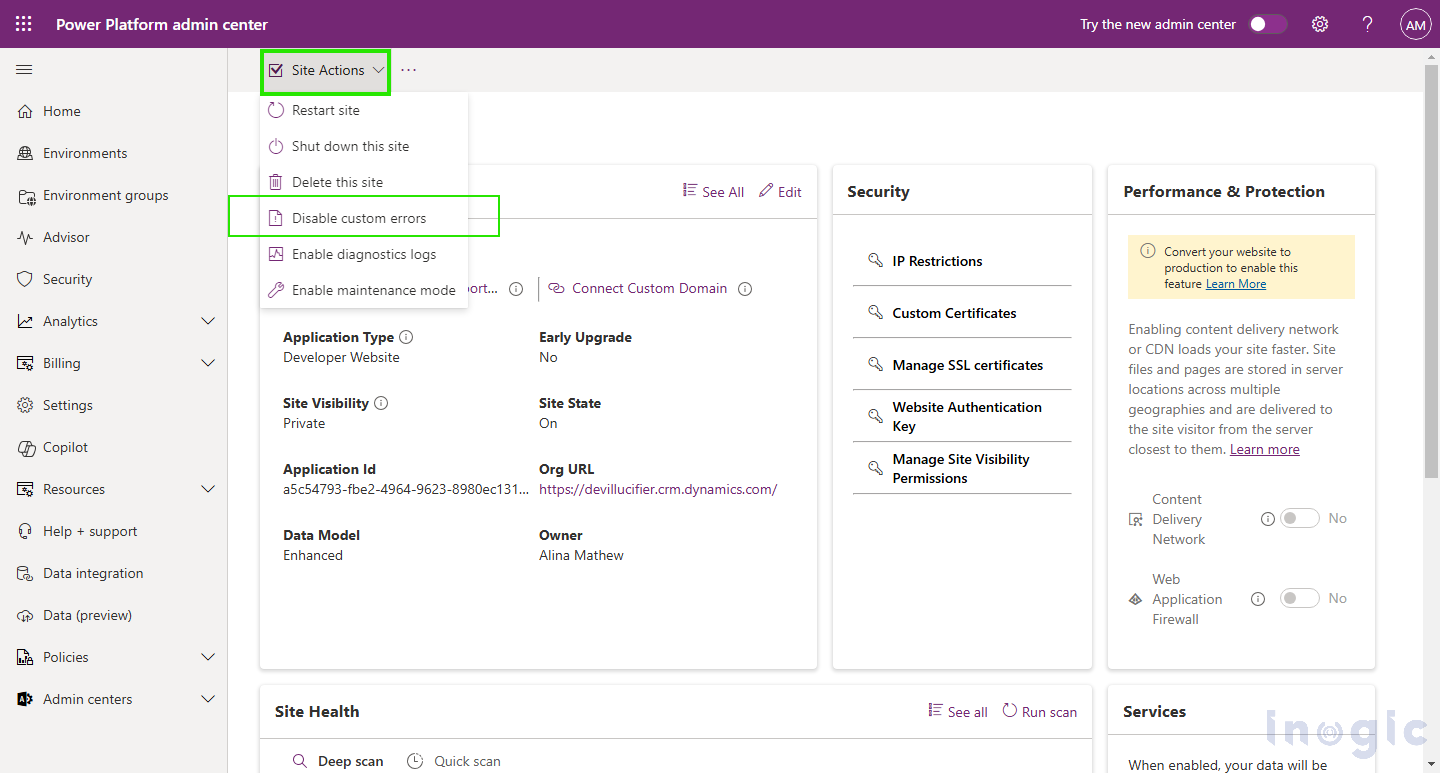
- After this a confirmation message appears on the screen to confirm that we are Disabling the custom messages. Assert the message by clicking the “Confirm Button”.
Now let’s run the scan again. This is the second scan result.
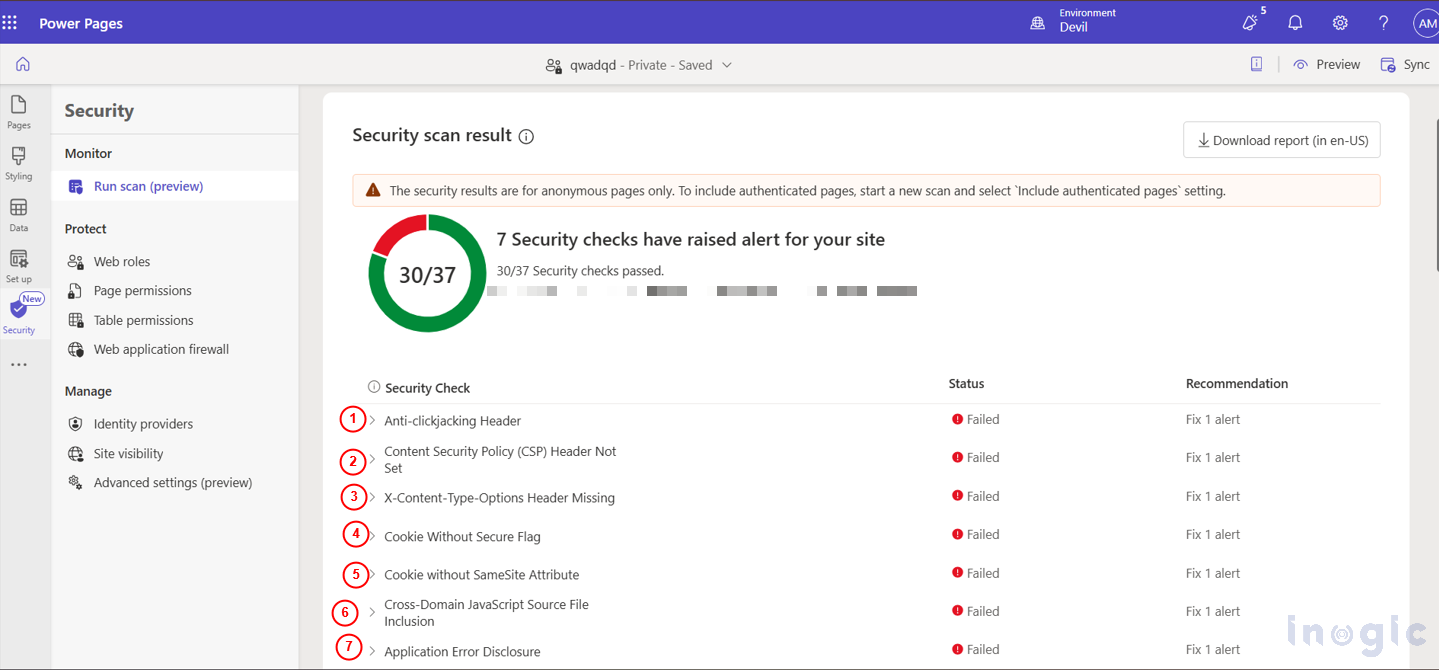
We can see only 7 errors, and the Information Disclosure – Debug Error Messages error is gone.
Conclusion
Using the Security Scan in Power Pages is an essential step in maintaining a secure website. By regularly running scans, you can identify vulnerabilities, fix issues, and create a safer environment for your users. Security is an ongoing process, and with tools like the Security Scan, you can stay ahead of potential threats and ensure that your website is protected.
The post Power Pages Portal Security Scan Feature in Dynamics 365 first appeared on Microsoft Dynamics 365 CRM Tips and Tricks.
Original Post https://www.inogic.com/blog/2025/03/power-pages-portal-security-scan-feature-in-dynamics-365/