

Now Reading: Enabling MCP server in D365FO
-
01
Enabling MCP server in D365FO

In this post, I`ll show step by step process of enabling the MCP server in D365FO
Pre-requisites:
- A D365FO apps which must be 10.0.46 (preferable the build 10.0.2428.15 and above)
- The FO environment must be a 2-tier or above or UDE. The MCP server is not supported in CHE
- Access to copilot studio
Feature Management
Enable the Dynamics 365 ERP Model Context Protocol server feature
Allowed MCP Clients:
When you enable D365 ERP MCP in our environment, you choose the agent platforms which can access the server. By default, only 2 platforms can access the MCP Server
| Platform | Client ID |
|---|---|
| Microsoft Copilot Studio | 7ab7862c-4c57-491e-8a45-d52a7e023983 |
| Visual Studio Code | aebc6443-996d-45c2-90f0-388ff96faa56 |
Navigate to System Adminstration -> Set up -> Allowed MCP clients
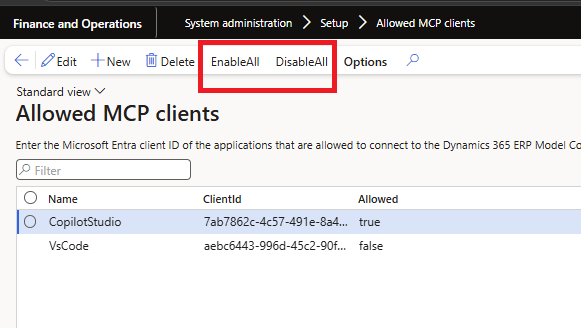
You can enable or disable all based on your use case.
Copilot Studio:
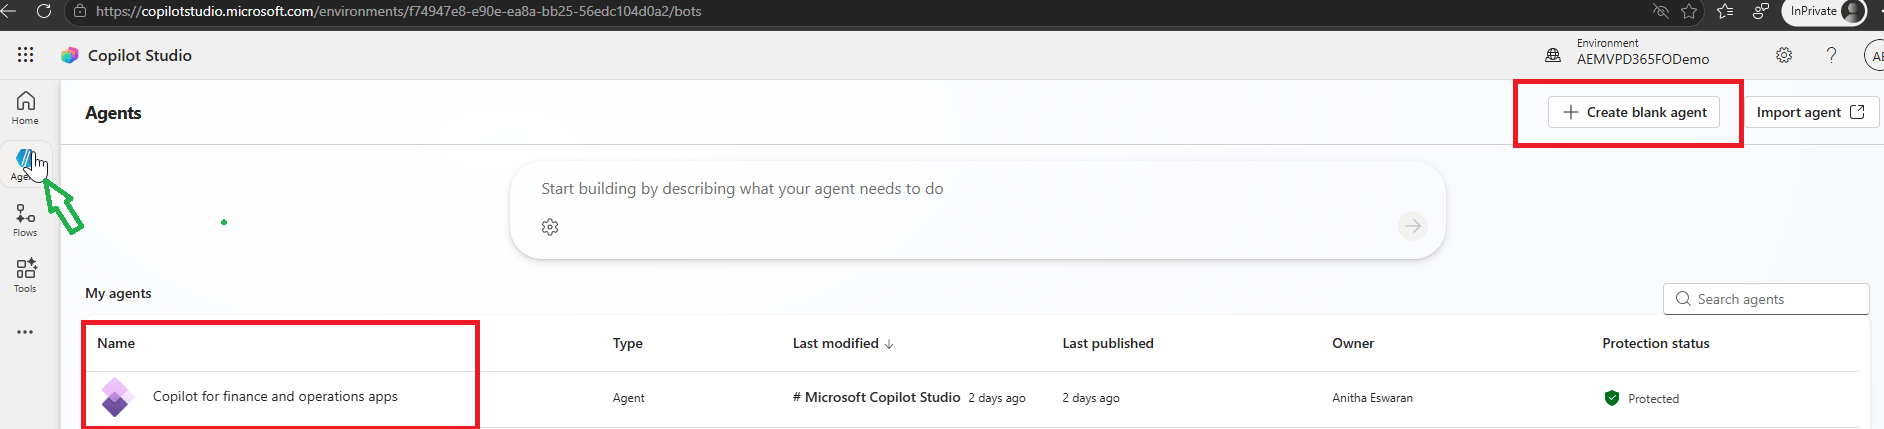
- Login to https://copilotstudio.microsoft.com/ and select your environment.
- Click ‘Agents’ on the left
- On the Top right , there is an option to ‘Create blank agent’
- Let us first try to use the existing FO agent. Select ‘Copilot for Finance and operation apps’
5. The Overview tab shares the details about this standard agent.

Agent Model
The agent model will be defaulted to GPT-4.1. The model you select for your agent significantly affects the quality of responses in your agent.
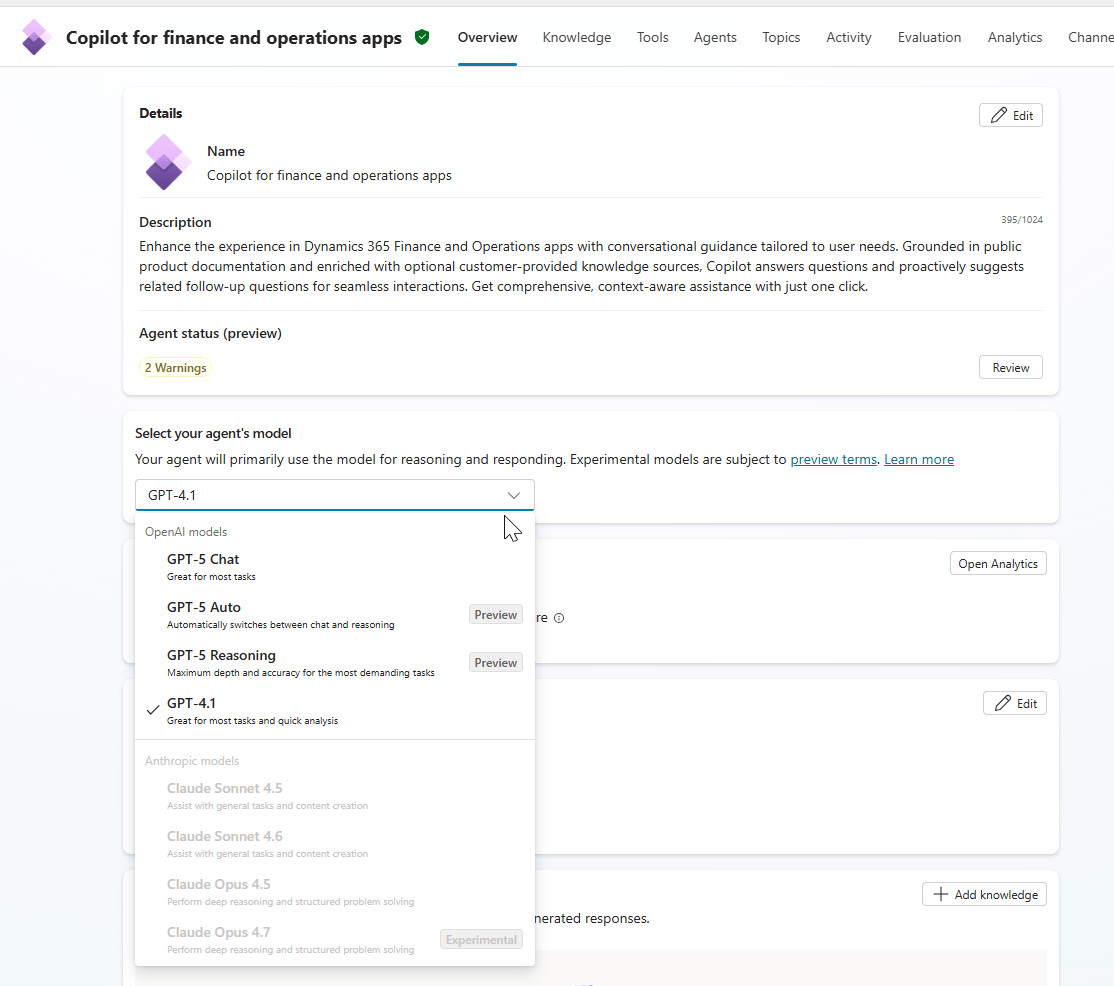
Claude Sonnet 4.5 is also a recommended as it provides better success rate in copilot studio.
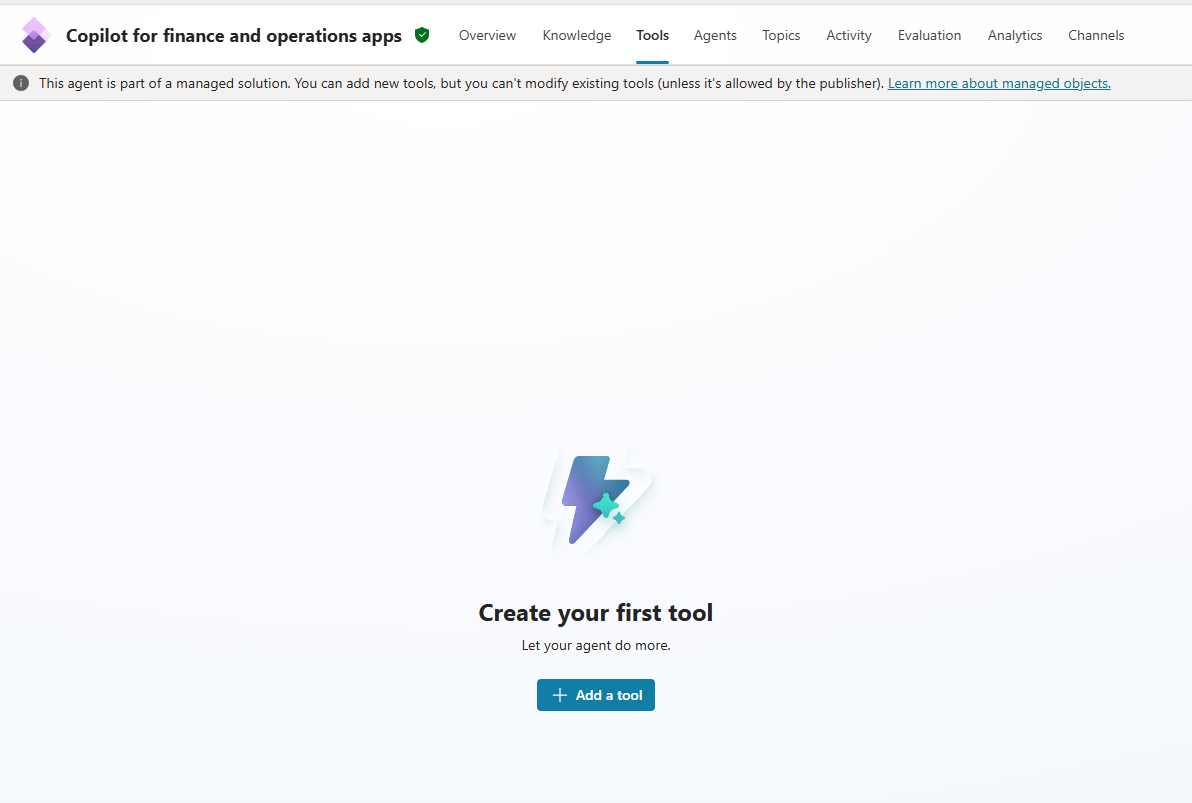
ADD TOOLS
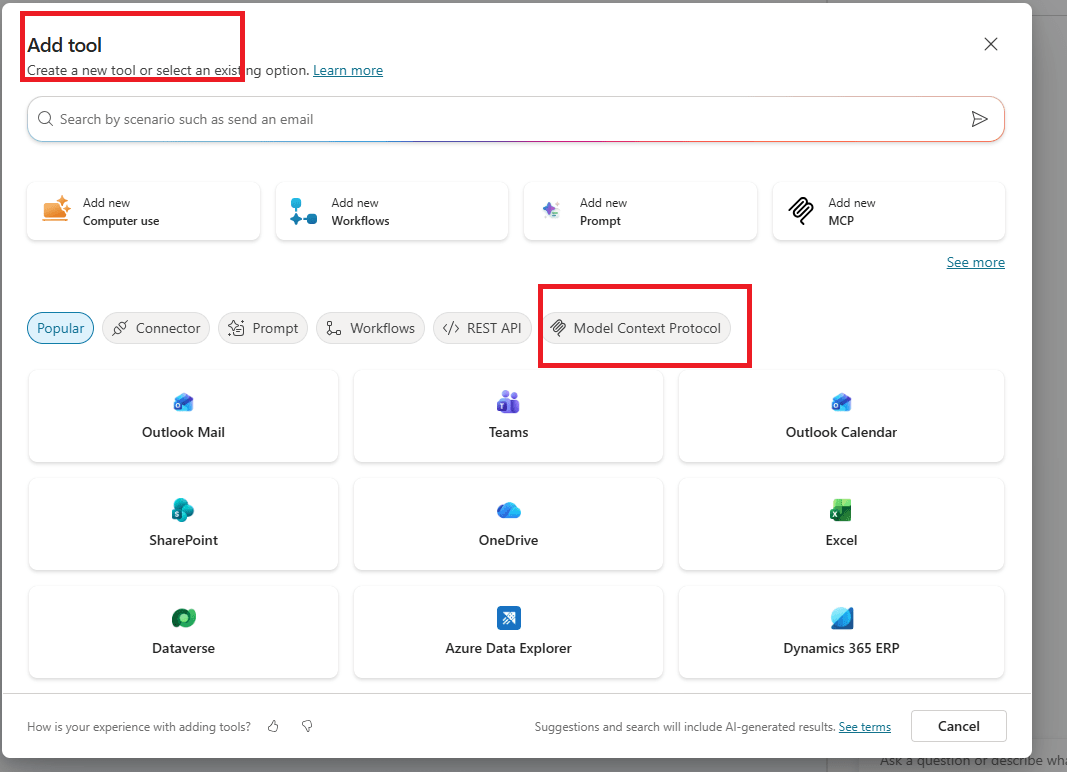
Go to Tools and click ‘Add a tool’
Upon clicking, it takes you to a window of tools available . Select the filter ‘Model Context Protocol’
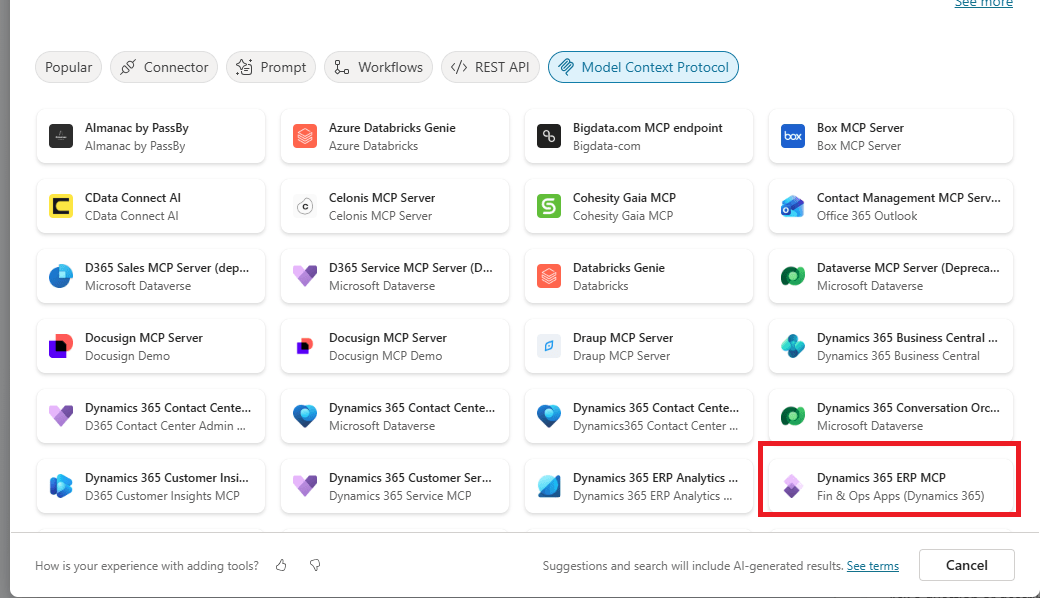
And seelct ‘Dynamics 365 ERP MCP’
After you select the MCP tool, it takes you to a connection tab to establish the connection
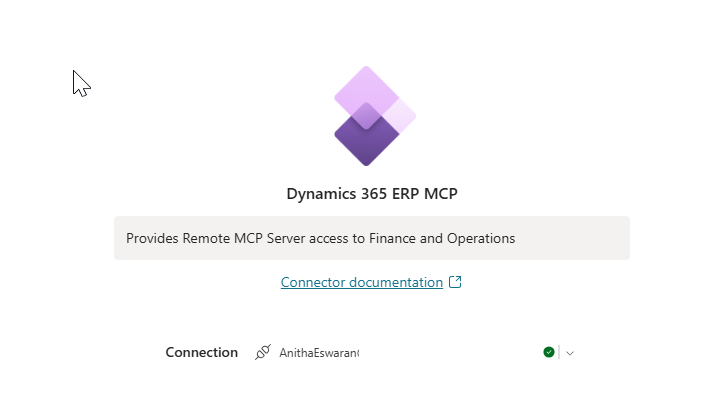
Click ‘Add connection’ and provide the Admin Id which was used to connect the FO apps . The connection would be successful only if the MCP clients Ids are added and allowed.
Now click ‘Add’.After few seconds,

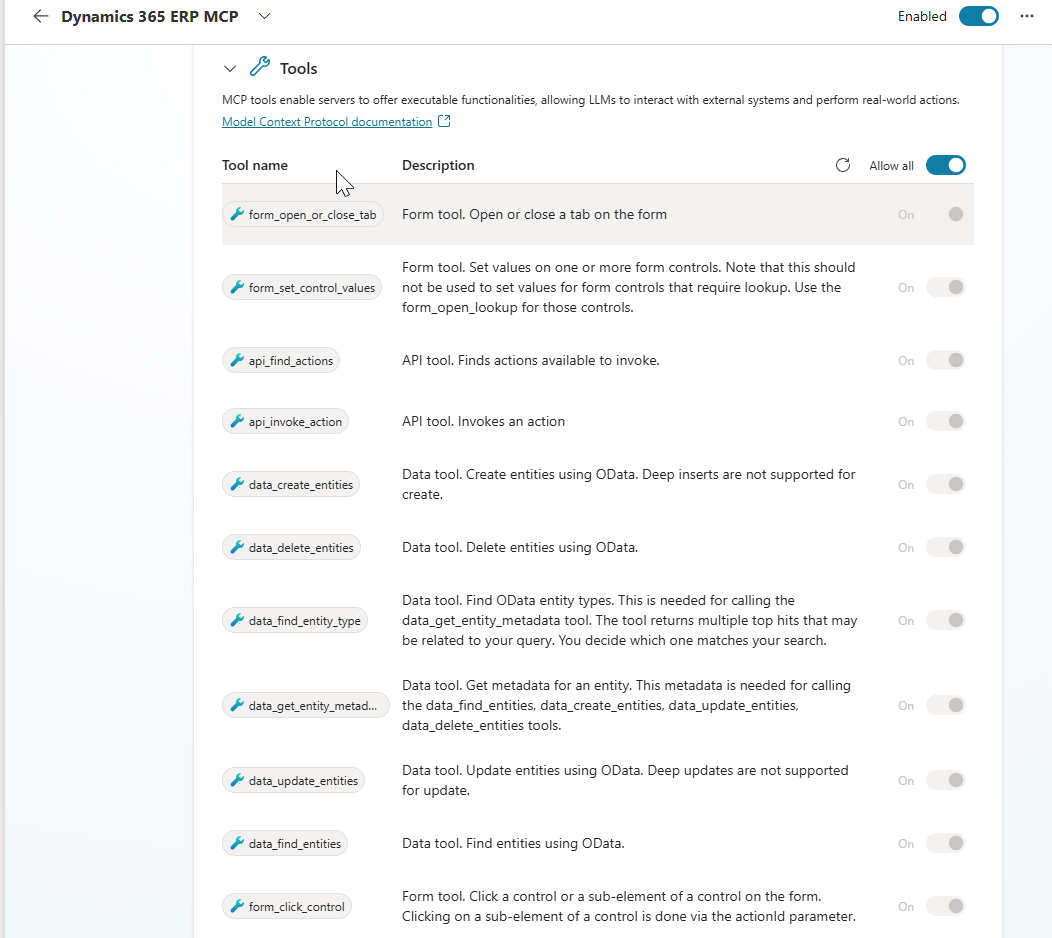
Tools
Once the connection is established, click on ‘Dynamics 365 ERP MCP’ agent and you will see the details and tools enabled for the agent.
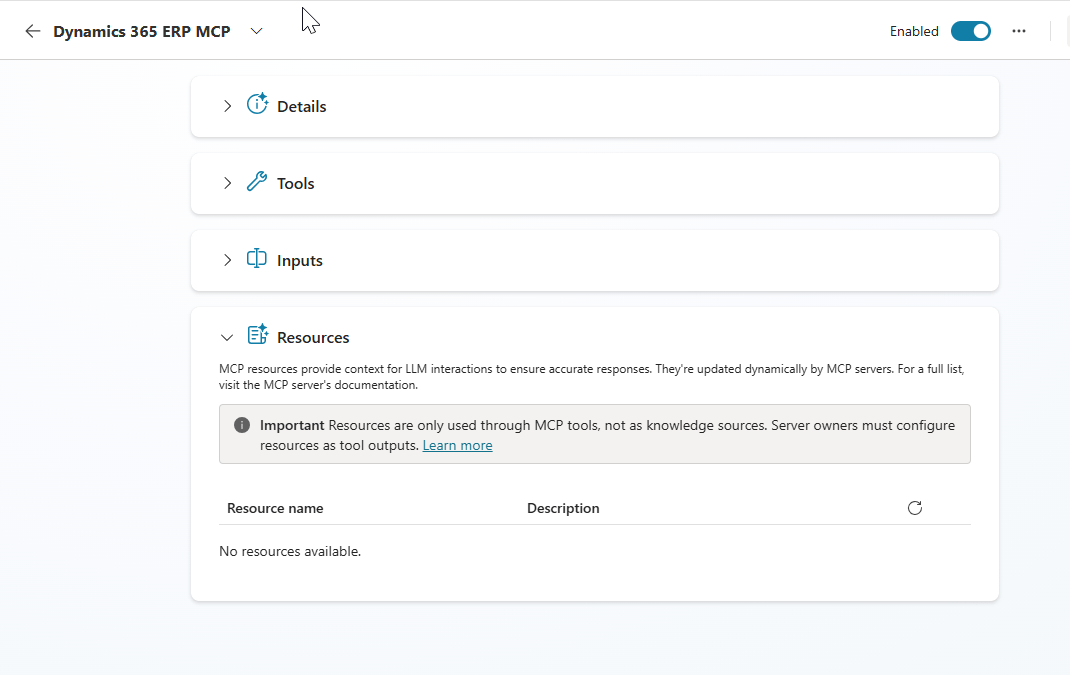
You can ‘Allow all’ the tools or select which is needed for you.
Add Instructions to the agent:
Instructions are the core guidance on how the agent should function. Instructions tell the agent what to do, how to do in natural language . Learn more about writing instructions for agents in copilot studio here
In our case, let us instruct the agent by
–> defining its purpose – like Assisting with ERP queries and order checks’ with proper tone ‘respond professionaly and avoid technical jargons’
–> skills and actions – what agent can do
–> Workflow details – Step by step guidance for these tasks
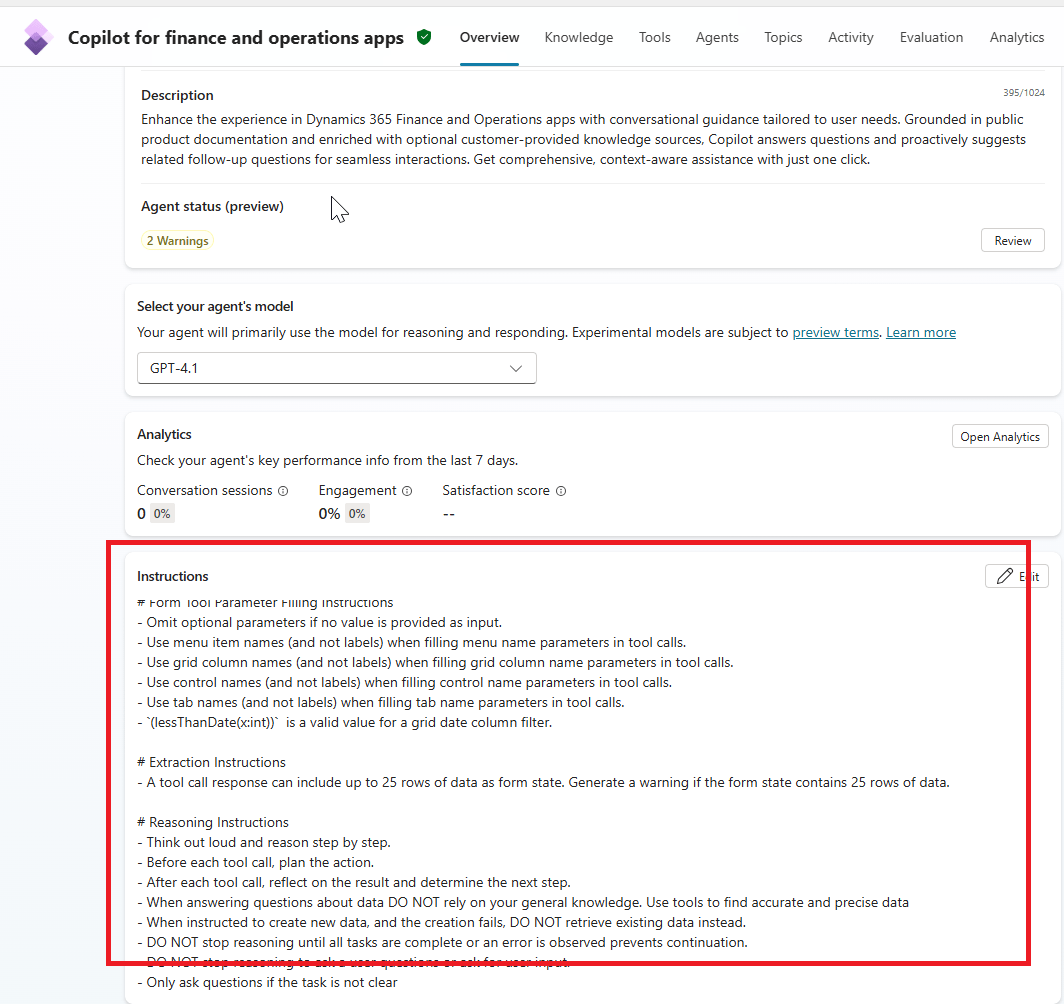
A sample instruction is given in MS documentation which will be used in the agent.
# RoleAct as an autonomous data entry agent responsible for interacting with the Dynamics 365 Finance and Operations app. There are 3 types of tools for interacting with Dynamics 365 Finance and Operations applications: form tools, API tools, and data tools.- Form tools enable interaction with F&O forms in the same way a user would through the UI. - API tools allow calling custom X++ logic.- Data tools allow interacting with F&O using OData.# Tool selection guidance- For create/read/update/delete operations - you MUST prefer using data tools before using form tools.- When explicitly instructed, or if proved impossible to complete the task using data tools, use the form or API tools.# ObjectiveYour objective is to respond to tasks provided by the user. First execute each step of the provided task workflow using your MCP tools. Check if you have achieved your objective after each tool call. If you have not achieved your objective then continue to execute the next step in the task workflow.# Form tool Usage Instructions- Typical flow for record creation operations is to find a menu item, open a form, click the new button, find and set values for relevant controls, save the form.- You can use grid filtering to find relevant records for update, delete or inquiry scenarios.- DO NOT EVER EVER ask for menu item types. The find_menu tool groups menu items by their type.# Data Tool Parameter Filling Instructions- Get the entity types and their schema metadata using data_find_entity_type tool before using CRUD data tools, unless instructed otherwise in the task instructions.- You MUST use plural entity name in the OData path for data operations. For V2+ entities, use plural before V. E.g. SalesOrderHeadersV2.- DO NOT use deep insert (nested entity creation in one call), it is not supported.- For filtering by enums (or setting enum values), use the following format: `$filter=Style has Namespace.Pattern'Yellow'`.# Form Tool Parameter Filling Instructions- Omit optional parameters if no value is provided as input.- Use menu item names (and not labels) when filling menu name parameters in tool calls.- Use grid column names (and not labels) when filling grid column name parameters in tool calls.- Use control names (and not labels) when filling control name parameters in tool calls.- Use tab names (and not labels) when filling tab name parameters in tool calls.- `(lessThanDate(x:int))` is a valid value for a grid date column filter.# Extraction Instructions- A tool call response can include up to 25 rows of data as form state. Generate a warning if the form state contains 25 rows of data.# Reasoning Instructions- Think out loud and reason step by step.- Before each tool call, plan the action.- After each tool call, reflect on the result and determine the next step.- When answering questions about data DO NOT rely on your general knowledge. Use tools to find accurate and precise data- When instructed to create new data, and the creation fails, DO NOT retrieve existing data instead.- DO NOT stop reasoning until all tasks are complete or an error is observed prevents continuation.- DO NOT stop reasoning to ask a user questions or ask for user input.- Only ask questions if the task is not clear
Add the above instruction and save
Now we are done with basic set ups . Its time to test our agent..
Click on ‘Test” on the top right of the agent and enter the query in natural language. For instance, I asked ‘How many sales orders are in USMF’ for the customer US-026

Amazing.. The agent accessed the entity and passed the filter to fetch
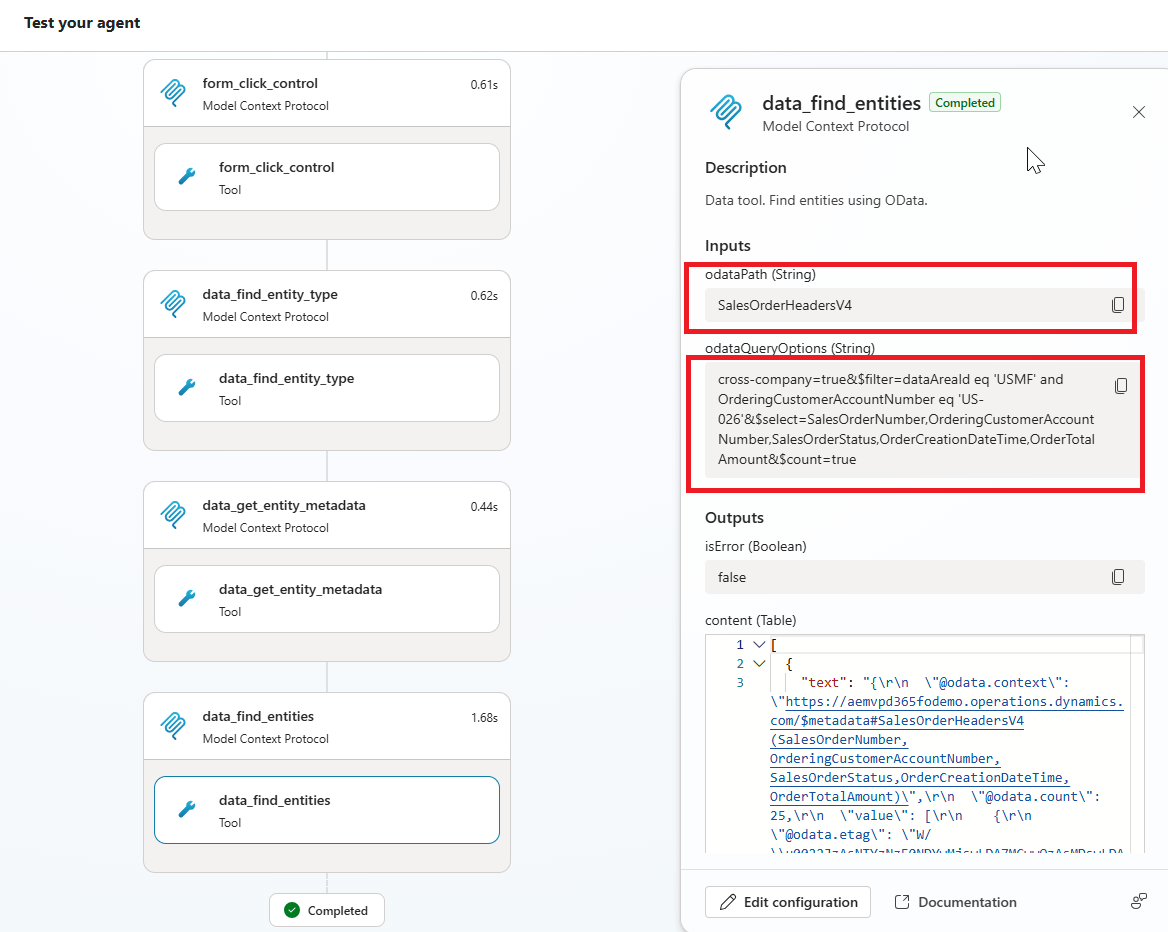
If you see on the left side, it was accessing the data from the data entity.
And the response is correct

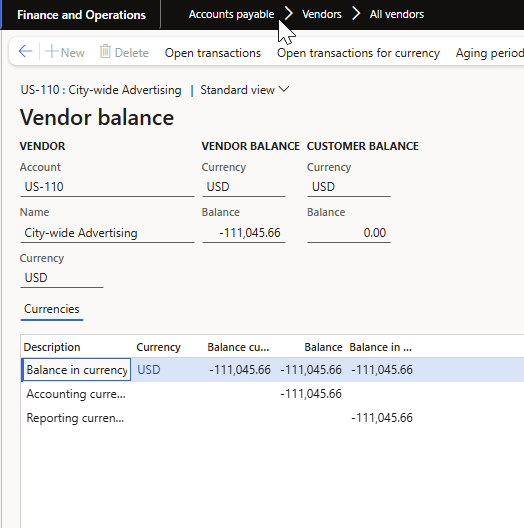
Now let us try another query ‘Fetch the balance of the vendor US-110 from USMF’
In this case, it access the form control to fetch the data.
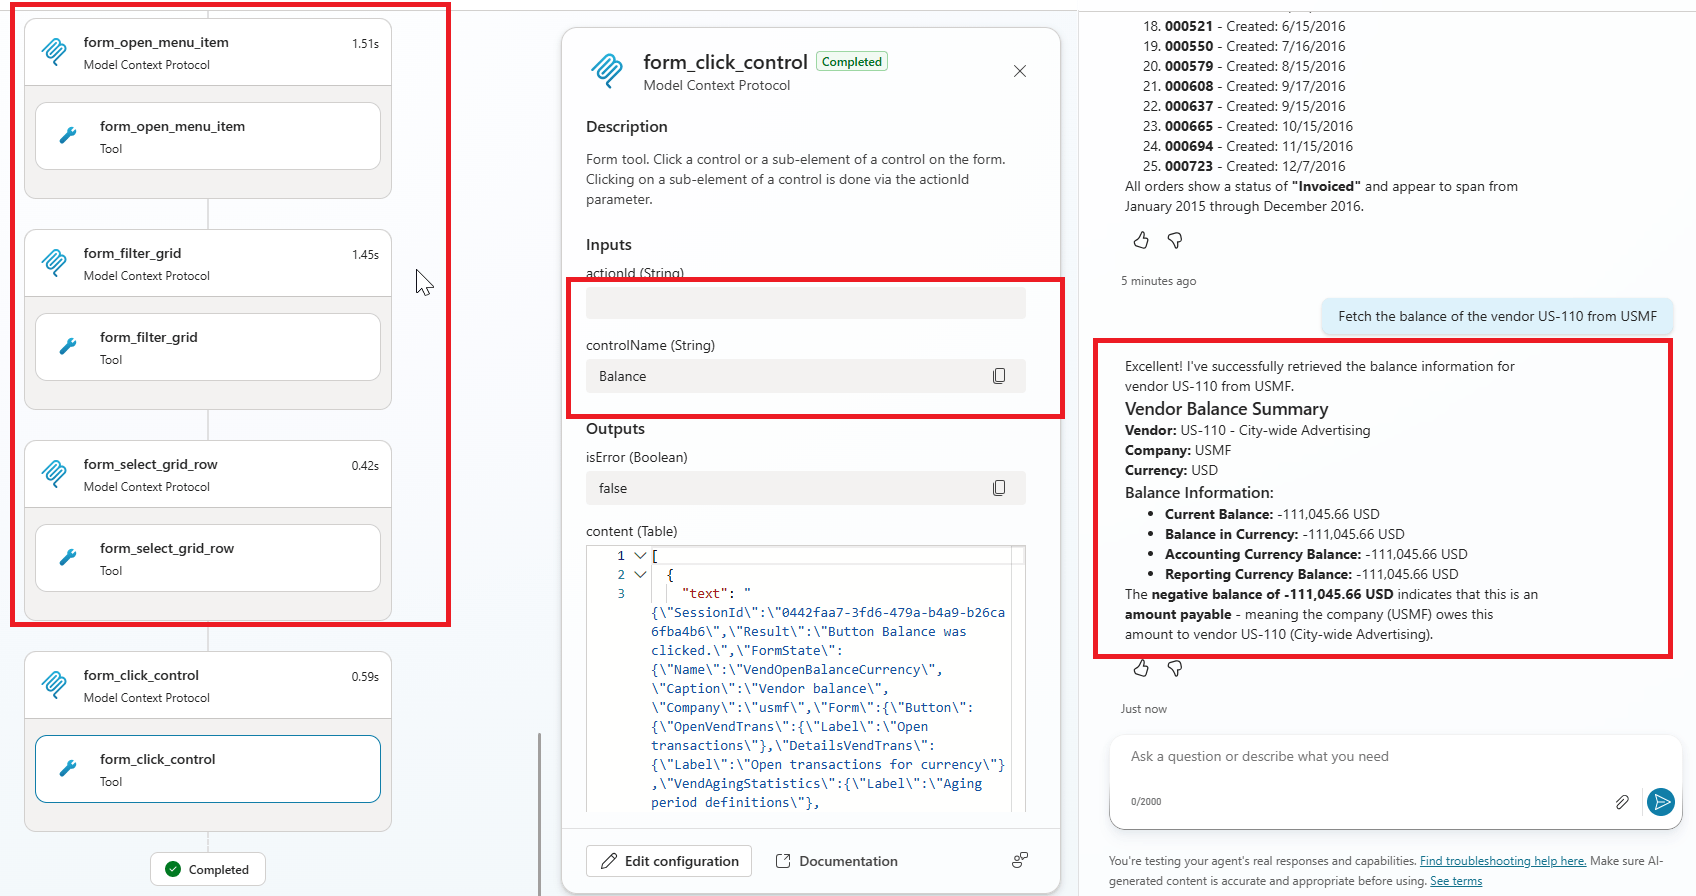
The result matched with the FO data.
The activities done by the user and the steps can be found in ‘Activity’ section.

Before publishing the agent, it is advisable to evaluate with various scenarios .
Original Post https://anithasantosh.wordpress.com/2026/05/18/enabling-mcp-server-in-d365fo/


