Now Reading: Develop your own chatbot in Power Apps
-
01
Develop your own chatbot in Power Apps
Develop your own chatbot in Power Apps

Recently a new feature to added to Power Apps to add your Power Virtual Agent chatbot in Power Apps. In this post the step by step guide.
Enable the Chatbot component feature
In the settings of your app all you have to do is enable the Chatbot component feature and you are up and running.

Then of course don’t forget to save your app and restart the Power Apps studio and reopen you app.
Adding the Chatbot to your app
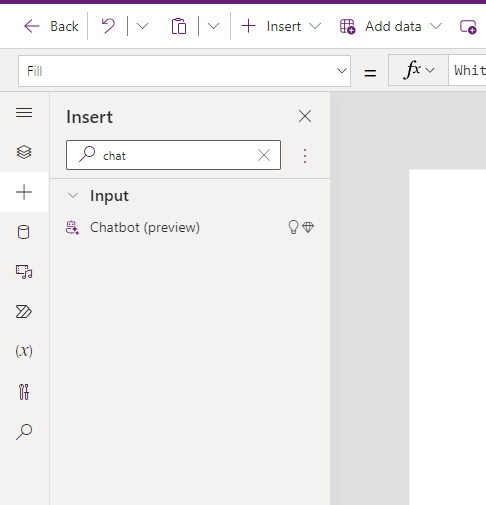
Now you can add the chatbot control to your app:

Once the chatbot has been added you can select your chatbots that have been create in Power Virtual Agent.

Create your chatbot
To get started with Power virtual agent go to make.powervirtualgent.com, make.powervirtualgent.microsoft.com, https://web.powerva.microsoft.com
Don’t we all like the consistent URLs in the Power Platform?

As we go to Chatbots -> Create we will quite quickly see that it is better to build the chatbot from within a custom solution rather than the default solution. (notice the prefix crd6e_ in the below screenshot). We can now either select the solution in the screen below or you could open the solution that you created within Power Apps and then add the bot there.

Solutions and Power Virtual Agent
As we can see in the above screenshots, there is no solution option in the left hand menu, however we were able to select a solution as we created the bot.
If we already have created a solution and we’re working mainly within Power Apps then you might find yourself going to https://make.powerapps.com instead.

For existing solutions we can add the chatbot as shown below. Either of the two options mentioned is fine.

Creating the Chatbot from within a solution
So I’m adding my chatbot to the solution and I’m supplying the bot’s name

Once you hit the create button your bot will be created and after a while you will get the following screen.

After we have configured the chat bot we can have a conversation with the chatbot

Have you noticed that people often don’t use please when they think that they are talking to a chatbot? Yes indeed, the chat on SharePains is not a bot!
Anyway, back to our post. I’ve now created a bot, I’ve published it and I want to add this to my app.
Adding the chatbot in Power Apps
My Order an ice-cream bot is now available and I can select it form my list of chatbots.

And my chatbot in Power Apps is ready to help me order my ice cream within the app.

Continue Reading Pieter Veenstra’s Article on their blog
Develop your own chatbot in Power Apps
Recently a new feature to added to Power Apps to add your Power Virtual Agent chatbot in Power Apps. In this post the step by step guide.
Blog Syndicated with Pieter Veenstra’s Permission


