

Now Reading: Create A Basic Dialog Custom Page To Update One Record
-
01
Create A Basic Dialog Custom Page To Update One Record

Let’s start off slow with this one and build a basic dialog custom page for updating an individual record in Dataverse (Dynamics 365). For those of us who remember when D365 was still CRM (always close to my heart!), you’ll recall the old dialog boxes, those handy pop-ups users could interact with. Custom pages let us do something similar today. They’re perfect when you want a user to make a simple change like changing a yes/no field, or fill out a field that triggers another process. A well-designed pop-up is ideal for quick actions that need to update a record immediately. In this simple example, we’ll create a custom page that lets users mark a Lead as “Return to Marketing.” It’s basic, but it’s a solid first step toward building your own custom pages.
If you are trying to learn about custom pages, you should have an understanding of solutions (if not, go and learn a bit more about the basics of configuration in Dataverse), so make sure you start off with a new or existing solution. Then click on New, App and then create a new page.
The easiest way to get started is to pick the ‘With layout’ option as soon as the new page is created.
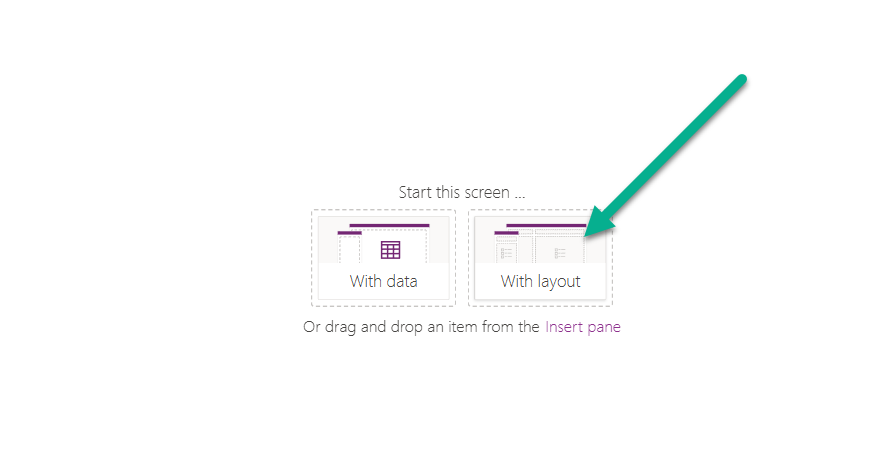
Then pick the kind of layout you want. For our dialog box, the header and footer is a nice option to go with. It’s formatted nicely and any resizing (responsive) should be built in for you. That means if you have users zoomed far in or zoomed far out should still be able to see and interact with the custom page when it opens on a record.

When you begin it might be tempting to just jump right in, but I would suggest getting used to using a nice naming convention. You will see that your custom page has a screen with several containers included. They have default names, but I suggest renaming them.

The naming structure you use could be something your organisation/IT team already have defined so check with them especially if you are part of a team and others might need to work on the same custom page. It’s always nice to open a custom page and see something clear and easy to understand pretty quickly.

Next we need to go to the Data section and add in any tables that we need to use in the custom page. For my example, I have looked for and added the Leads table.

Once you’ve got things named (and be sure to keep doing that as you go) and your table(s) added in the data section, we need to add in some code (don’t worry!). In the tree view of the custom page you will see one section called App. Click on that, then click on the drop down above and select OnStart. Whatever we put here will run when the custom page opens. Here we are going to state that if we can’t find the GUID (id) of a record, we will specify a specific one to use. This is really so that we can test it when creating it, so go to a Lead (or whatever type of record you are using in your own custom page) and go to the end of the URL to get the record id. Then put that in place of where you see the existing GUID below. Then we will use that id to do a lookup to the table to do a match from Lead Id to the variable we have stored the record id in.
Set(varRecordId, If(
    IsBlank(Param("recordId")),
    GUID("857495b1-d892-f011-b4cc-00224841cf03"),
    GUID(Param("recordId"))
    ));
Set(varSelectedRecord, LookUp(Leads, Lead = varRecordId));

Now let’s add some items to the custom page. When you first get started you can click a plus symbol in each container (header, footer, main body) and pick an option from the list. Here we will add a label in the header.

You then have a bunch of different properties that can be set. The Text is what will actually show, then you have things like the font including size, weight and style. You can spend time figuring out exactly what does what, and change things as you wish.

You will also notice that you can get to all of the properties (and even more) from the drop down at the top left when you click on that label. Each component has it’s own list and you can click on each one to make changes. Those you modify you will see in bold in the drop down list.

Right in the middle, I’ve added another label. For this, I want to make sure it is aligned in the centre. You can also update the width of that label component. Something I use a lot is Parent.Width, which would make it the same width as the ‘thing’ it is contained in. So for this label it is in the Details container, so would take the Width of that container. It’s a nice way to make sure it always sets things accurately based on where that component is added.

Next, we want a text box, still in the Details container. For this, we use the mode property to make it multi line. This will allow someone to add in a reason as to why they are ‘returning the lead’.

In the bottom container, the footer, we need to have two buttons. Now this post isn’t about User Experience or User Interface design, we could be here all day. I have seen some pop ups in D365 have Cancel on the left and others with Cancel on the right. I feel that whatever the Submit or OK confirmation is should go on the right as that is the final part of ‘action’ being taken. So that is what we have here in my example.  On the footer container, you will see a property called gap. Set the gap to be 20, and the justify and align on the container as centre.
Then do this for your buttons:
- Button 1 – text is Cancel, button type as Standard, solid border of 1 in the properties
- Button 2 – text is Submit, button type as Primary
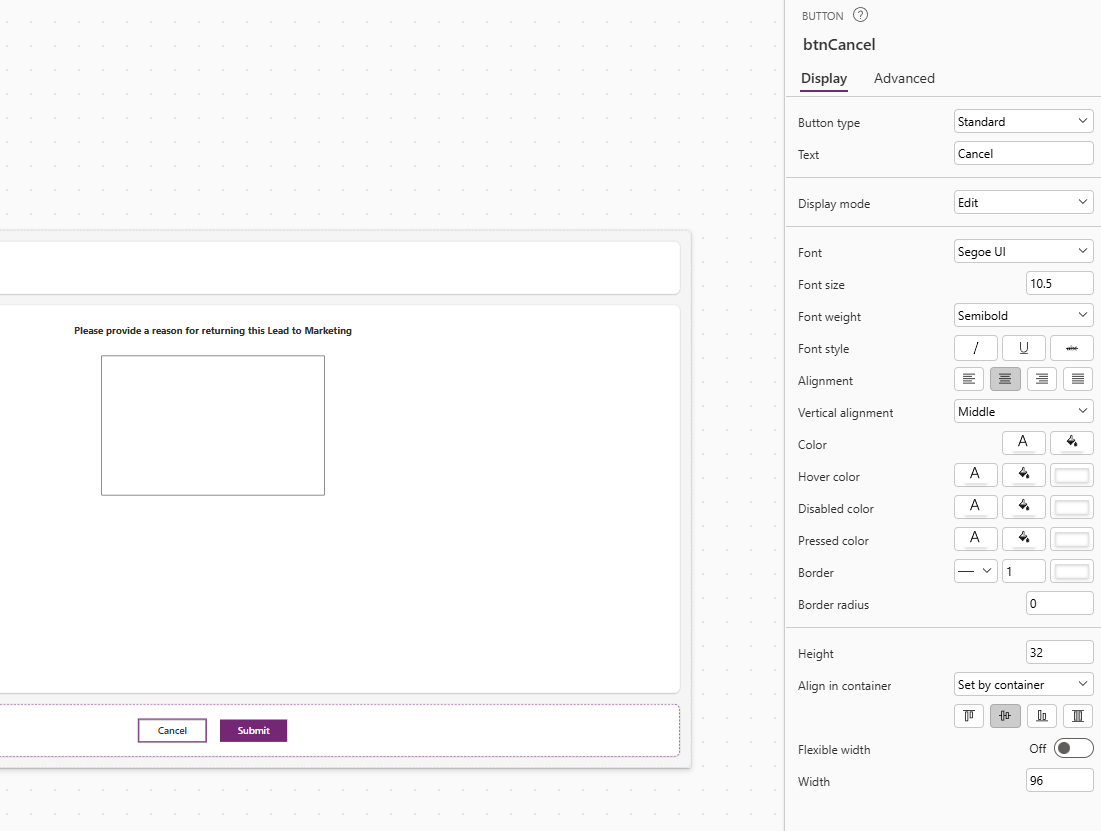
We need to give a user the ability to close out if they clicked the initial button on the Lead to return it by mistake. This one is quick and easy. Click on your cancel button then go to OnSelect from the dropdown on the top left. Then just put Back(); as the expression. When they click this, the user will be taken back to the previous place which in the real world is just back to the record and will close the custom page.

For your Submit button, the OnSelect will be a couple of things. First we will use a Patch statement that will update the record (Lead) we selected. This is done by stating the name of the table (Leads), then a comma, and then the variable we defined in the beginning in the OnStart expression on the App. So varSelectedRecord will be Patched (updated) with whatever we state in between the curly brackets. Including the same Back() command at the end will do the same thing as the Cancel and close the custom page leaving the user on the Lead record where they should see that the values were updated.
Patch (Leads, varSelectedRecord, {
    'Status Reason': 'Status Reason (Leads)'.'Marketing Qualified',
    Description: txtReason.Value,
    'Marketing Lead': true
});
Back()

As you are typing, you will see that things will start being populated as you type using something called IntelliSense. It ‘helps’ us to find what we are looking for. Sometimes it can be frustrating but most times it is helpful. Again, this is a very basic custom page to get started with, so I am just updating a few fields. If you want to change the Status Reason, type that first which should then show it in quotes with a colon after it. Then you start typing in Status Reason again. however, this time you need to select the one that has (Leads) after it (or whatever the name of the table is you are working with). This lets us get in to the Choice field and then after adding a dot, we can see the values that are available. One thing to note, you will get errors if you try and set the Status Reason where the Status is Inactive if the record itself is Active, and vice versa. So keep that in mind if you are allowing someone to update a record and want to change the Status/Status Reason.

Add a comma and a new line for additional fields to set. If we want to use the value that was added to the text box, we can do so by typing the name (when you lovingly renamed your components) you gave your multi-line text field, then add a dot and find Value. I am also going to set a Yes/No field to yes, which is done by setting it to true.

Once you’ve done all that, time to test it out. Go up to the App section in the tree view, then click on the ellipsis (three dots) menu and click Run OnStart. Then use the play button that you will find on the top right of the custom page. This will open it and allow you to fill out the field and press the Submit button.

Finally, to show yourself that it worked, go to the record in D365 and confirm that all of the fields you wanted to set in the Patch statement were actually updated.

Nice work! You created your first basic custom page that can update a record in Dataverse. I know you are itching to add it to one of your Model-driven apps right? More in a future post.
Original Post http://meganvwalker.com/create-a-basic-dialog-custom-page/


