Now Reading: How to Create Reusable Custom Component using Web Template in Power Pages
-
01
How to Create Reusable Custom Component using Web Template in Power Pages
How to Create Reusable Custom Component using Web Template in Power Pages
In this blog, we’ll show you how to create a reusable, dynamic review card component in Power Pages using custom web templates. This allows you to display customer reviews in a visually engaging way—perfect for product pages, homepages, or testimonial sections.
In the world of e-commerce, showcasing product reviews effectively is key to building trust with customers. Power Pages, a part of Microsoft’s Power Platform, enables users to build professional-grade websites quickly and with minimal coding effort.
One powerful way to enhance the user experience is by displaying product reviews as visually engaging cards. Using custom web templates, you can create dynamic review components that not only look great but are also reusable across different pages of your portal.
With just one well-structured template, you can show different reviews on your homepage, product pages, or testimonial sections — simply by configuring different property values such as reviewer name, text, rating, and profile image. This approach streamlines content management and ensures design consistency across your site.
Preparation
Prior to implementing the code, please confirm that the following setup has been completed:
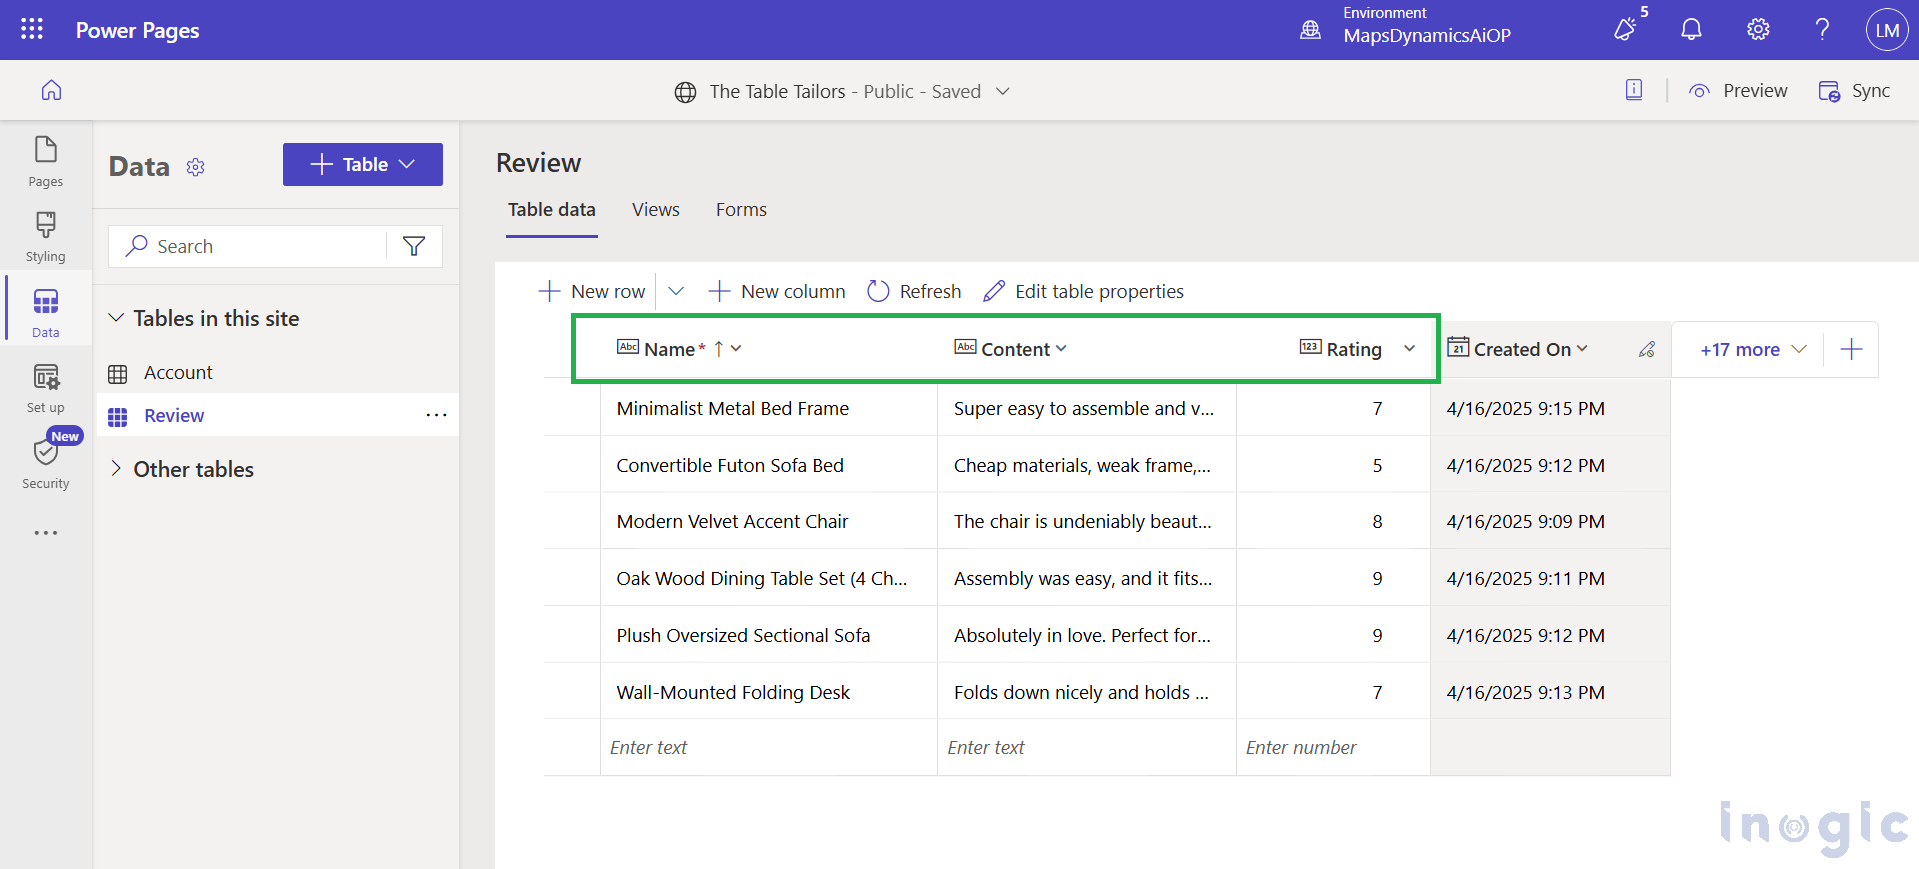
1. Set up a custom table within your environment.
Include the following columns:
- Name (Single Line of Text – Plain Text)
- Content (Multiple Lines of Text – Plain Text)
- Rating (Number – Whole number Range (1–10))
2. Add a few sample records to your new table so you can see how the reviews will appear on the page.
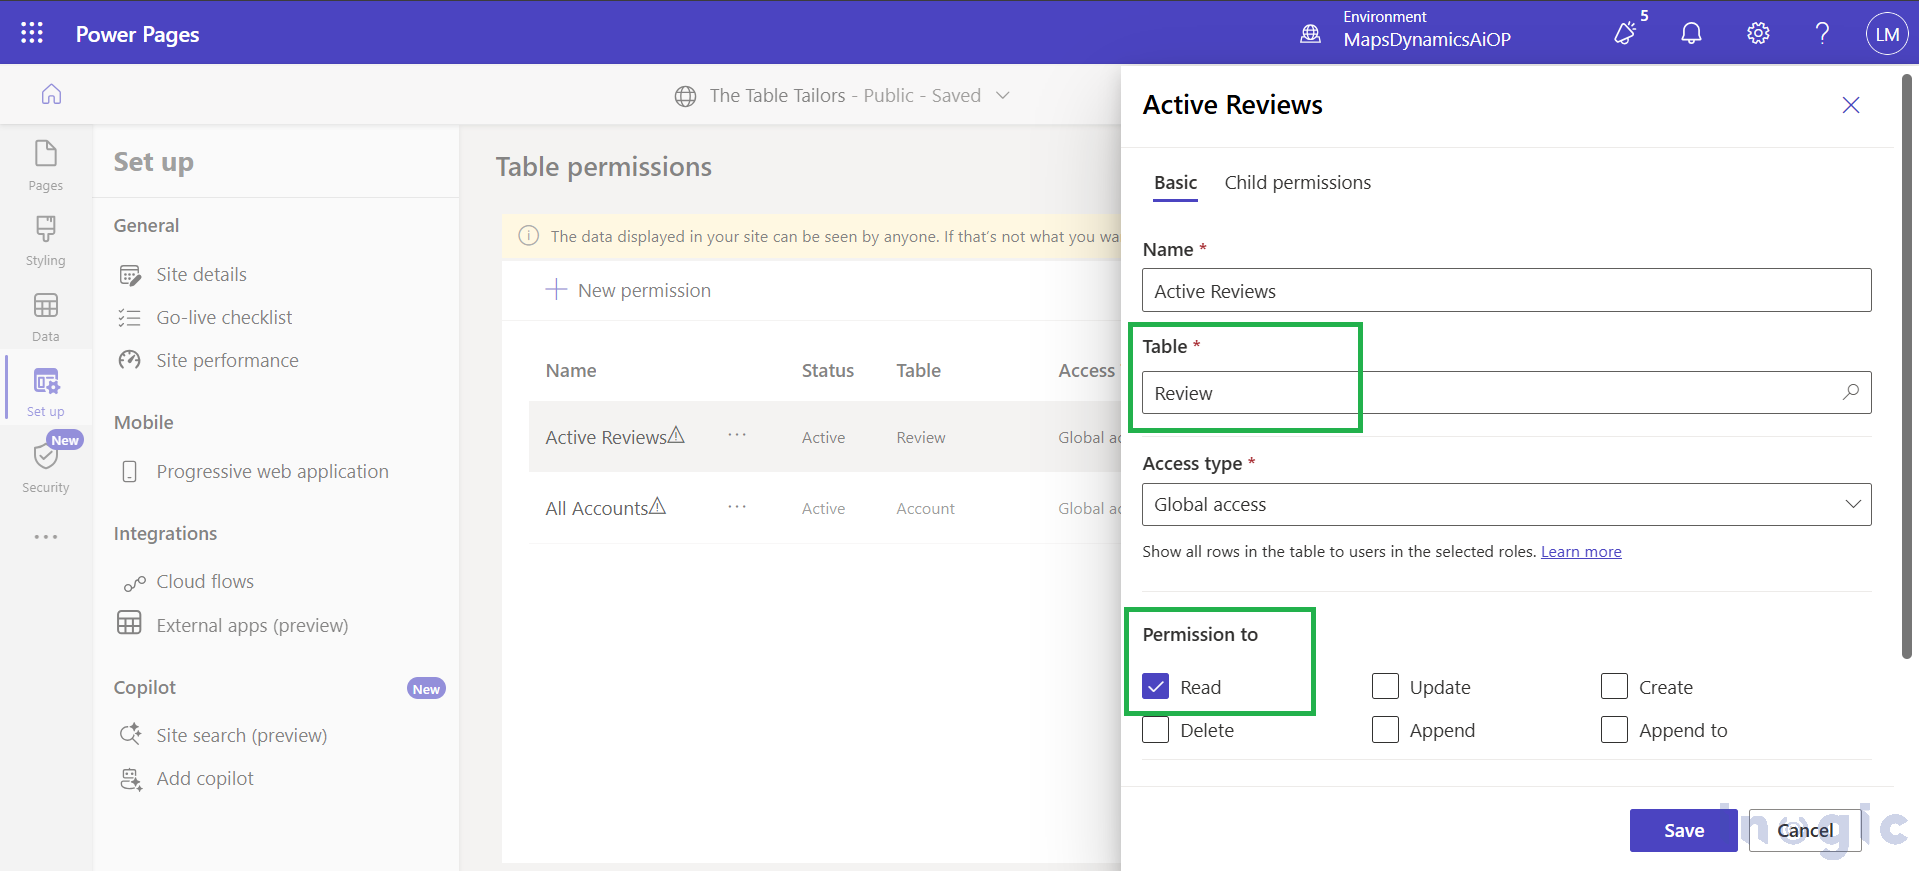
3. In the Security workspace, grant read access by adding a table permission and assigning it to the relevant web roles.
4. Copy the logical name of your custom table (e.g., cr90b_review). You’ll use this in the FetchXML and throughout the template.
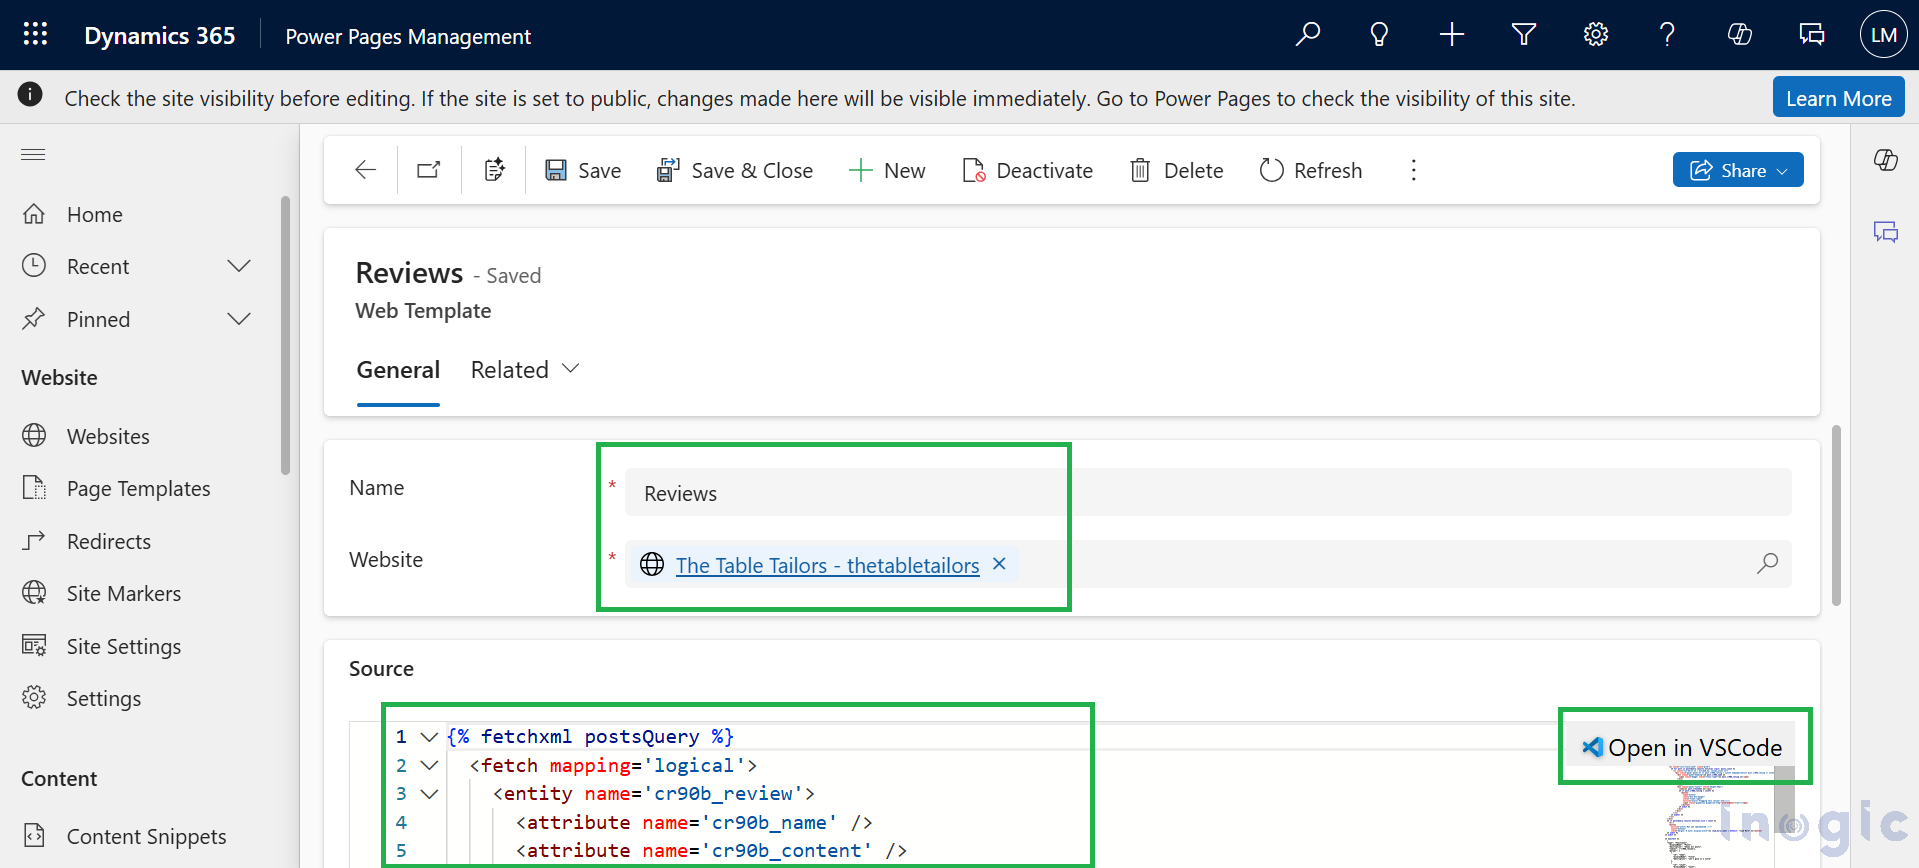
Set Up the Web Template
Navigate to the Power Pages Management App, select “Web Templates” from the site map, create a new web template in your environment, and paste the following HTML + Liquid code.
Web Template Code
{% fetchxml postsQuery %}

<fetch mapping='logical'>

<entity name="cr90b_review">

<attribute name="cr90b_name" />

<attribute name="cr90b_content" />

<attribute name="cr90b_rating" />

<attribute name="createdon" />

<order attribute="createdon" descending='false' />

</entity>

</fetch>

{% endfetchxml %}

{% assign posts_count = count | integer %}

{% assign column_count = columns | integer %}

{% assign cutoff = cutoff | integer %}

<h2>{{ name | default: "Feedback entries (default)" }}

</h2>

<span>Showing {{ posts_count }} out of {{ postsQuery.results.entities.size }}</span>

{% if postsQuery.results.entities.size > 0 %}

<div class="col-sm-12">

<ul style="list-style:none" class="grid">

{% for post in postsQuery.results.entities limit: posts_count %}

<li class="col-md-{{ 12 | divided_by: column_count }}">

<div class="panel panel-{% if post.cr90b_rating < cutoff %}danger{%elsif post.cr90b_rating == cutoff%}warning{%elsif post.cr90b_rating == 10%}success{% else %}default{% endif %}">

<div class="panel-heading">{{ post.cr90b_name }}

<span class="badge" style="float:right">{{ post.cr90b_rating }}</span>

</div>

<div class="panel-body" style="height:150px">

<p>{{ post.cr90b_content }}</p>

</div>

<div class="panel-footer" style="height:55px">

<span>{{ post.createdon }}</span>

{% if post.cr90b_rating < cutoff %}

<button

type="button"

class="btn btn-danger"

style="float:right"

onclick="alert('Flagging this review!')">

<span class="glyphicon glyphicon-flag" aria-hidden="true"></span>

</button>

{% endif %}

</div>

</div>

</li>

{% endfor %}

</ul>

</div>

{% if postsQuery.results.entities.size > count %}

<hr/>

<button

onclick="alert('Not yet implemented :)')"

class="button1"

style="margin: 0 auto; display:block">{{ load_more_label | default: "Load More" }}</button>

{% endif %}

{% endif %}
Manifest Block
Below the HTML, add the manifest to define template properties:
{% manifest %}

{

"type": "Functional",

"displayName": "Posts",

"description": "Shows all posts",

"tables": ["cr90b_review"],

"params": [

{

"id": "name",

"displayName": "Title",

"description": "Let's give it a title"

},

{

"id": "count",

"displayName": "Count",

"description": "No. of items"

},

{

"id": "columns",

"displayName": "# of Columns",

"description": "less than 12"

},

{

"id": "cutoff",

"displayName": "Limit for review",

"description": "Number between 1 and 10"

},

{

"id": "load_more_label",

"displayName": "Load more label",

"description": ""

}

]

}

{% endmanifest %}
Replace all instances of cr90b_review and its attribute prefixes (cr90b_) with the schema name from your custom table. Then, add this code to the source field of the web template record. Users can also edit this code by opening it in VSCode for the web.
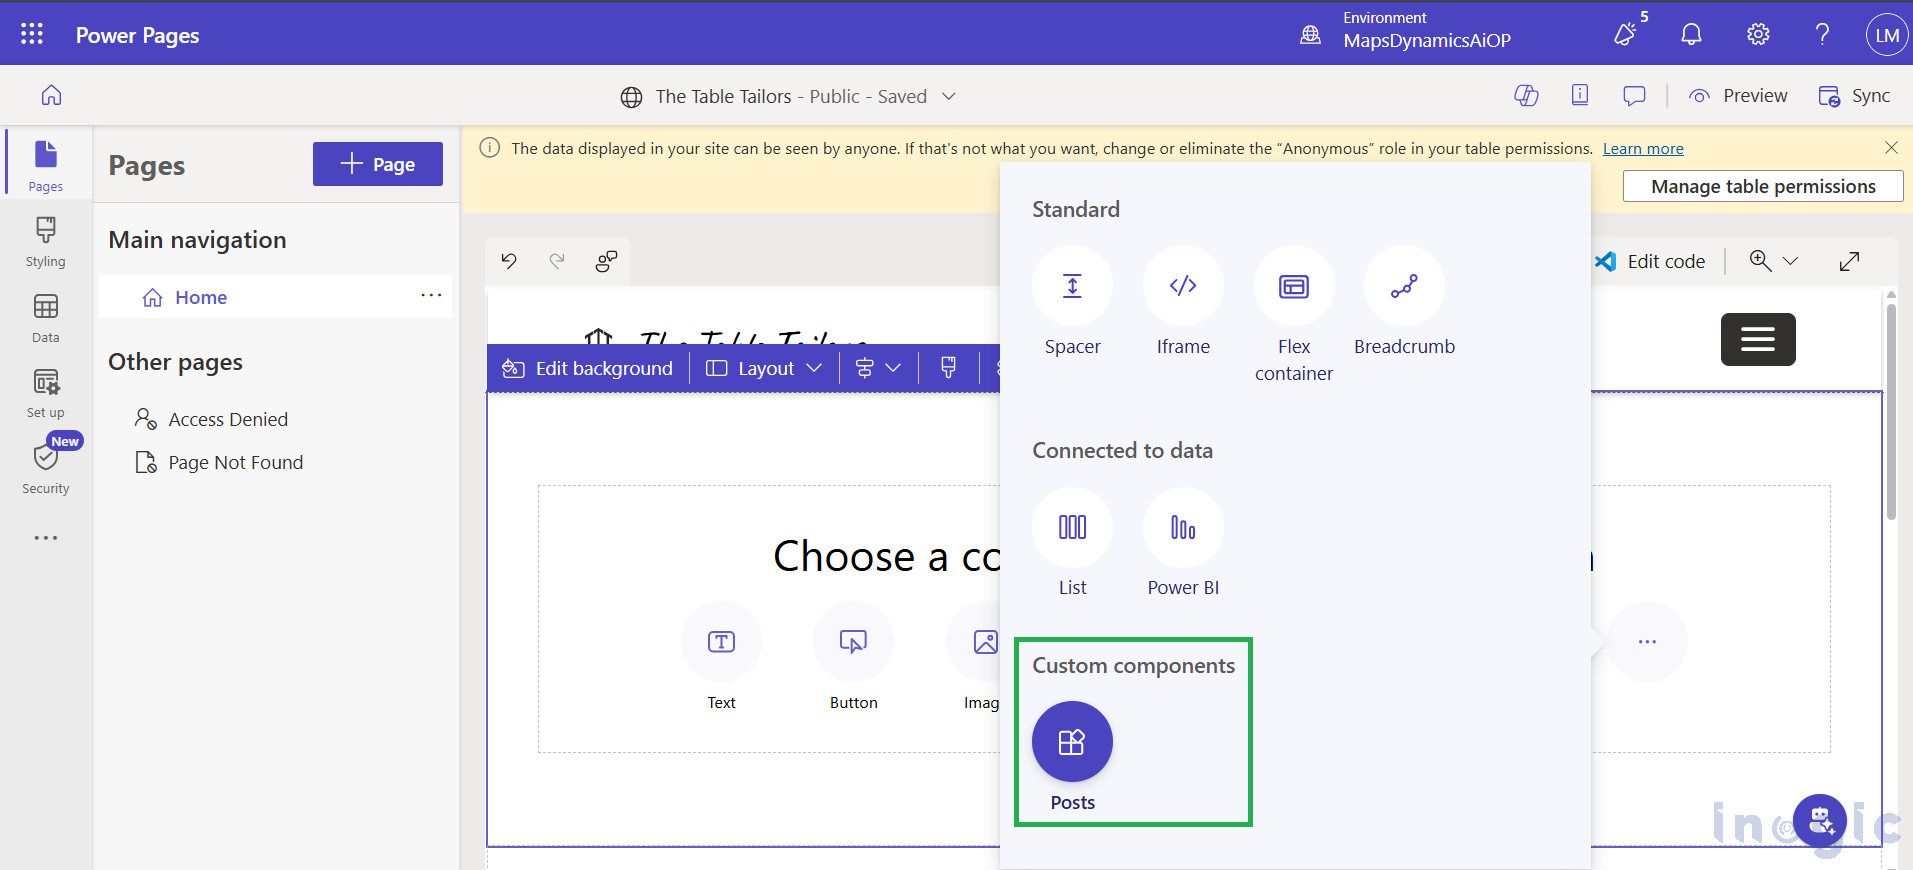
Use the Web Template
You can now embed this component on any page using either Visual Studio Code for the Web or the Design Studio. Your template will be available in the Custom Components section.
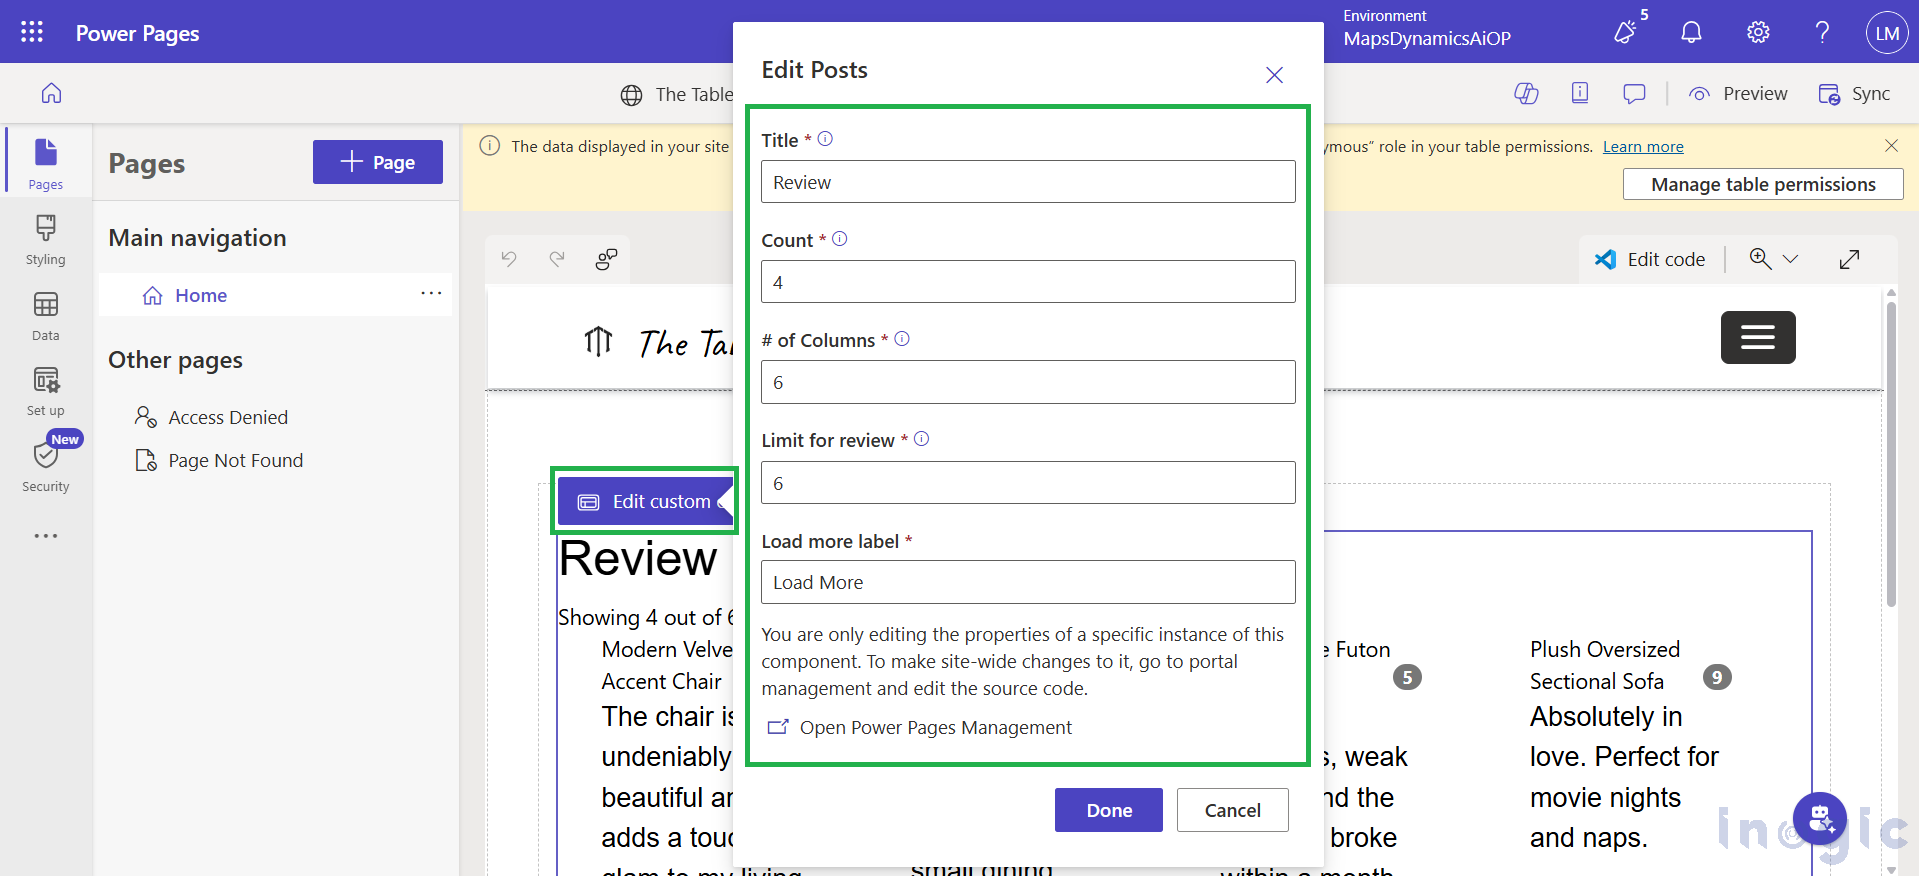
Reusability & Flexibility
This web template is designed with reusability in mind. It can be seamlessly integrated across multiple pages of your website, allowing you to maintain a consistent layout while showcasing different content.
By clicking on “Edit Custom Component”, you can easily configure the properties of the review card.
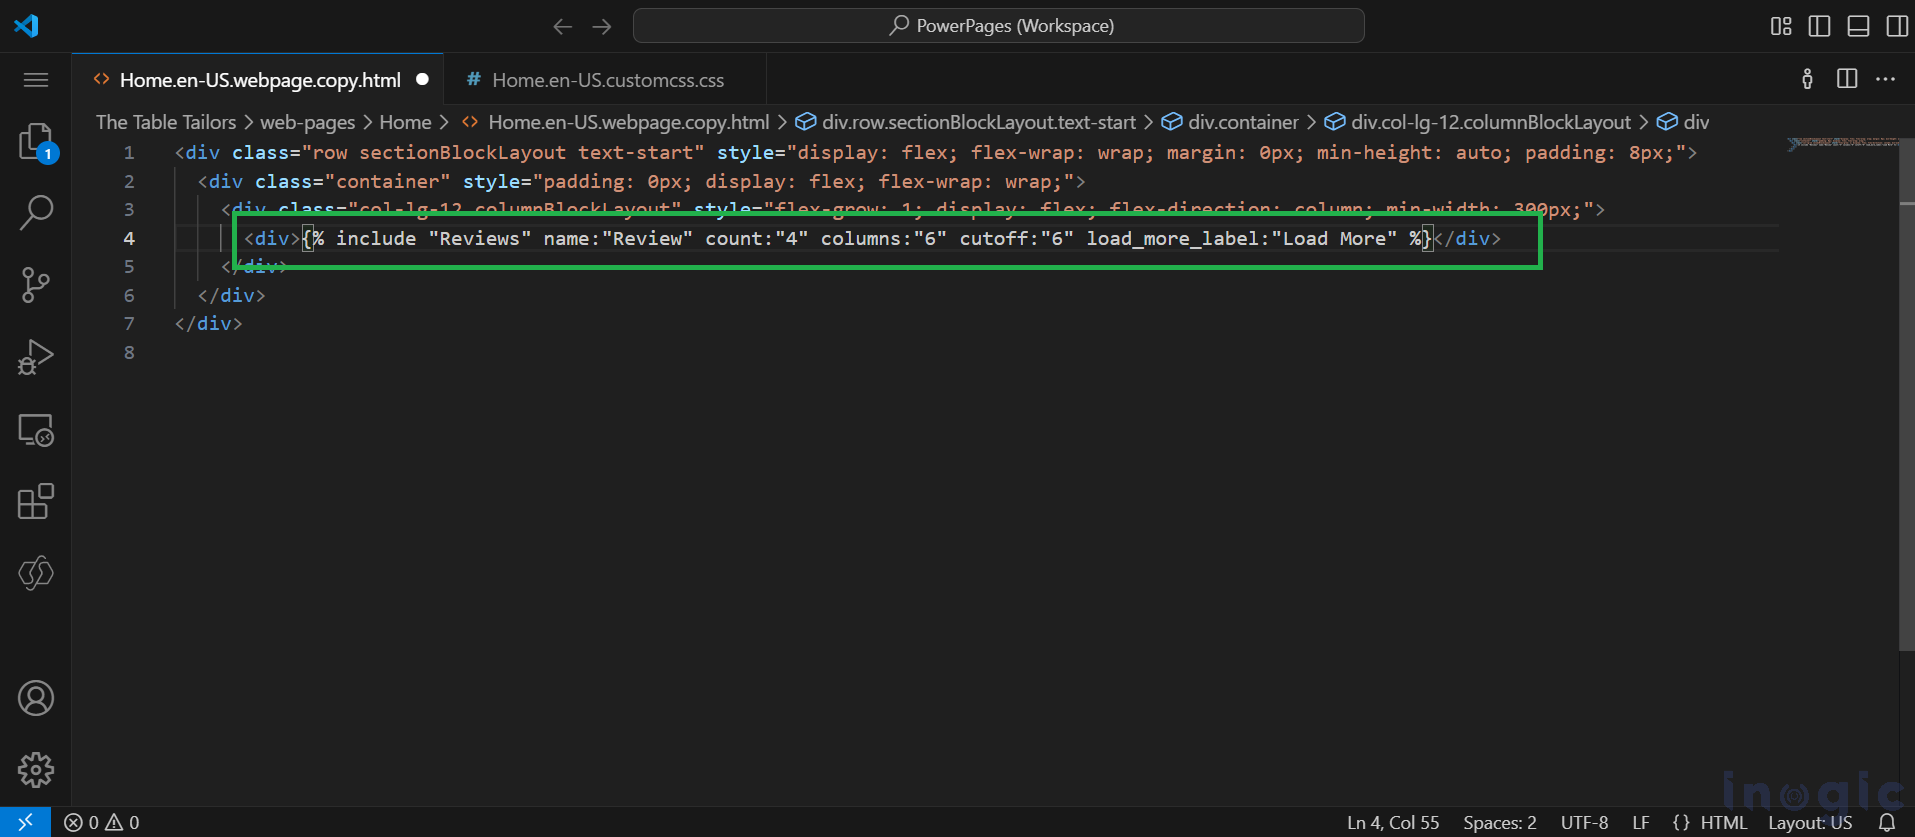
In Visual Studio Code, you can add the following snippet:
{% include ‘Reviews’ name:’Product Reviews’ count:’6′ columns:’6′ cutoff:’6′ load_more_label:’Load more entries’ %}
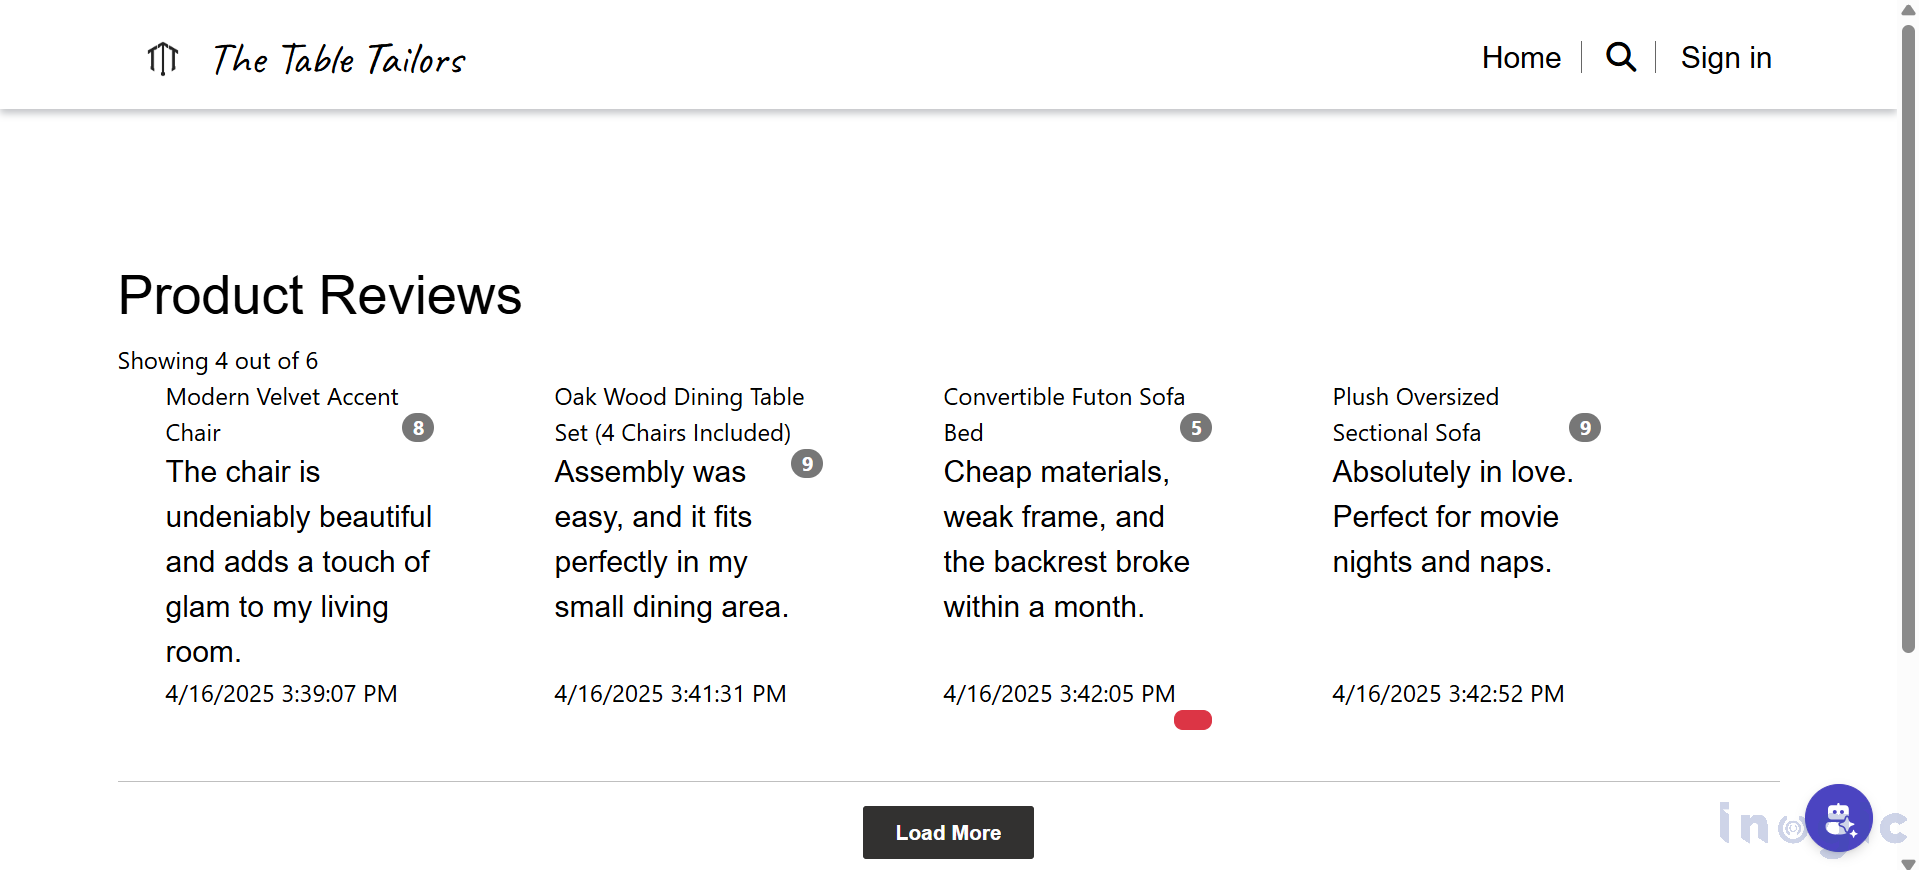
To test and reuse the template, navigate to the page where it’s embedded, and the reviews will appear in a card layout using Bootstrap’s panel component. You can easily reuse the component across different pages by updating the include parameters. For a better user experience, consider adding additional styling, animations, or icons, and plan to implement pagination with a “Load More” button in the future.
Conclusion
Custom web templates in Power Pages provide a versatile and reusable solution for showcasing product reviews in a card-style layout. With configurable properties, you can use the same template across multiple pages while showing different content. This approach ensures consistency, saves time, and enhances the overall user experience.
The post How to Create Reusable Custom Component using Web Template in Power Pages first appeared on Microsoft Dynamics 365 CRM Tips and Tricks.
Original Post https://www.inogic.com/blog/2025/04/how-to-create-reusable-custom-component-using-web-template-in-power-pages/