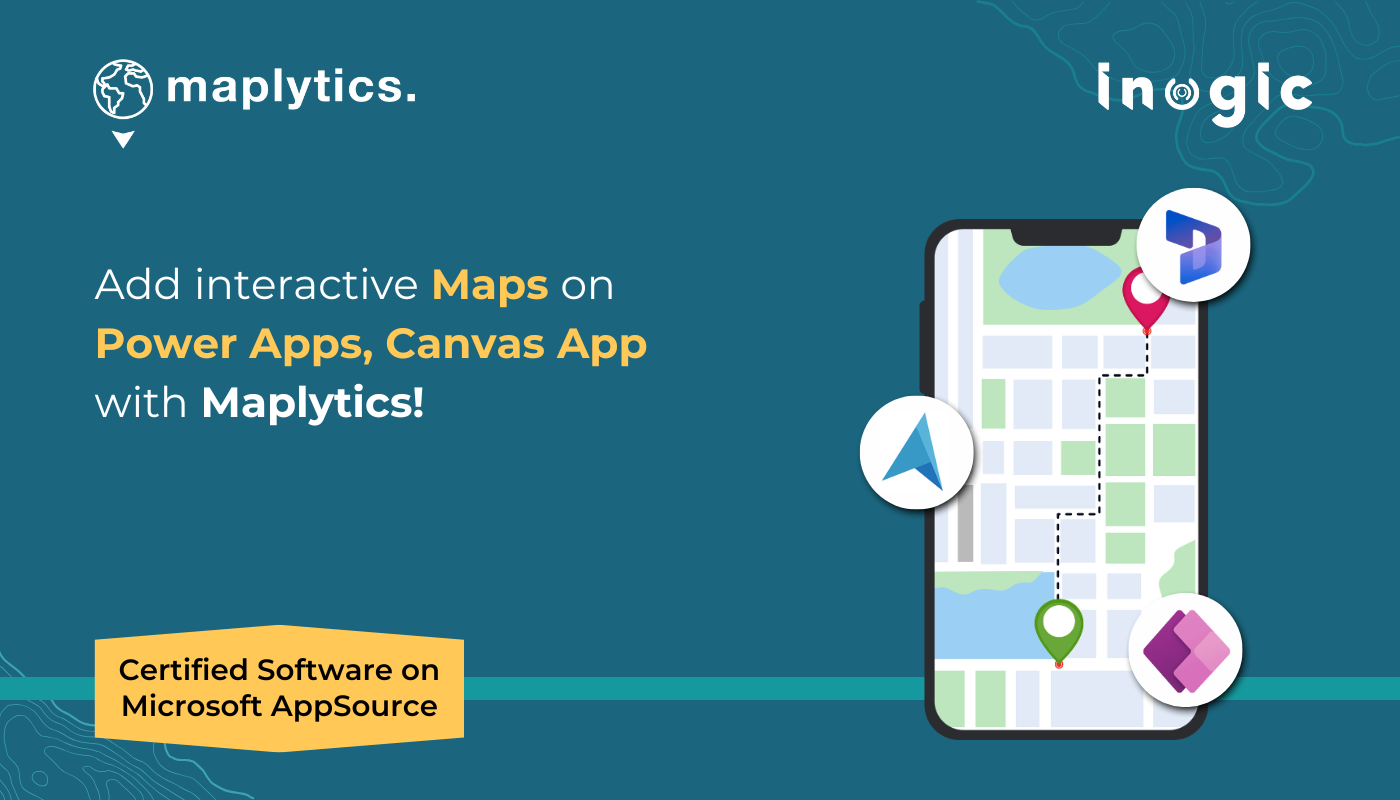
After the successful adoption of Azure Maps integration, Maplytics – Your #1 Geo-Mapping Companion, now brings seamless data visualization on Azure Maps within Canvas Apps
With its powerful mapping control, users can easily access and display their table data while leveraging advanced features such as route plotting, nearby POI search, and locational analysis. With a simple configuration, users can seamlessly integrate Maplytics into their Canvas Apps to enhance location-based insights. This guide will walk you through the steps to set up Maplytics and unlock its full potential for interactive mapping.
Enabling the Publishing of Canvas Apps
Before configuring Maplytics in a Canvas App, ensure that the Allow publishing of canvas apps with code components setting is enabled.
The steps to enable the setting can be followed here.
Once enabled, users can proceed with creating and configuring Maplytics in their Canvas App.
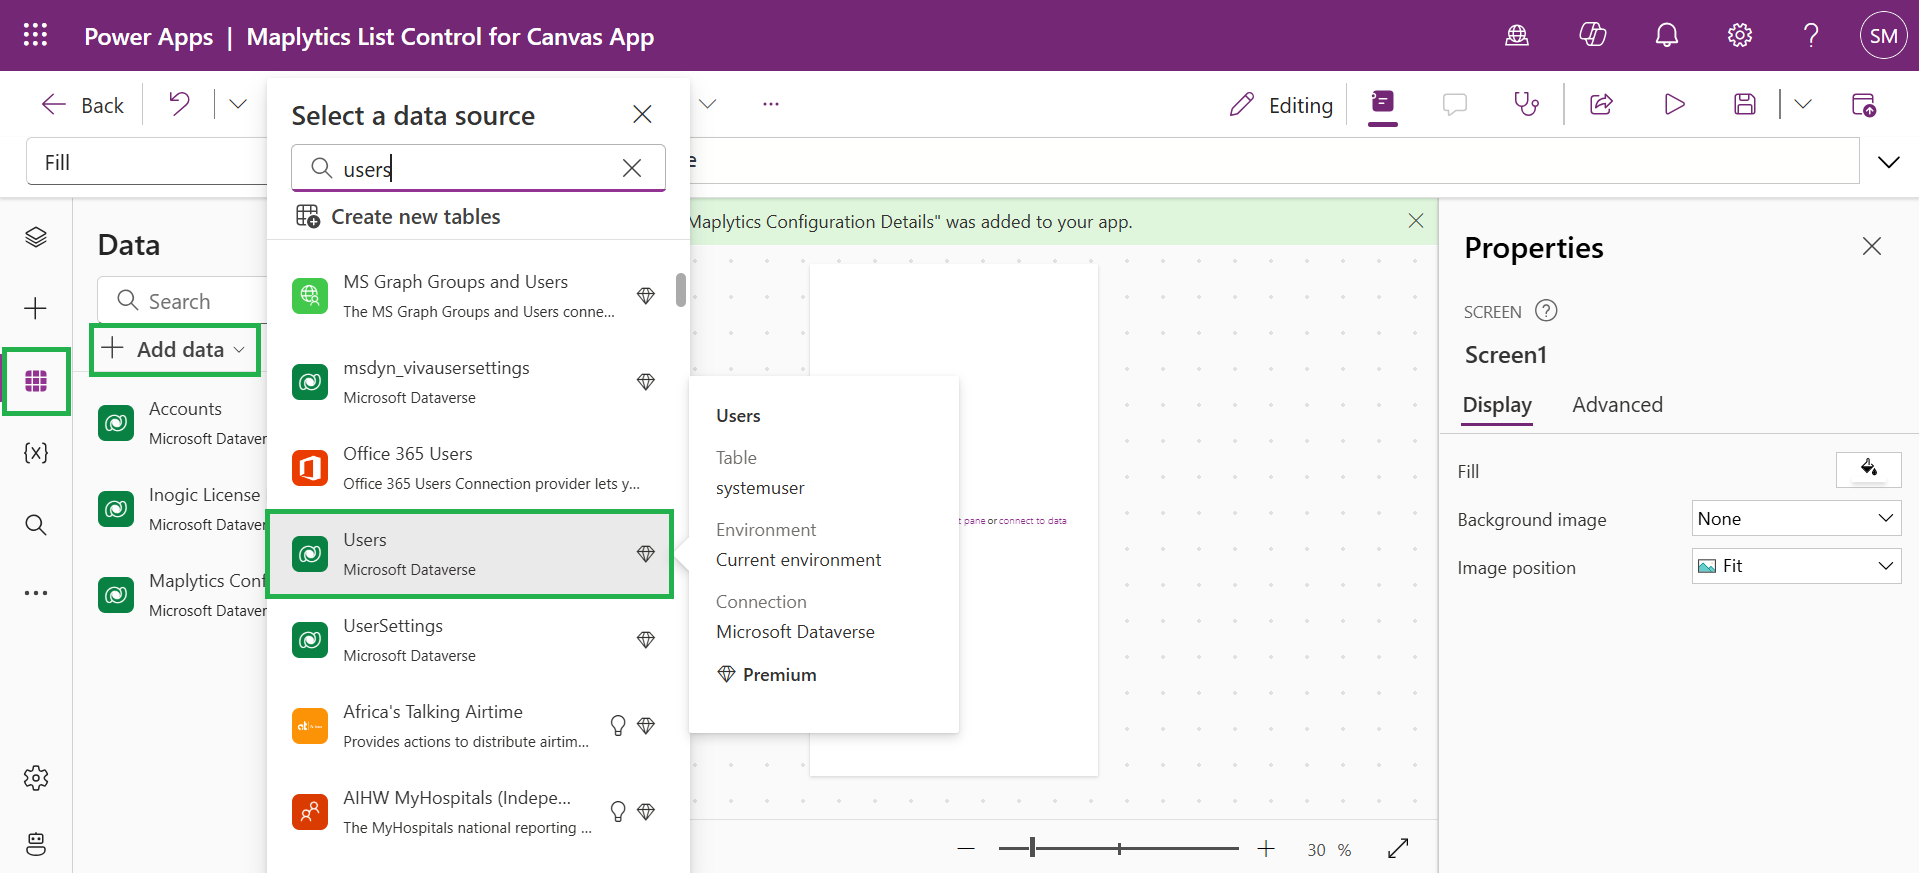
Adding Data to the Canvas App
To ensure Maplytics functions effectively, users must add relevant data sources. These are the Steps to Add Data
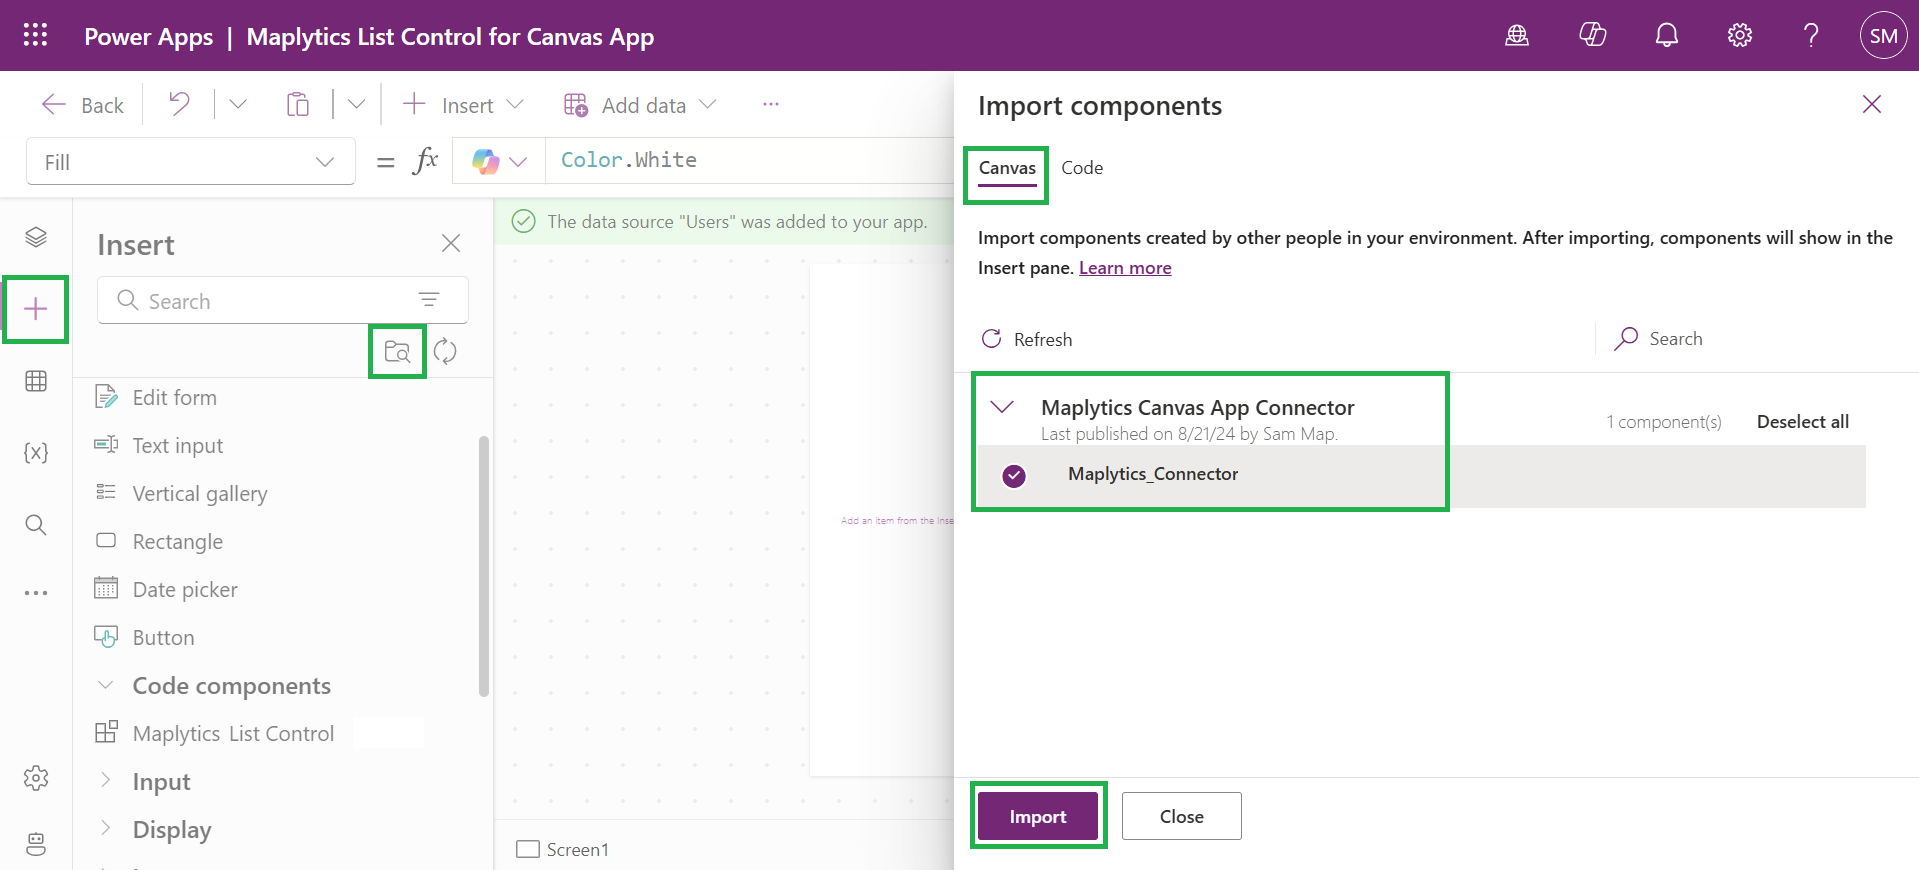
Importing Maplytics Components
Here’s a look at the components that need to be imported, and these are the steps for the same.
Steps to Import the Maplytics List Control
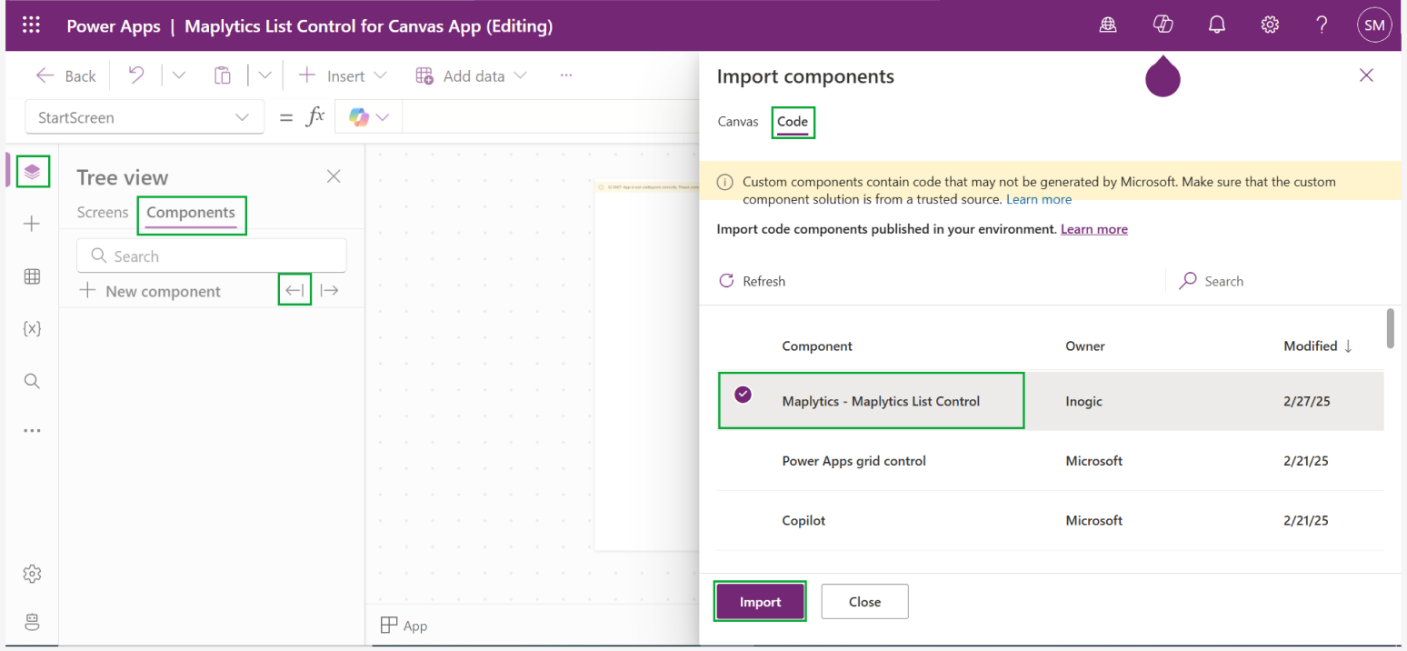 Steps to Import the Maplytics Connector
After importing, the Maplytics Connector will appear under Library Components. Select and add it to the Canvas App screen.
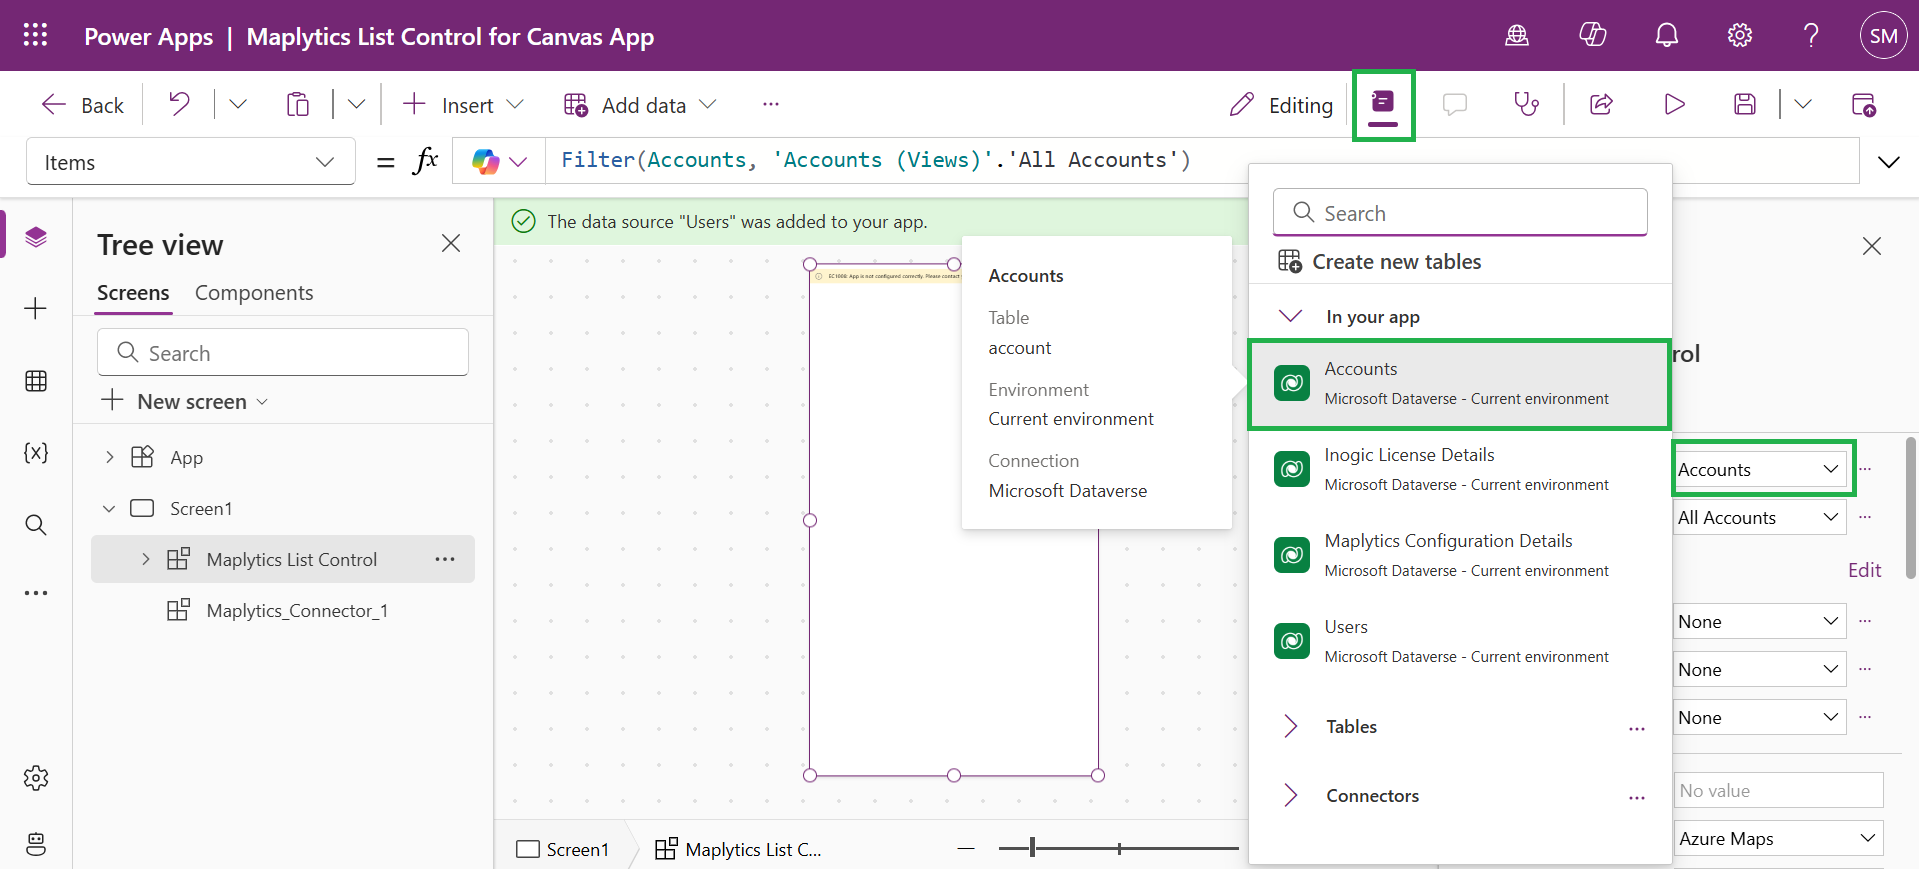
 Configuring Maplytics List Control
Once the component is imported, bind data to the Maplytics List Control
 The next steps include-
- Adding Power Fx Formulas
- Configuring Init Configuration Details
- Setting Up Map Properties
- Enhancing User Experience
These can be followed in detail from our technical docs.
After this, the app can be run by
• Navigating to Apps in Power Apps
• Finding the app in My Apps
• Clicking the Play to launch it
Mobile users can access the app through the Power Apps mobile application.
Now, let’s see the result!
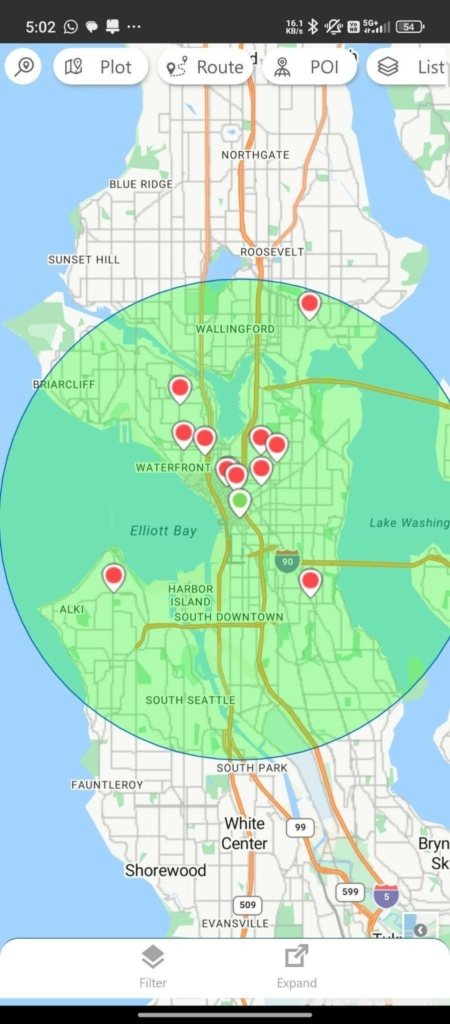
Plotting Records in Canvas App:
Easily plot and filter CRM records on a Canvas App with Maplytics, using Proximity Search, Region-based plotting, and Drawing tools for better location insights and quick actions.

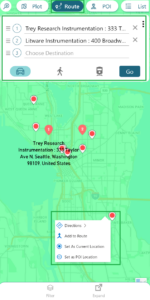
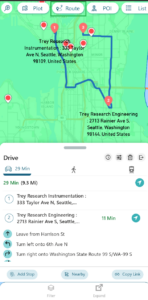
Route Optimization in Canvas App:
Easily plan and optimize your travel routes on the Canvas App with Maplytics’ Route Optimization, powered by Azure Maps—saving time, avoiding hassles, and ensuring a smooth journey.
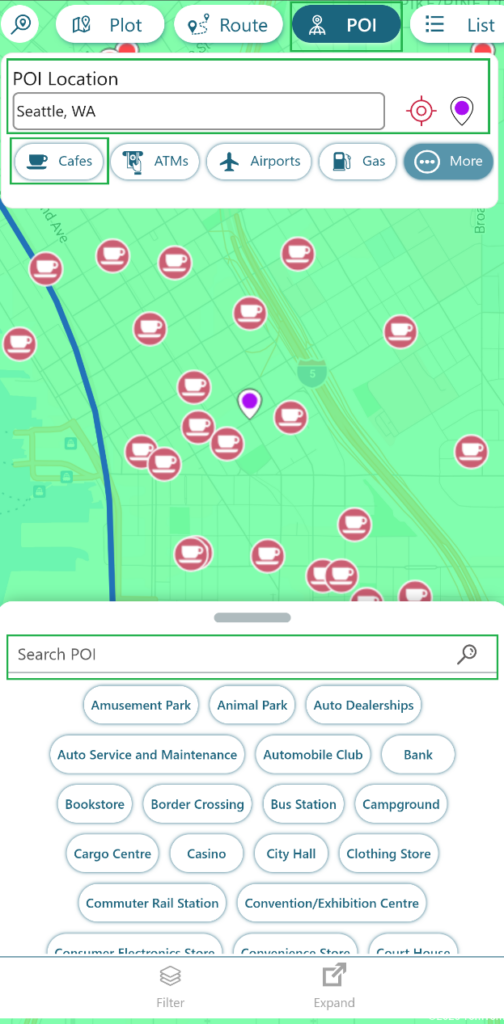
POI in Canvas App:
Easily find nearby places like ATMs, Cafes, restaurants, and more on the Azure map using Canvas App and integrate them with your CRM for smarter planning and decisions.
 Woww… it looks as perfect as expected!
Why Use Maplytics in Your Canvas Apps?
A Canvas App in Power Apps is created to build custom business applications with a drag-and-drop interface, offering flexibility in UI design and logic without requiring extensive coding.
Maplytics brings seamless geo-mapping capabilities to Canvas Apps, enabling users to:
- Visualize Data on Azure Maps – Display records with interactive mapping controls.
- Enhance Decision-Making – Leverage geographic insights for better business strategies.
- Optimize Routes – Plan and track optimized routes for field service teams.
- Find Nearby POIs – Discover relevant locations based on proximity.
- Improve Efficiency – Access locational data directly within your app without switching screens.
- Seamless Integration – Simple, no-code setup with Power Fx formulas for dynamic mapping.
To wrap up,
By following these steps, you can successfully integrate Maplytics into your Canvas App and unlock powerful geo-analytical insights. With its easy-to-use features, you can visualize, analyze, and optimize location data effortlessly. Start leveraging Maplytics today to enhance your data-driven decision-making!
If you want to know more or have any questions, just email us at crm@inogic.com.
Stay tuned with Maplytics – a 5-star-rated geo-mapping app for Dynamics 365 CRM; many more surprises are on your way!
Until then, keep exploring the world of geo-mapping!