

Now Reading: Custom Dialog Boxes – Part 2
-
01
Custom Dialog Boxes – Part 2

In [Part 1](https://bguidinger.com/blog/custom-dialog-boxes-part-1 “Custom Dialog Boxes – Part 1”), I introduced Dialog Boxes and showed the basics of how to create one and import it through a solution. In this post, we’ll take a look at a few other features including passing data parameters into the dialog and adding event handlers on form load or on click of a button.
> Note: although I said I considered this supported in Part 1, this is currently a preview feature, and it is therefore not yet released/supported by Microsoft. Please do not use this in a Production environment.*
### Parameters
Parameters are used to pass data into your dialog. These can be used, for example, to pass in an entity type code and entity id which you can use to save that back to an entity during the process flow.
Defining a parameter is very easy. In the `
“`
The valid types values are: `Boolean`, `DateTime`, `Double`, `EntityType`, `Integer`, `Long`, `PositiveInteger`, `SafeString`, `UniqueId`, and `UnsignedInt`.
Also, all query string parameter names must begin with “id_” in order to pass the solution import validation. Seems kind of arbitrary, but I’m sure there’s a perfectly logical reason behind it.
To pass the data into the dialog when we open it, simply adjust the call to openDialog. The third parameter is a JavaScript object which has keys that match the names of the query string parameters.
“`javascript
var options = {
dialogName: ‘custom’,
position: 1,
};
var data = {
id_ID: ‘00000000-0000-0000-0000-000000000000’,
id_Type: 1
}
Xrm.Navigation.openDialog(“CustomDialog”, options, data);
“`
Passing data into the dialog isn’t very useful, unless we can do something with the data. In order to do that, we can use event handlers, but before I cover that, let’s take a look at how we can add multiple pages/tabs to our dialog.
### Pages
In our dialog box, we can have multiple pages which are defined as “tabs” in the Form XML. Effectively, we can just create a copy of the tab we created in the previous post and change some of the ID’s and Names. When you’re done it should look something like this:
“`xml
…
…
…
…
“`
On their own, we won’t be able to navigate from page to page. In order to do that, we must have some buttons on the form with onclick event handlers.
### Event Handlers
Just like on an entity form, we can add event handlers to a dialog box. For example, we can have a form onload event handler which reads the input parameters and does something with them, or we can have an onclick event handler on a button to move us to the next/previous page.
Both of them are used the same way – you simply define them under the “ node.
“`xml
“`
You’ll notice that the event handlers reference a JavaScript web resource file. This file is just like any regular JavaScript file you use to add form scripts to an entity form. In order for our solution to import successfully, we must also add a reference to the web resource in our customizations.xml file.
“`xml
…
{f192e5a1-c78d-e811-a95b-000d3a18b4b9}
bg_CustomDialog_Library.js
CustomDialog_Library.js
3
1.0.0.0
0
0
1
1
0
/WebResources/bg_CustomDialog_Library.js
“`
And then also add a reference for the RootComponent the solution.xml.
“`xml
“`
Finally, if your [Content_Types].xml file doesn’t have a type for JavaScript files, you must add it (note: this is necessary if you are using a solution file that does not yet contain any JavaScript files). With all of the files updated, we can package and deploy the solution to test it out!
### Testing
Once the solution is imported, let’s test it out. Go to a Unified Interface app, drop into the developer console for the browser, and run the `Xrm.Navigation.openDialog(…)` command from above. This should open the dialog like so.
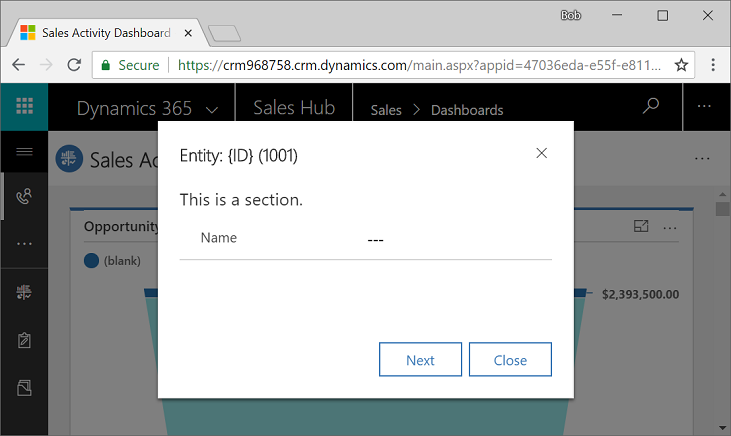{width=731 height=436}
And clicking the Next button will take us to the second page!
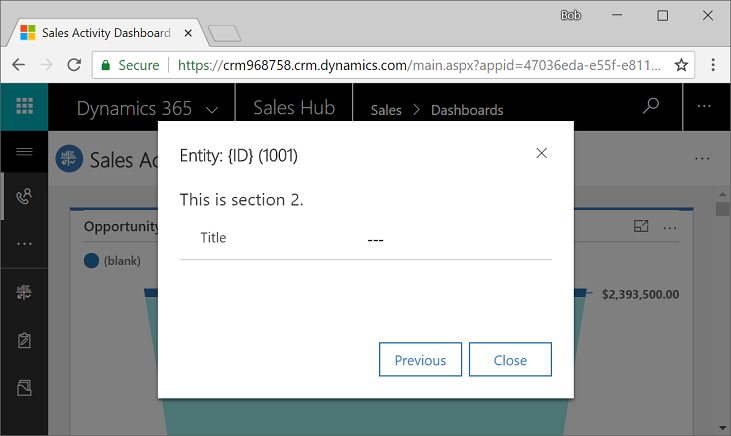{width=731 height=436}
Pretty neat, eh?! In the next post, we’ll look at adding custom controls onto the form. That’s where it really gets fun 🙂
You can download the solution file I used for this post here: [CustomDialogs_1_0_0_1.zip](http://bguidinger.comhttps://bguidinger.com/upload/CustomDialogs_1_0_0_1.zip “Custom Dialogs – 1.0.0.1”).
Original Post https://bguidinger.com/blog/custom-dialog-boxes-part-2


