

Now Reading: Stop Using Static Filters! Automate DIXF Exports with Logic App
-
01
Stop Using Static Filters! Automate DIXF Exports with Logic App

Exporting data from DIXF (Data Import Export Framework) is straightforward when filters are static. But what happens when your business scenario requires dynamic filters—filters that change based on real‑time inputs or business events?
In this post, I’ll walk you through how I implemented dynamic filtering for DIXF exports using Logic Apps, combined with a small customization in D365FO. This approach allows you to export only the relevant data based on parameters passed at runtime—such as a Customer Group ID.
Why Dynamic Filters?
In a typical DIXF export project, you manually define filters like this:
and mention the value like this

But what if the filter value needs to change dynamically?
For example:
- Export Customer Group 10 today
- Export Customer Group 20 tomorrow
- Triggered automatically based on a business event
This is where Logic Apps + OData customization becomes powerful.
Solution Overview
To achieve dynamic filtering, we combine:
- A custom OData action in D365FO that updates the filter on the DIXF project
- A Logic App that receives the dynamic parameter (e.g., Customer Group)
- The standard ExportToPackage API to trigger the export
- The GetExportedPackageUrl API to download the generated file
Let’s walk through the steps.
Step 1: Create a DIXF Export Project
- Start by creating a new DIXF export project. At this stage, do not add any filters manually—we’ll override them dynamically.

Step 2: Create an OData Action to Override Filters
I created a simple OData attribute method that updates the filter on the Definition Group.
This method accepts:
- Definition Group Name
- Entity Name
- Dynamic Filter Value (e.g., Customer Group ID)
You can find the full implementation on my GitHub github handle
Step 3: Build the Logic App Trigger
My use case begins with a Business Event that sends the Customer Group ID. So the Logic App starts with:
Trigger: When an HTTP Request Is Received
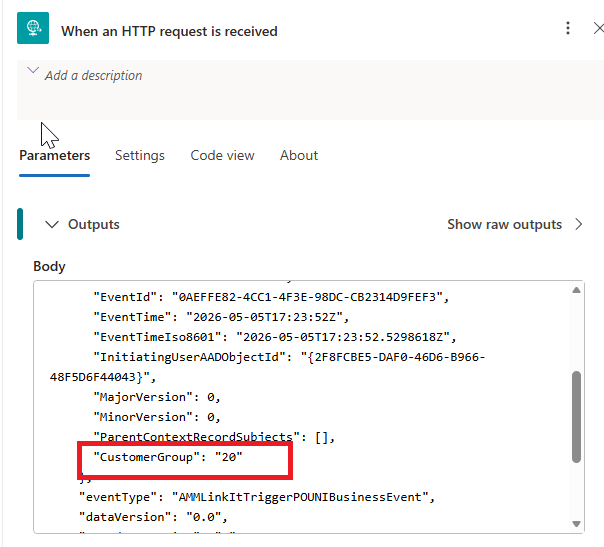
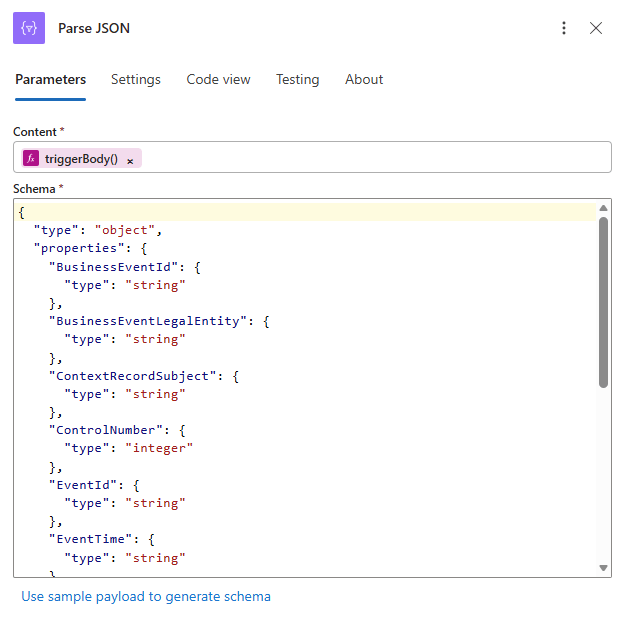
Step 4: Parse the Incoming JSON
Add the Parse_Json which converts structured data (JSON string) into user-friendly data tokens, enabling easy access to specific properties in subsequent steps.
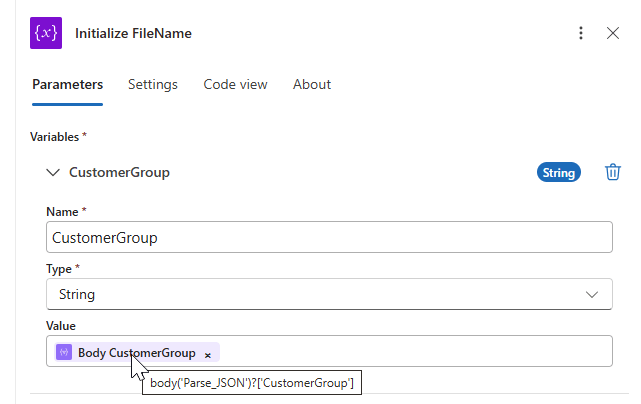
Step 5: Store the Customer Group ID
Extract the Customer Group ID and store it in a variable for later use.
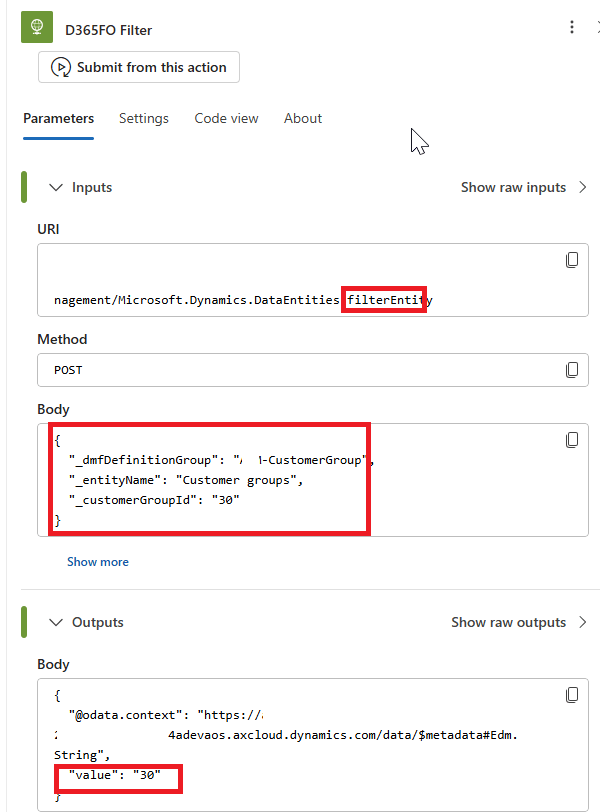
Step 6: Call the Custom OData Action
This is the key step.
Use an HTTP action to call your custom OData API and pass:
- Definition Group Name
- Entity Name
- Customer Group ID (dynamic filter)
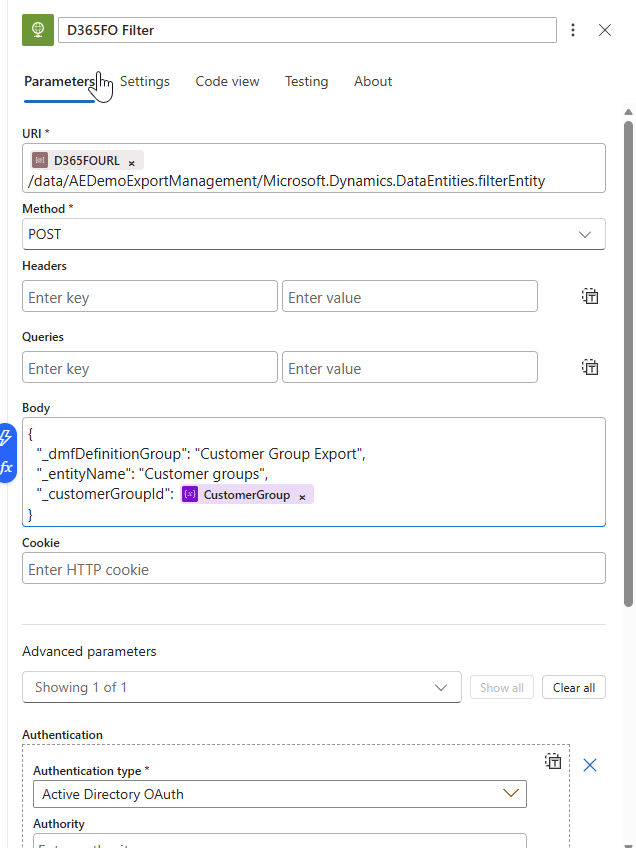
If the Customer Group passed is 10, the filter becomes 10.
If it’s 20, the filter becomes 20.
The response returns the updated filter value.
Step 7: Trigger the DIXF Export
This triggers the export with the dynamic filter applied.
The response returns the Execution ID, which we’ll use next.
The standard ‘ExportToPackage’ API is called with the following paramters
{ "definitionGroupId": "Export project name", "packageName": "Package name", "executionId": "passed as empty as the system will generate", "reExecute": false, "legalEntityId": "companyid"}
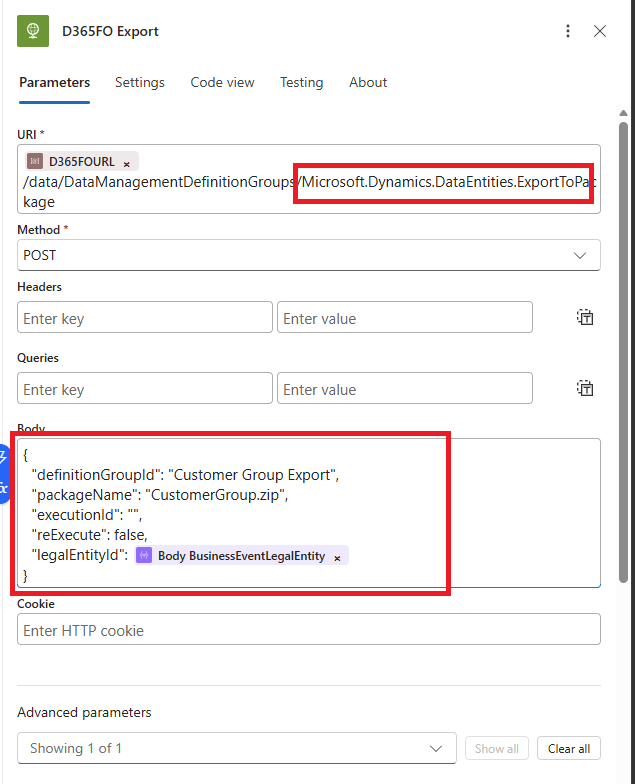
When this step is executed, it triggers the export with the filter as 30 for the customer Group is passed.


The response of the above step is the execution Id generated in D365FO from this trigger.

Step 8: Download the Exported File
Using the standard DIXF API , it is possible to export the generated file and download it.
https://FOURL.axcloud.dynamics.com//data/DataManagementDefinitionGroups/Microsoft.Dynamics.DataEntities.GetExportedPackageUrl
Parameters passed for the above request is the execution id which is generated from the above step
{ "executionId": "ExportPackage-5/5/2026 07:40:57 pm"}
The API generates a blob URL that has an embedded SAS token. Use the URL to download the exported data package.
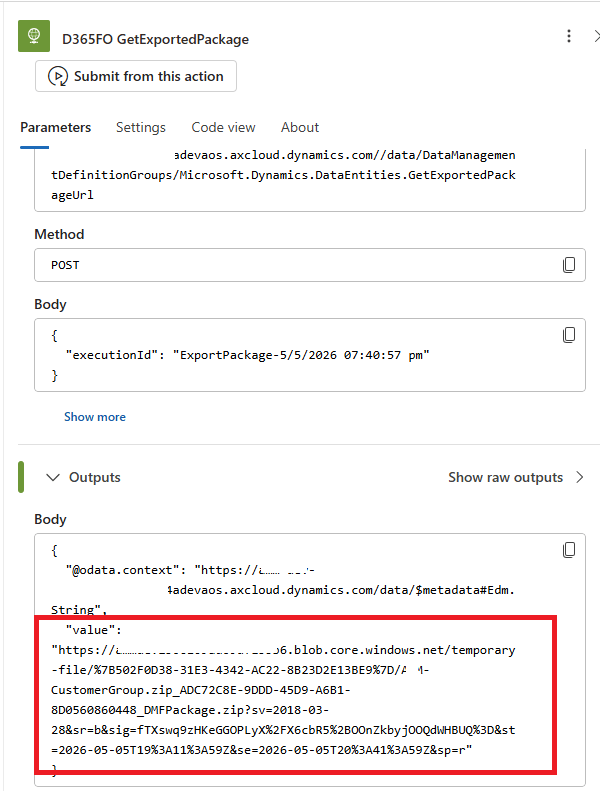
The URL format will be
https://FOAddress.blob.core.windows.net/temporary-file/%7B502F0D38-31E3-4342-AC22-8B23D2E13BE9%7D/CustomerGroup.zip_ADC72C8E-9DDD-45D9-A6B1-8D0560860448_DMFPackage.zip?sv=2018-03-28&sr=b&sig=fTXswq9zHKeGGOPLyX%2FX6cbR5%2BOOnZkbyjOOQdWHBUQ%3D&st=2026-05-05T19%3A11%3A59Z&se=2026-05-05T20%3A41%3A59Z&sp=r
The URL has a SAS token suffixed at the end , valid for a short time.
Step 9: Add HTTP Connector to Download the File
Finally, add an HTTP action to download the file using the SAS URL.
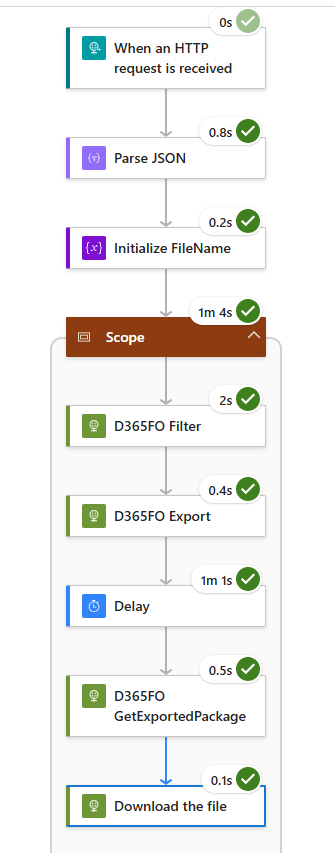
Your Logic App is now complete.


Final Logic apps looks like
Conclusion
With a small customization and a well‑designed Logic App, you can:
- Dynamically update DIXF filters
- Trigger exports automatically
- Download the resulting package
- Build flexible, event‑driven integrations
This approach is especially useful when your export criteria change frequently or are driven by business events.
If you try this out or extend it further, I’d love to hear your experience.
Original Post https://anithasantosh.wordpress.com/2026/05/05/dixf-export-with-dynamic-filter-using-logic-apps/


