Now Reading: Transform Business Ideas into Solutions with Power Platform Plan Designer
-
01
Transform Business Ideas into Solutions with Power Platform Plan Designer
Transform Business Ideas into Solutions with Power Platform Plan Designer
When creating a business plan, makers often need to define and organize the data that powers their solution. With the latest update to Plan Designer, there’s now a more powerful and unified way to do this. Everything needed to model, structure, and refine data for your plan is now in one place.
With this enhanced experience, makers can go beyond simply creating tables. Plan Designer now empowers users to manage entire CRM solutions—from data models and user roles to apps and automation—all without leaving the tool. Whether you’re building from scratch or expanding an existing solution, Plan Designer makes it easier to build full-featured, scalable business applications.
Use Case:
Sarah works in the finance department of a mid-sized company where each employee is given a set number of paid vacation hours annually. To ensure accurate tracking and simplify monthly HR reporting, every department is required to maintain a log of vacation hours used by team members.
To streamline the process, the Organization uses Plan Designer to create a “Vacation Hours Log” app.
Here is Step by Step guidance on how to use plan designer
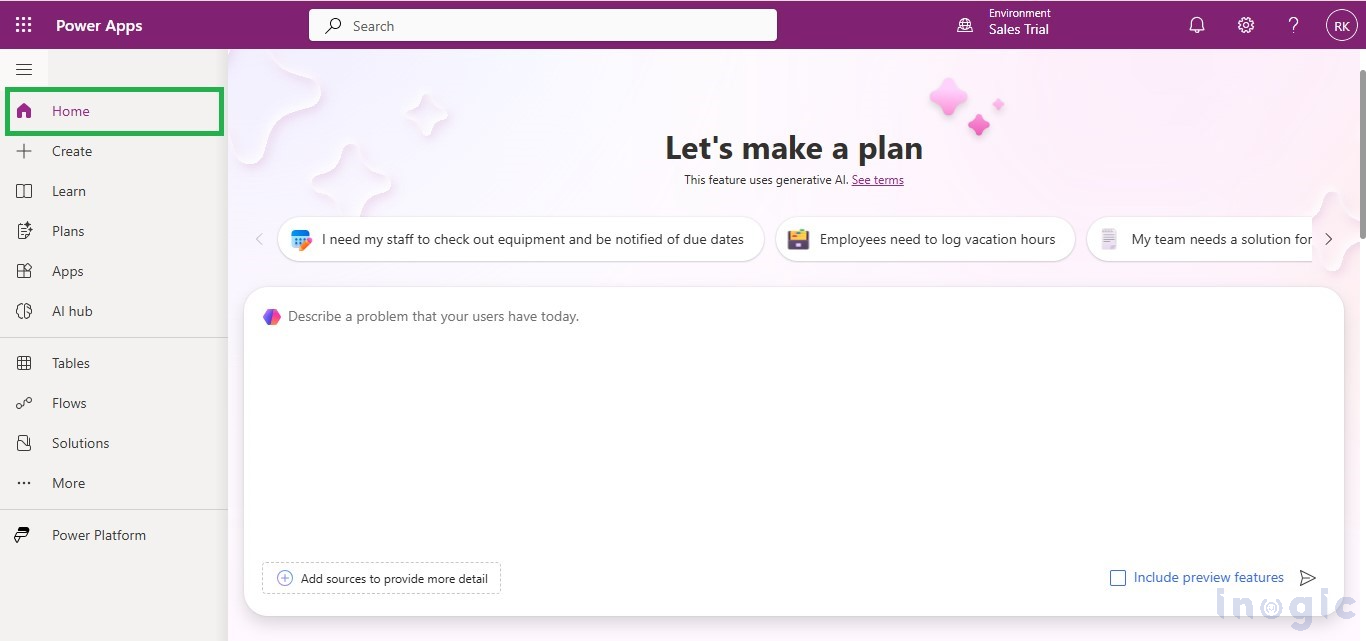
Step 1: Access Plan Designer
- Go to PowerApps > Select your environment > Click on “Home” button.
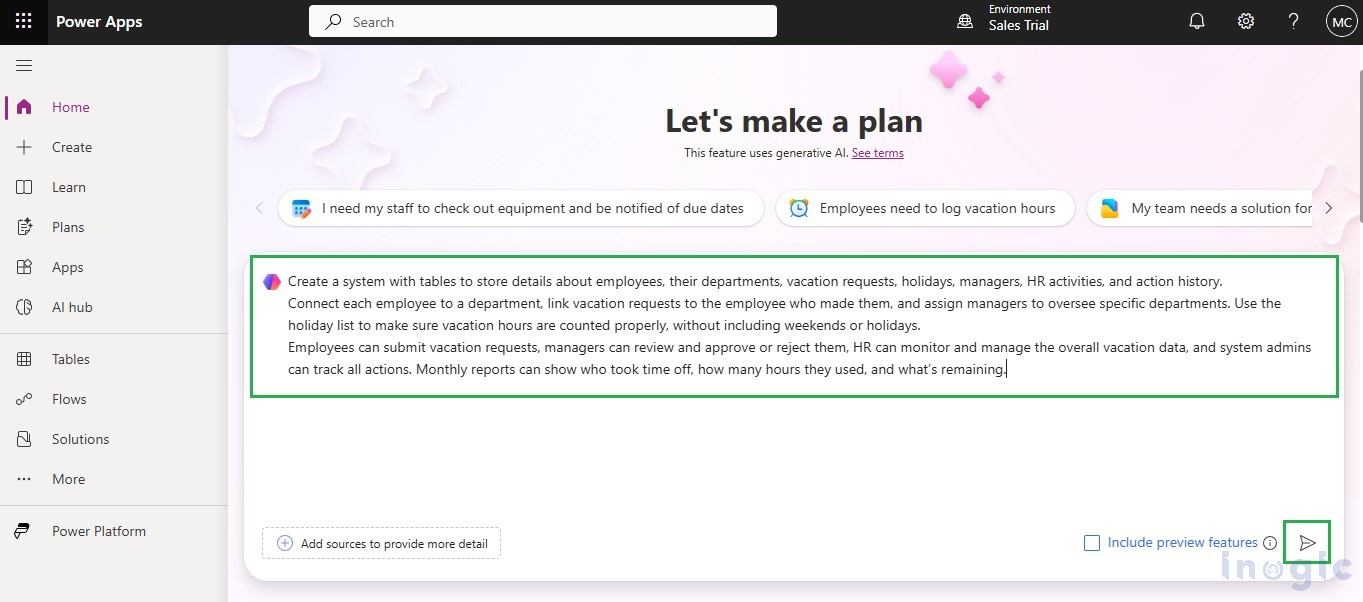
Step 2: Describe Your Requirement – Define the Business need clearly
- Explain your business need or the problem you want to solve by typing it into the input field. Make sure to include important details like what you want to achieve, who is involved, and any challenges you face. After entering the required information, click the “Go” button to submit your requirement.
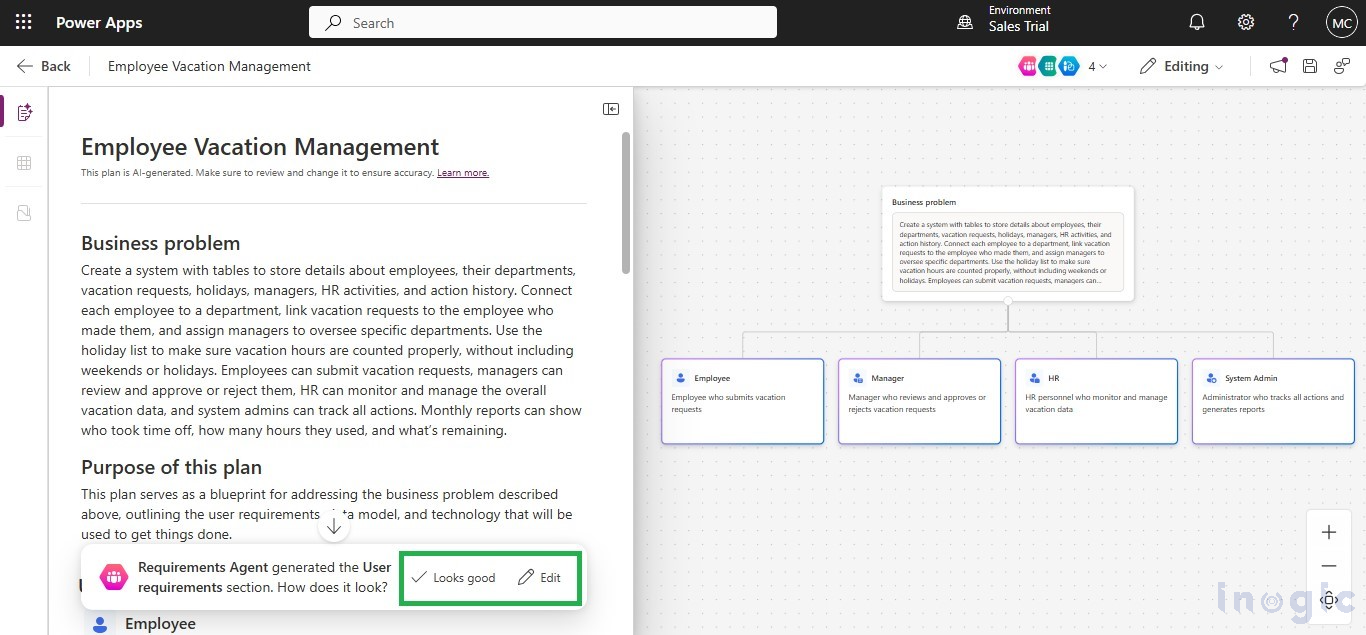
Step 3: Review the Generated Plan
- Plan Designer will generate a business plan, including tables, relationships, and roles based on your input.
- Click “Looks good” to proceed if you’re satisfied with the generated plan.
- Click “Edit” if you want to customize something in your plan.
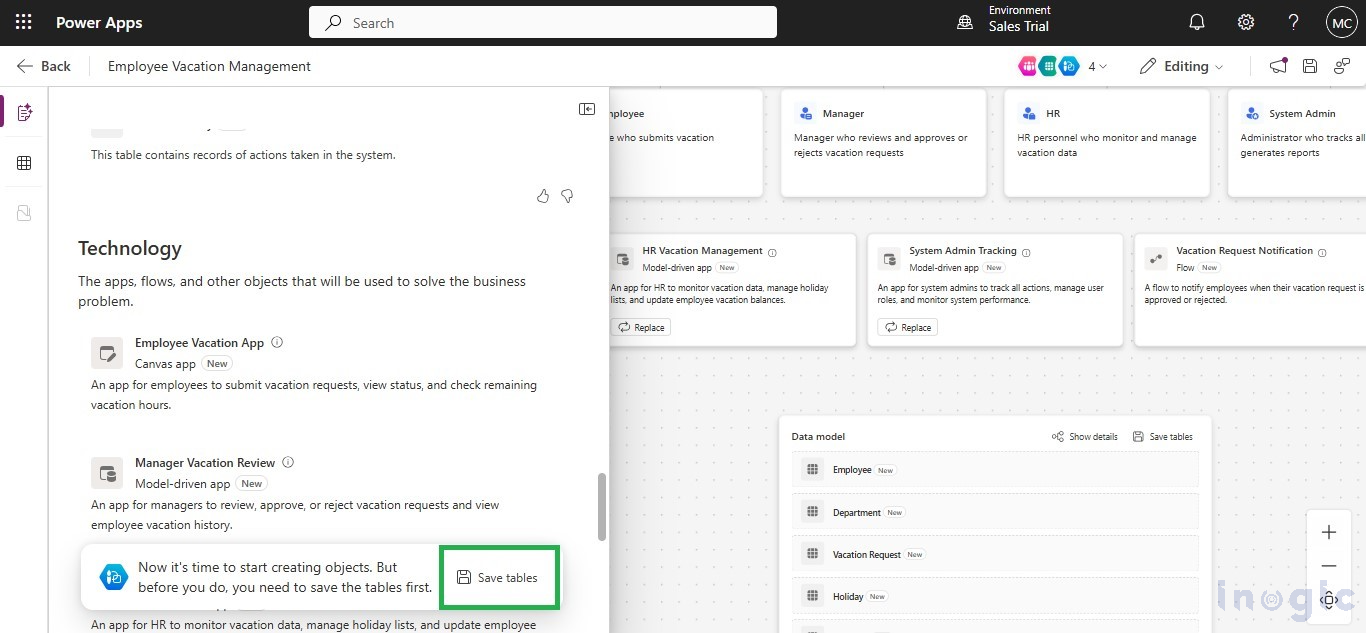
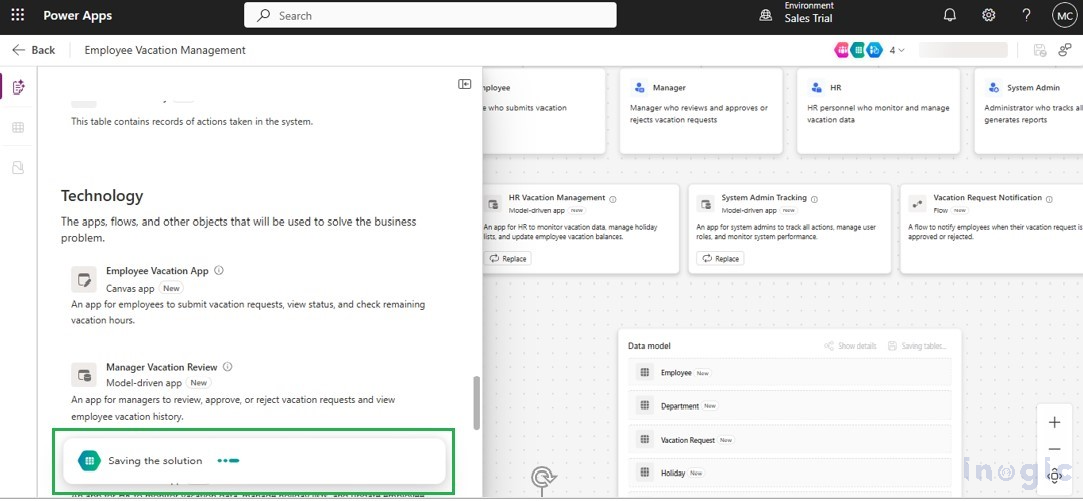
Step 4: Save Your Tables
- Click on “Save Tables”.
- To view the saved tables, Go to PowerApps > Tables > Custom

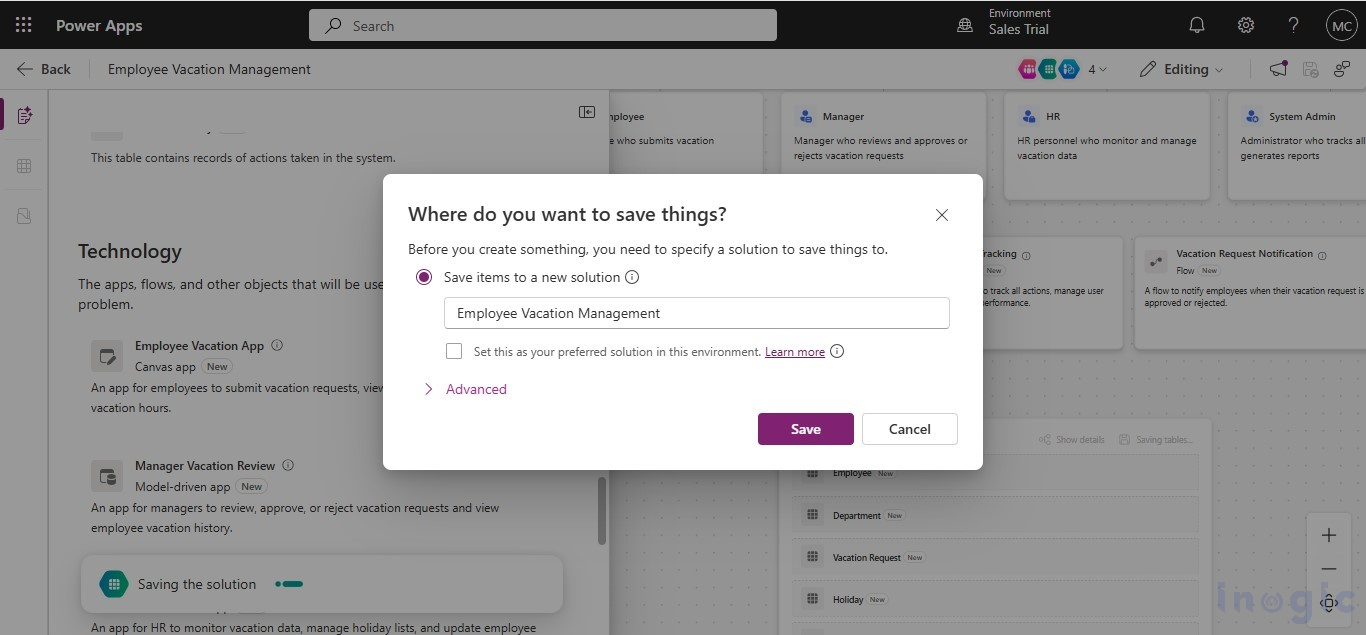
Step 5: Choose a Solution – (New or Existing)
- You can save your plan into a new solution or an existing one.
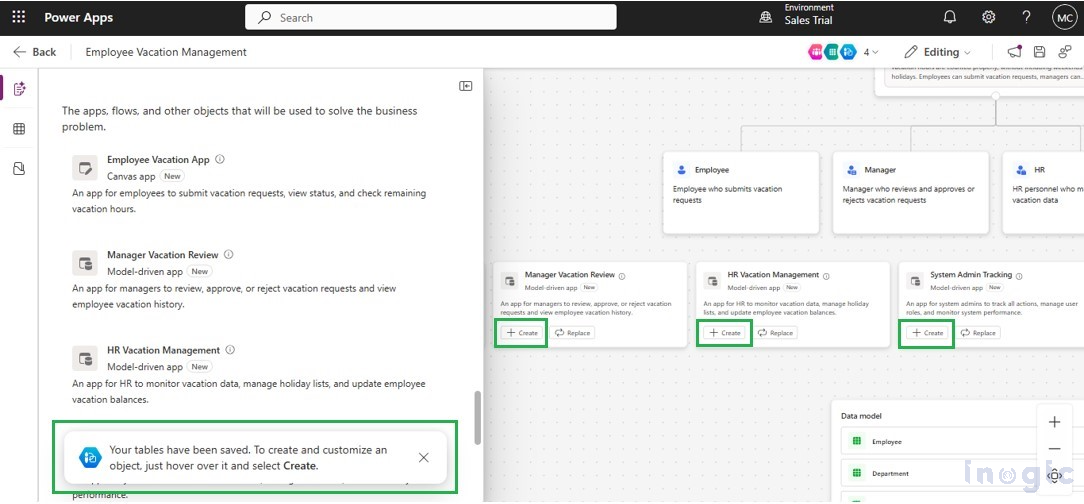
- A message will appear indicating the saving of the solution and tables.
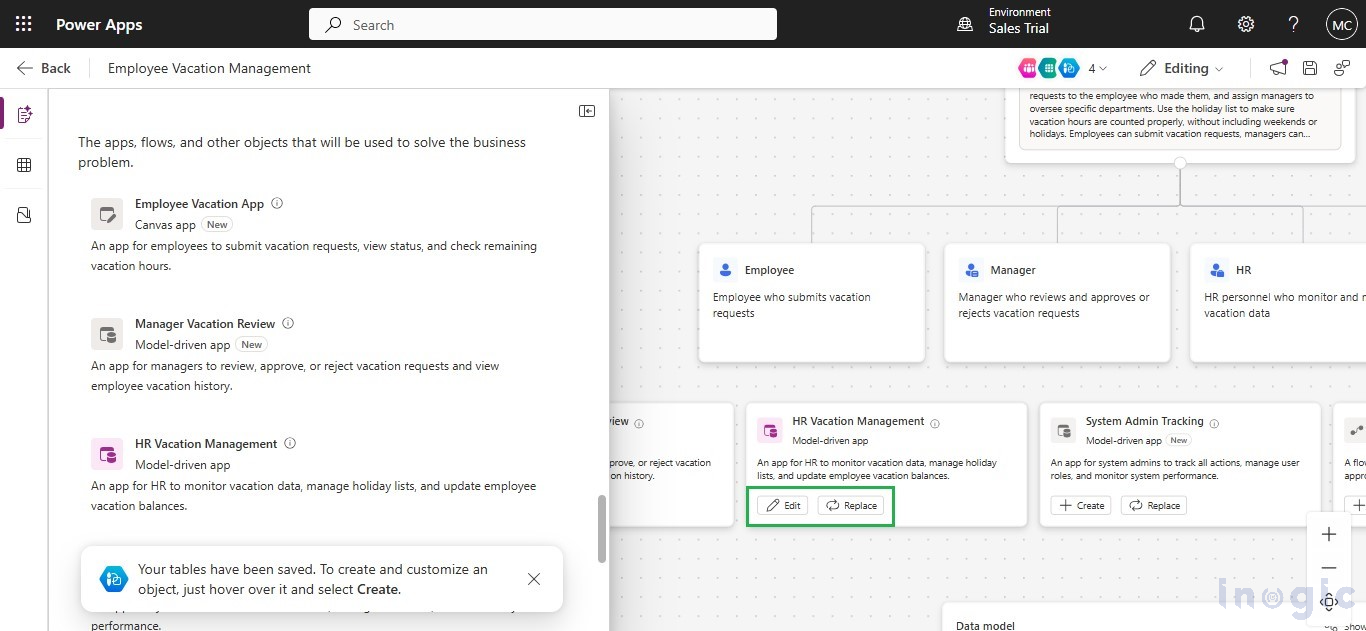
Step 6: Create Fully Functional Apps from Our Data Model – Model-Driven, Canvas, Flow and Agent by Clicking “Create”.
- Click on the “Create” button.
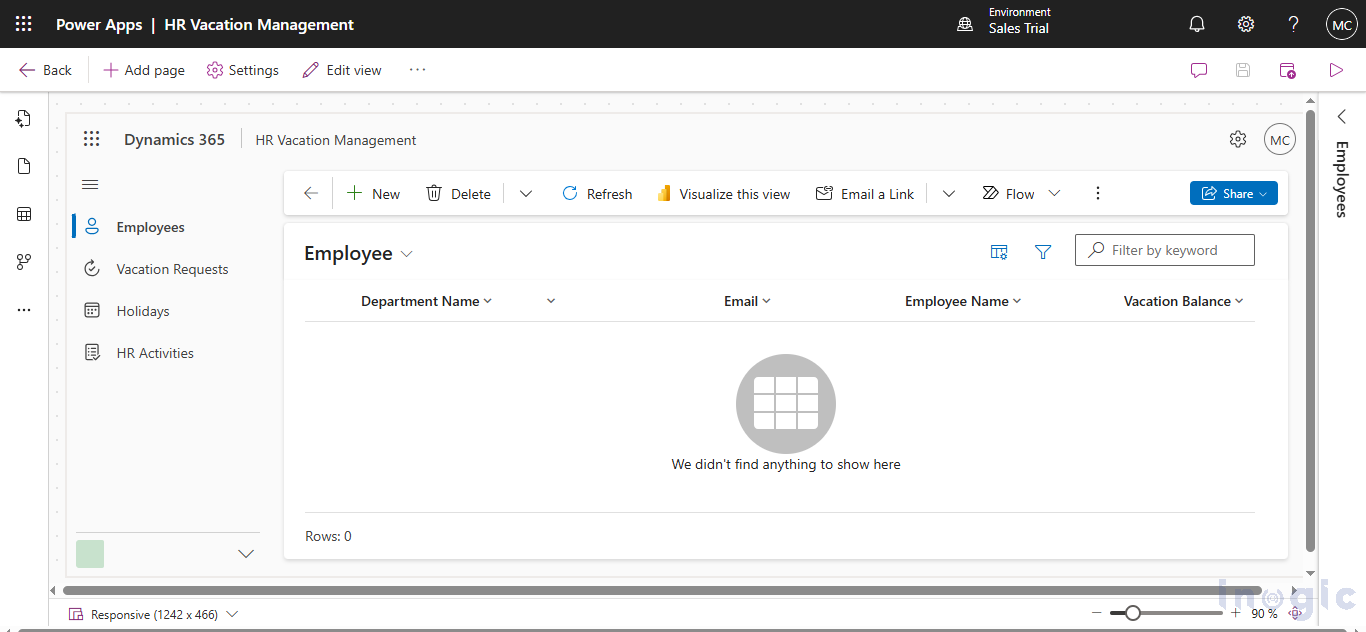
Step 7: Save and Use Your App
- The model-driven app will be automatically created with all the necessary tables and logic.
- Save and Publish, then you can start using your app.
Step 8: Edit or Replace the Created App – We can update its design, features, or data and make more changes in the app which we have already created.
- Click on the “Edit” or “Replace” button.
Conclusion
With the new and improved Plan Designer, creating business apps has become simpler, faster, and more efficient. You don’t need to be a coding expert — just describe your business needs, and the tool helps you build the right app all in one place. Once your app is created, you can easily go back and edit or update it anytime to keep up with changes in your business. Plan Designer makes the whole process smooth and flexible.
The post Transform Business Ideas into Solutions with Power Platform Plan Designer first appeared on Microsoft Dynamics 365 CRM Tips and Tricks.
Original Post https://www.inogic.com/blog/2025/06/transform-business-ideas-into-solutions-with-power-platform-plan-designer/